Vesa mounting: cvbf/cvbr 21, 5 vesa mounting: cvbf/cvbr 21 – CyberResearch CYRAQ 21A User Manual
Page 30
C
Y
RAQ™ 21
CyberResearch
®
Displays
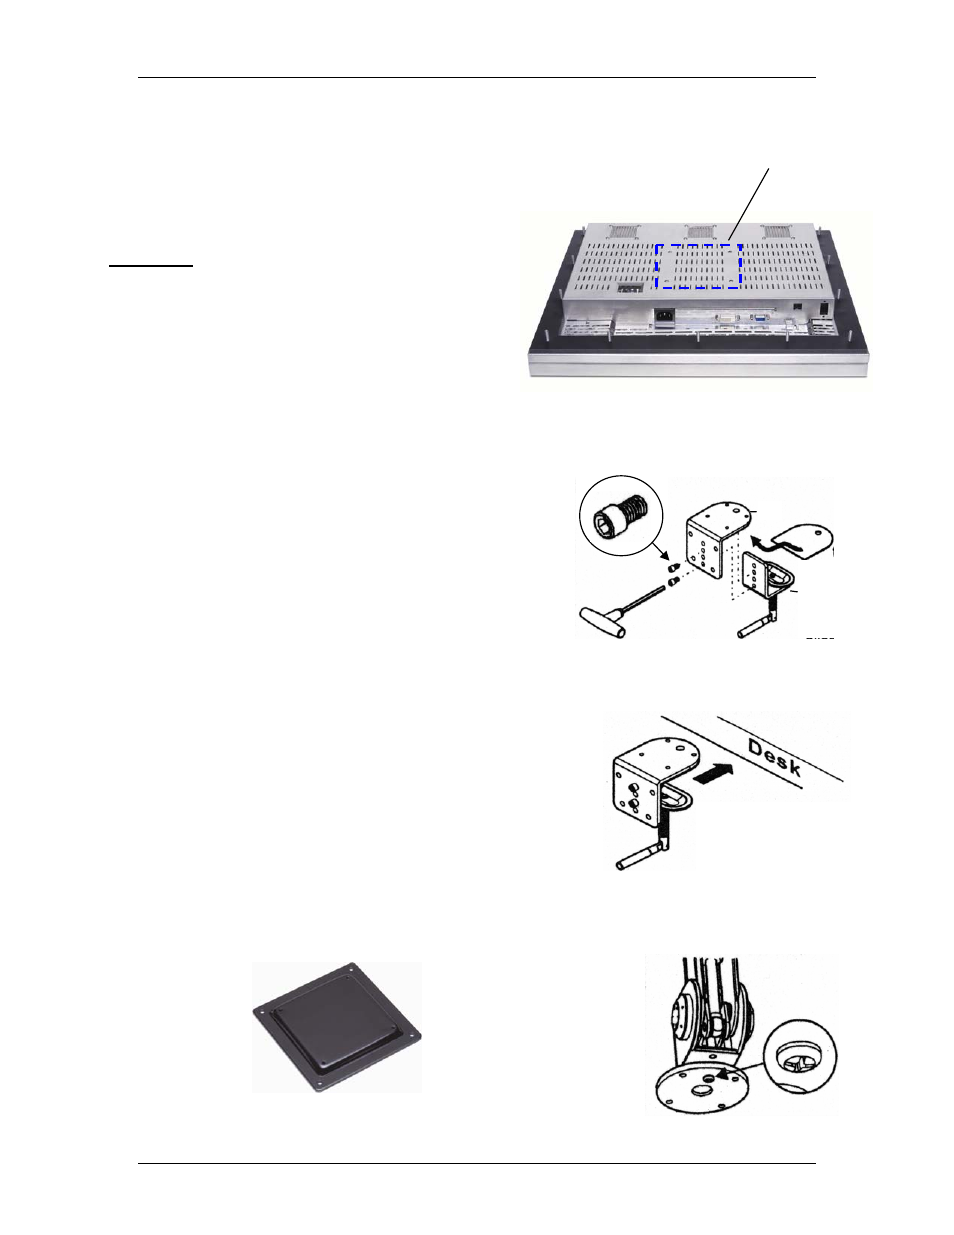
2.5 VESA Mounting: CVBF/CVBR 21
100 x
100
VESA
Figure 8: 100 x 100mm VESA Mounting Holes
Figure 9: VESA Arm Clamp
Figure 10: Affix Clamp to Benchtop
3
N
OTE
: These are “Quick Install”
instructions for a popular style bench-top
mount VESA arm. This VESA arm style
MAY NOT be the mounting choice you’ve
selected for your C
Y
RAQ. Check the
documentation accompanying your VESA
arm.
1) Disconnect the power, video and
touchscreen cables.
2) Secure cranking unit (#1) to bracket
(#2) with at least two bolts (Figure 9).
The use of bolts and bolt position
depends on thickness of desk. Fully
secure bolts with included “T” type
hex key.
o
n
3) Secure the clamp to the desk/bench
top Figure 10). This will make
subsequent installation easier. The
clamp is capable of securing the arm
to surfaces 15-100mm thick (30mm
and up is ideal).
4) Before continuing, remove the screw
from the arm’s base using a Philips
head screw driver (Figure 12).
5) Carefully place display on the bench
top with screen facing down, as seen
in Figure 13.
3
N
OTE
: The SWC 100 permits 100 x
100mm VESA monitors and 75 x 75mm
VESA arms to be used jointly.
6) Secure the SWC 100 adapter (Figure
11) to the VESA arm.
Figure 11: SWC 100 Adapter Mounting Plate
20 ©Copyright 2005 CyberResearch, Inc