Leak test procedures, Damper stop installation – Vermont Casting P User Manual
Page 6
6
20007967
Leak Test Procedures
After connecting the gas supply, test for leaks. Use a 50/50 solution of liquid soap and water to test for
leaks at gas fitting and joints. Apply water/soap solution with brush only - do not over apply. NEVER test
with an open flame.
WARNING: DO NOT USE AN OPEN FLAME TO TEST FOR LEAKS!
NOTE: Always perform a leak test any time the appliance has been moved or disconnected from the
gas supply line.
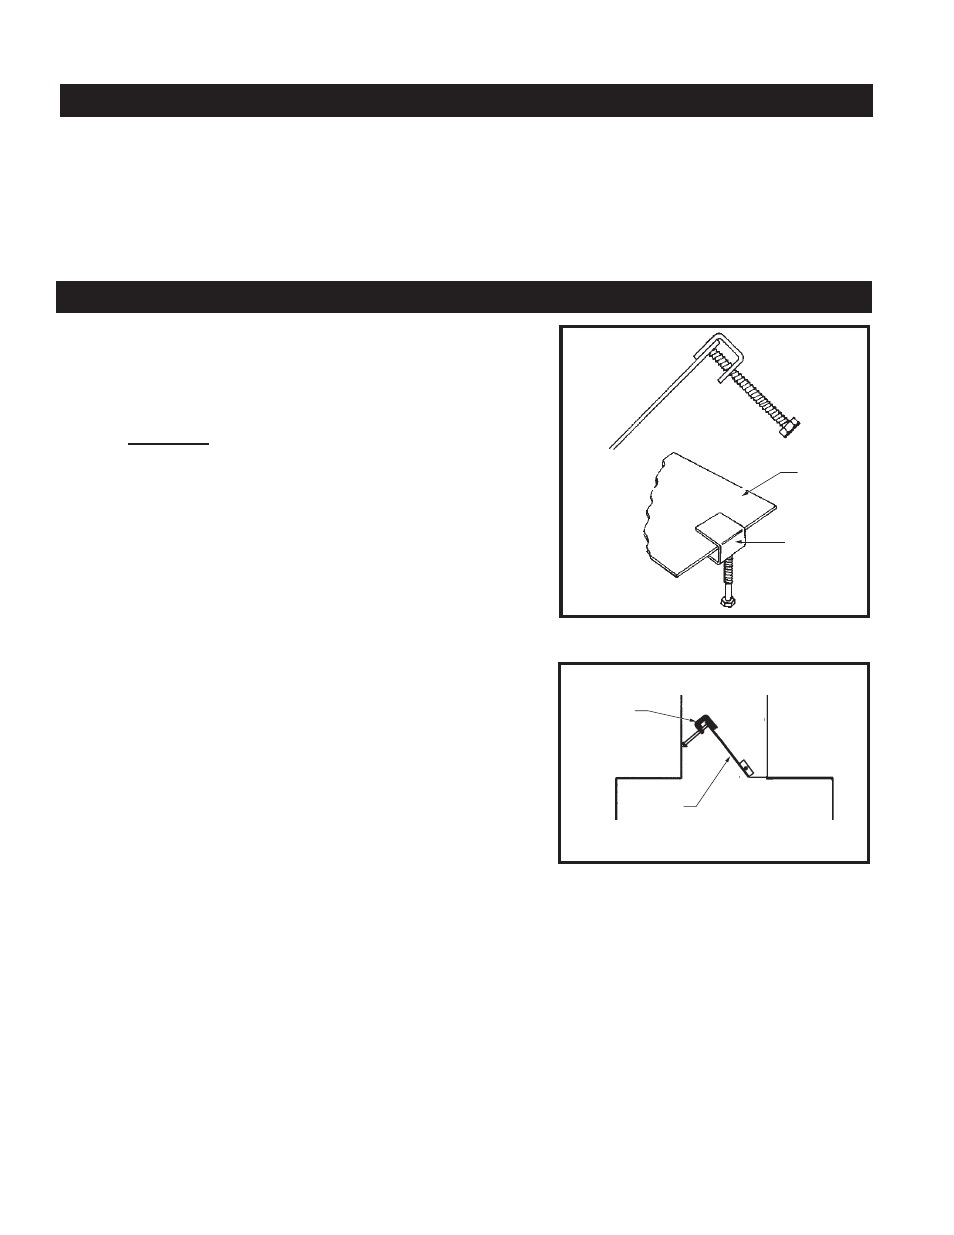
The Damper Stop provided keeps your damper from
accidentally closing during operation of your set. This
Damper Stop must be installed onto your Damper at all
times. NOTE: The damper clamp is designed to hold
the damper plate open 3 inches. However, the damper
must be fully open when the log set is in operation.
Install the Damper Stop onto the edge of the damper plate.
Attach by securing the bolt provided to the damper plate
with an adjustable wrench. (Fig. 5)
If the Damper Stop does not fit, drill a 1/4” hole into the
damper plate and install an
anchor bolt with nut, at a 90 degree angle, so that the
damper plate will remain fully open.
The proper finished installation of the Damper Stop is
shown in Figure 6. If the bolt fails to block the damper in
an open position, the damper should be removed from the
chimney.
To check your vent for proper drafting: Light a tightly
rolled newspaper on one end and place it at the inside
front edge of the fireplace. Observe the smoke and be
sure the vent is properly drawing it up the chimney. If
the smoke is drawn back into the room, extinguish the
flame and remove any obstruction until proper venting
is achieved. If that fails, check with a qualified chimney
sweep.
Damper Stop Installation
DP104
Damper clamp
Harris
Damper
Plate
Damper
Stop
DP104
Fig. 5 Attach damper clamp.
DP103
Damper clamp
Harris
Chimney
Clamp
Damper
DP103
Fig. 6 Damper clamp installation.