Step 9: attach the seat pad to the seat backbone – Bowflex Xtreme 2 User Manual
Page 10
8
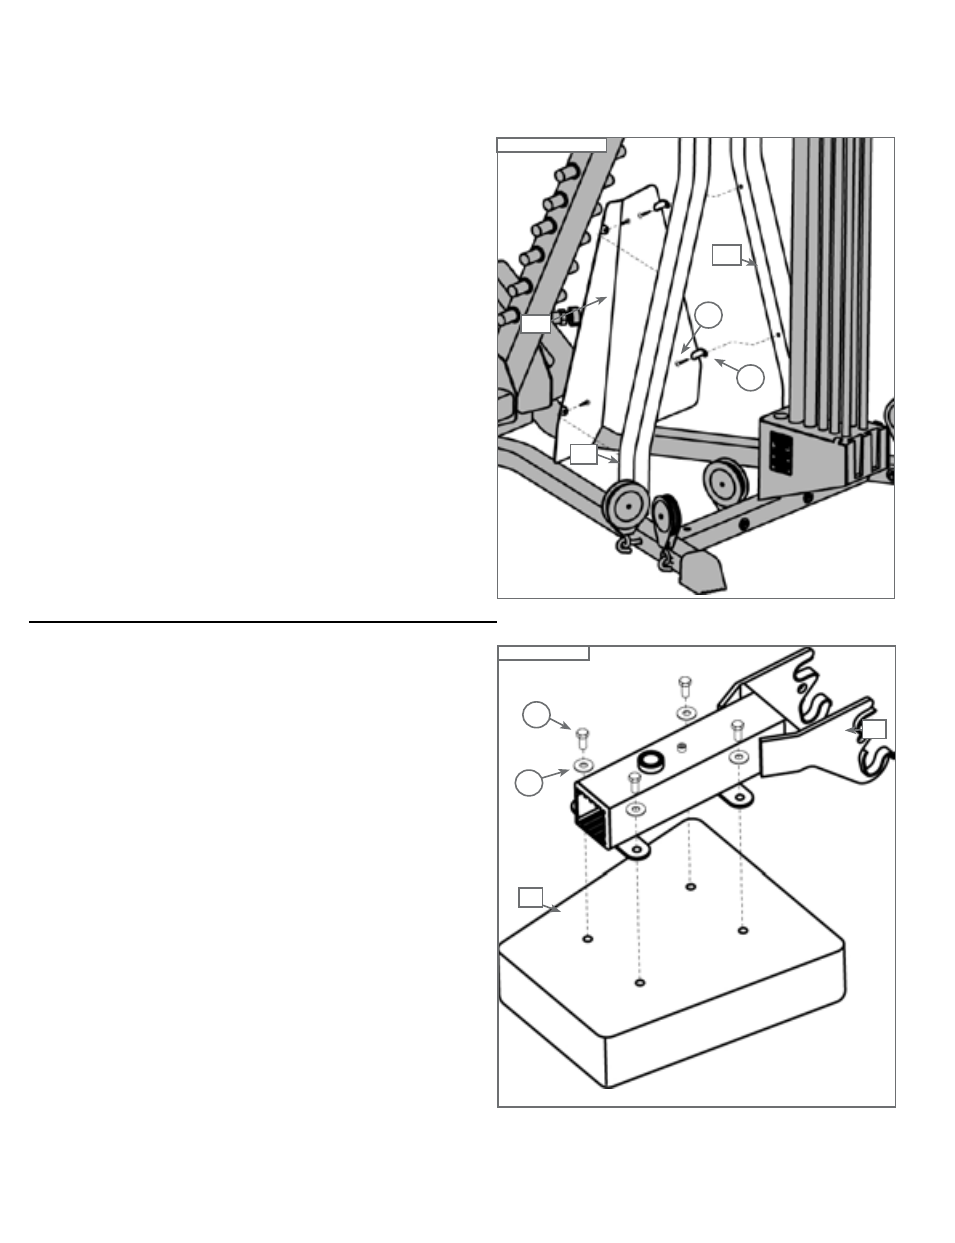
Step 8: Attach the Cable Shroud to the Pulley Arms
Locate the following items:
• Item #23 - Cable Shroud
• From Step 7 - Main Assembly
• Item #A - (4) 4.2mm X 12mm Self Drilling Screws
• Item #L - (4) M4 Washers
Line up the bolt holes in the Cable Shroud (Item #23) with
the bolt holes in the Right and Left Pulley Arms (Items #12
& 13) on the Main Assembly, as shown in Figure 8.
Place (4) M4 Washers (Item #L) over the ends of (4) 4.2mm
X 12mm Self Drilling Screws (Item #A), and use these
screws to attach the Cable Shroud to the Pulley Arms
through the aligned bolt holes.
STOP! At this time, review and tighten all
hardware installed in Steps 1-8.
Step 9: Attach the Seat Pad to the Seat Backbone
Locate the following items:
• Item #16 - Seat Pad
• Item #17 - Seat Backbone
• Item #D - (4) 5/16" X 3/4" Hex Head Bolts
• Item #N - (4) 5/16" Washers
Turn the Seat Pad (Item #16) cushion side down (holes
upward), and place the Seat Backbone (Item #17) over the
Seat Pad, lining up the holes, as shown in Figure 9.
Place (4) 5/16" Washers (Item #N) over the ends of (4) 5/16"
X 3/4" Hex Head Bolts (Item #D) - one washer per bolt.
Tightly affix the Seat Backbone to the Seat Pad as shown
in Figure 9.
Tighten all hardware from Step 9 only at this time.
Figure 9
16
N
D
17
Figure 8
A
23
L
13
12