Attaching the air duct assembly (hardware a), Installing the bag (hardware c) – MTD 675 thru 689 User Manual
Page 4
Attention! The text in this document has been recognized automatically. To view the original document, you can use the "Original mode".
11
Hand
Knob
Cupped
.Washer
Cup|)ed
Was tier
Thumb
Screw
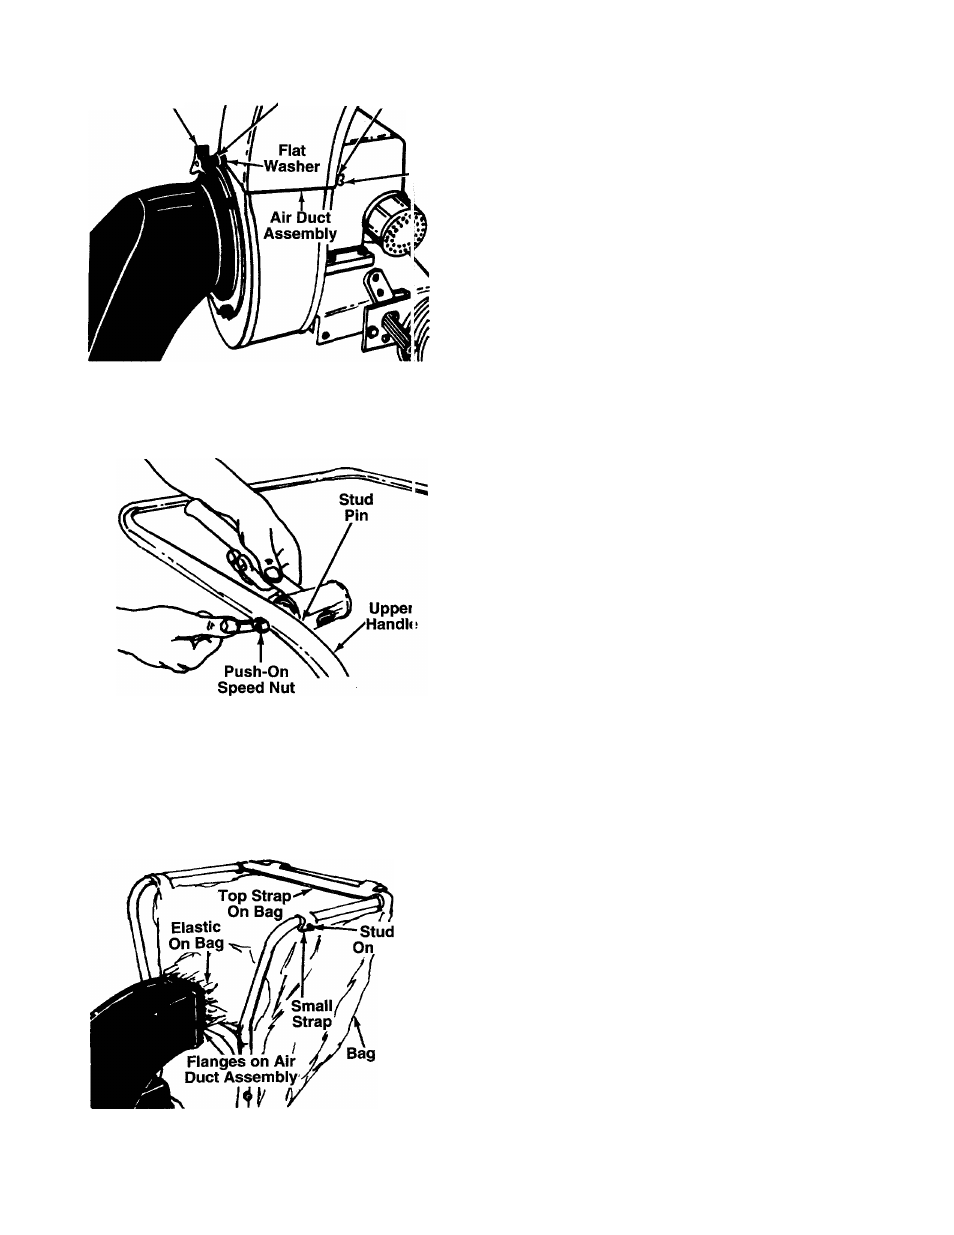
ATTACHING THE AIR DUCT ASSEMBLY
(Hardware A)
Place
air
duct
assembly
over
opening
on
top
ot
hous
ing.
Secure
front
of
air
duct
assembly
with
one
flat
washer,
cupped
washer
(cupped
side
of
washer
against
flat
washer)
and
a
hand
knob.
Secure
back
(close
to
engine)
with
one
cupped
washer
(cupped
side
against
air
duct
assembly)
and
thumb
screw.
See
-figure 6.
FIGURE 6.
INSTALLING THE BAG (Hardware C)
1.
Place the stud pins in holes in upper handle
(head of pins go to the inside of handle). Secure
pins with push-on speed nuts by holding speed
nut with box wrench and tapping pin with ham-
-------- mer. See figure 7.
FIGURE 7.
Pin
Handle
2.
Assemble the bag by slipping the top straps on
bag
over
upper
handle.
Hook
two
small
straps
over
stud
pins
on
handle.
Slip
elastic
opening
of
bag
over
air
duct
assembly.
Be
certain
elastic
on
bag is placed over the flanges on air duct assem-
— bly. See figure 8.
FIGURE 8.