Operating tiller – Troy-Bilt REAR-TINE TILLER 675B User Manual
Page 12
Attention! The text in this document has been recognized automatically. To view the original document, you can use the "Original mode".
7. Choke or prime the engine as instructed
in the separate Engine Owner’s Manual.
8. Check behind you to avoid contacting
any obstacies when pulling the starter
rope. Place one hand on the fuel tank to
stabilize the unit and use the recoil starter
to start the engine as instructed in the En
gine Owner’s Manual. When the engine
starts, gradually move the choke lever (on
engines so equipped) to the NO CHOKE.
CHOKE OFF or RUN position, whichever ap
plies.
9. Use the FAST throttle speed setting
when tilling.
Stopping the Engine
1. To stop the wheels and tines, release the
Forward Clutch levers or the Reverse
Clutch Control (whichever control Is in
use).
2. To stop the engine, move the Engine
Throttle Lever into the STOP position.
Operating Tiller
WARNING:
Before tilling,
contact your telephone and
utilities company to inquire if
underground lines are on your
property.
A
4. For forward motion of the wheels and
power to the tines:
(a) Pull up and hold the Forward Clutch
levers againstthe handlebars. To stop
the wheels and tines, release both le
vers.
A
The following pages provide guidelines to
using your tiller effectively and safely in
various gardening applications. Be sure to
read Tilling Tips & Techniques in this Sec
tion before you actually put the tines into
the soli.
1. Follow the Pre-Start Checklist on the
previous page. Be sure that the Wheel Gear
Lever Is in the ENGAGE position.
2. Move the Depth Regulator Lever into the
“travel” position (lever all the way down)
so that the tines dearths ground. Use this
position when practicing with or transport
ing the tiller. When you are ready to begin
tilling, move the Depth Regulator Lever
into the desired depth setting (see Titling
Tips & Techniques).
3. Start the engine and allow ittowarm up.
When warm, move the throttle control into
the FAST speed setting.
WARNING:
Do not push
down on the handlebars to try
to make the tiller till more
deeply. This prevents the
wheels from holding the tiller
back and can allow the tines to
rapidly propel the tiller
backward toward the operator,
which could result in loss of
control, property damage, or
personal Injury.
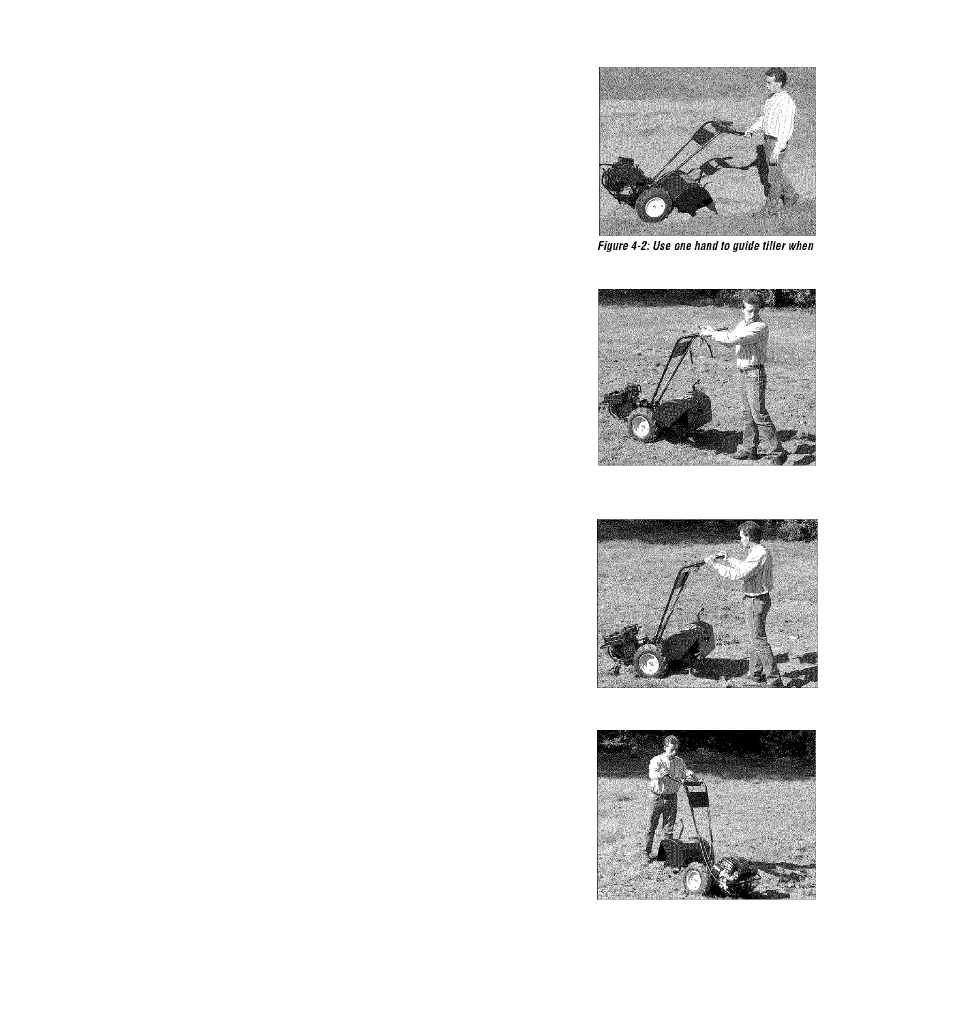
(b) As the tiller moves forward, relax and
letthe wheels pull the unit along while
the tines dig. Walk behind and a little
to one side of the tiller. Use a light but
secure grip with one hand on the han
dlebars, but keep your arm loose. See
Figure 4-2. Let the tiller move ahead
at its own pace. Do not push down on
the handlebars to try and force the
tiller to dig deeper - this takes weight
off the wheels, reduces traction, and
causes the tines to try and propel the
tiller.
5. For reverse motion of the wheels and
tines:
(a) Look behind and exercise caution
when operating in reverse.
Do not till
while In reverse.
(b) Stop all forward motion before re
versing. Lift the handlebars with one
hand until the tines are off the ground
and then pull the Reverse Clutch con
trol out (see Figure 4-3). To stop re
verse motion, let go of the Reverse
Clutch Control.
6. To turn the tiller around:
(a) Practice turning in a level, open area.
Be very careful to keep your feet and
legs away from the tines.
(b) To start a turn, reduce the engine
speed and then lift the handlebars un
til the engine and tines are balanced
over the wheels (Figure 4-4).
(c) With the tiller balanced, push side
ways on the handlebar to move the
tiller in the direction of the turn (Fig
ure 4-5). After completing the turn,
slowly lower the tines into the soil
and increase the engine speed.
moving forward.
Figure 4-3: Raise tines off ground and look be
hind when moving in reverse.
Figure 4-4: Find baiance point before turning.
Figure 4-5
12