Unpacking and loose parts, Easy assembly – Troy-Bilt 12157 User Manual
Page 9
Attention! The text in this document has been recognized automatically. To view the original document, you can use the "Original mode".
Please follow the steps in this Section to assemble your tiller and prepare it for use. These
steps will not take long and will assure correct assembly of your new tiller. We recommend you
read this Section all the way through first. Then begin the assembly steps.
UNPACKING AND LOOSE PARTS
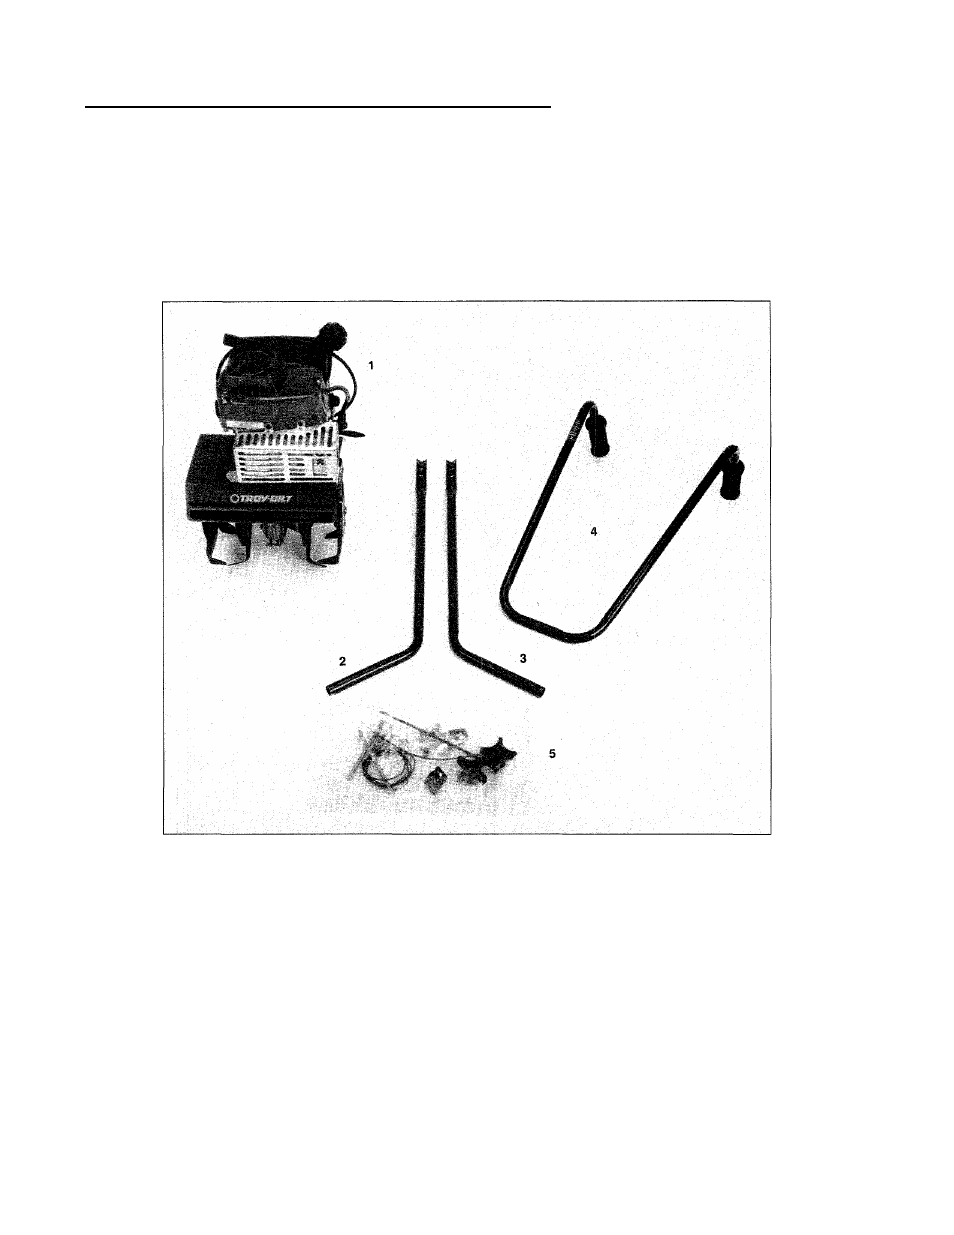
Your tiller was shipped fully assembled except for the parts shown in Photo 2. The small hardware
items are inside a plastic bag.
Section 2:
Easy Assembly______________
Photo 2: Contents of the shipping carton.
Carefuliy remove the contents of the shipping
carton and compare the contents with the items
shown in Photo 2 and listed below. If any items
are damaged or missing, contact your local
Authorized
Dealer
or
our
Technical
Service
Department.
1. The engine/tines/transmission assembly.
2. The lower right handlebar.
3. The lower left handlebar.
4. The upper handlebar.
5. The hardware bag, which contains:
(2) Handlebar Knobs
(1) Pan Head Phillips Screw, #10-16 x 1-1/2",
Self-Tapping
(2) Curved Head Carriage Bolts, 5/16"-18 x 2"
(2) Hex Head Screws, 1/4"-20 x 5"
(4) Flat Washers, 1/4"
(2) Flat Washers, 5/16"
(2) Locknuts, 1/4"-20
(1) Rubber Spacer (rectangular shape)
(2) Plastic Tie Straps
(2) Tine Spacers (used when outer tines are
removed for narrow tilling)
(1) Engine Ignition Switch and Wire Assembly