Straight stitches, Straight stitch, Seam allowance lines – SINGER 384.18024 (Sold at Sears) User Manual
Page 19: Seam allowance line, I i i )
Attention! The text in this document has been recognized automatically. To view the original document, you can use the "Original mode".
STRAIGHT STITCHES
Straight Stitch
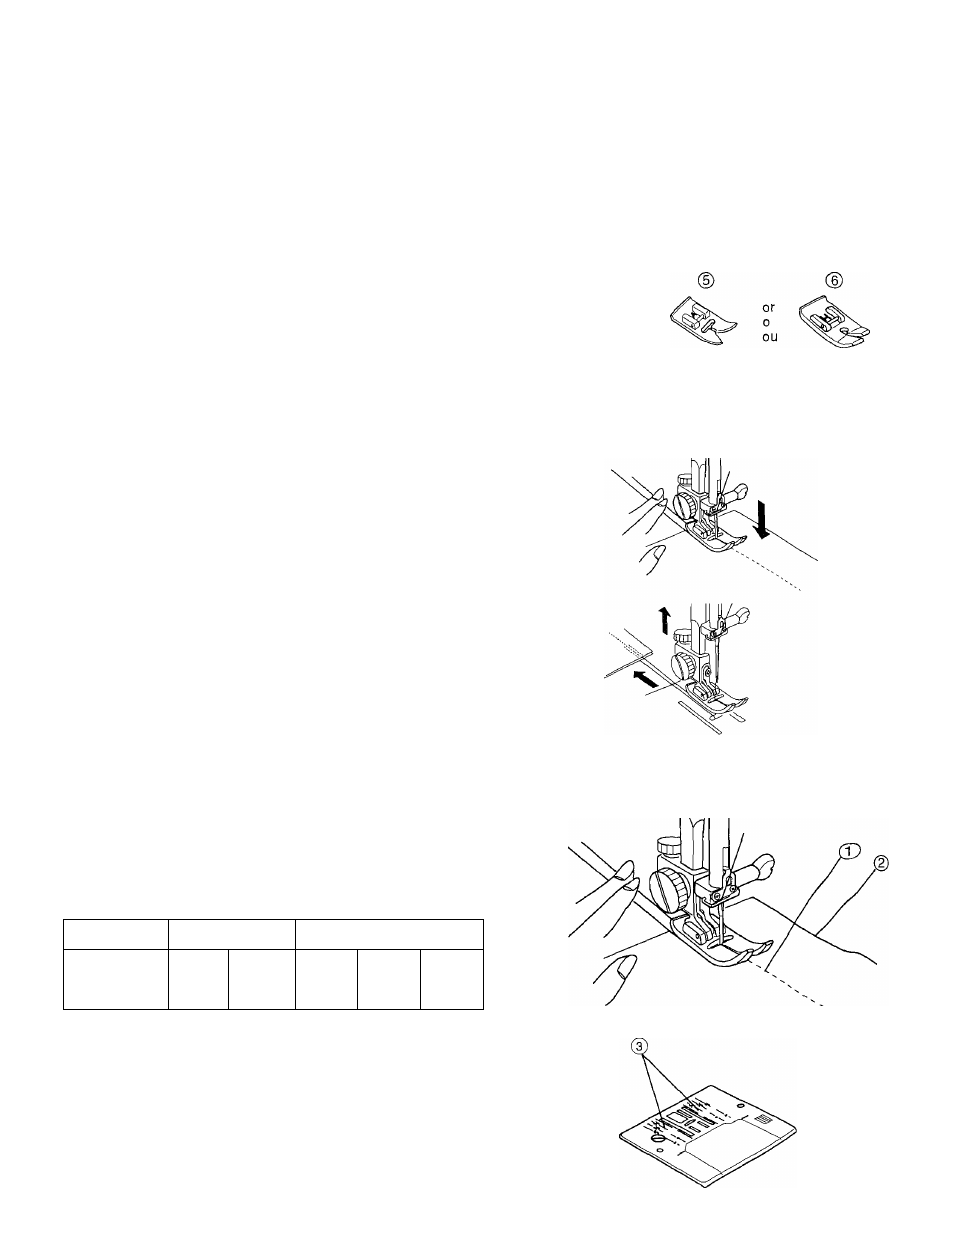
0 Stitch selector;
© Stitch width:
© Stitch length:
© Needle thread tension:
® Presserfoot A:
® Presser foot H (option):
Straight stitch foot( ,i, only)
6 to 8
6.5
1.5 to 4
2 to 6
Zigzag foot (
i i i )
'p ‘p =1'
'
,
NOTE; When using the straight stitch foot, make sure to
set the stitch width control at 0. Otherwise the needle
may strike the presser foot and possibily break.
• Starting to sew
Raise the presser foot and position the fabric next to a seam
guide line on the needle plate (5/8”{1.6cm) is most common).
Lower the needle to the point where you want to start. Lower the
presser foot and pull the threads toward the back. Depress the
foot control. Gently guide the fabric along a seam guide line letting
the fabric feed naturally.
• Finishing sewing
To fasten the ends of a seam, press the reverse stitch control
and sew several reverse stitches. Raise the presserfoot. Remove
the fabric, draw the threads to the back and cut them with the
thread cutter. The threads are cut in a proper length for the next
seam.
Seam allowance lines
The seam guides on the needle plate and hook cover
plate help you measure seam width.
The numbers on the needle plate indicate the distance
between the middle needle position and the seam
allowance line.
r
Millimeters
Inches
Marks on
needle
plate
15mm
20mm
4/8”
5/8”
6/8”
_______
)
0 Middle needle position
© Edge of fabric
@ Needle plate guide lines
CD
I
I I
1 I
CD CD
WIDTH
LENGTH
T5J
im
38