SINGER WRotary (Book 13) User Manual
Page 7
Attention! The text in this document has been recognized automatically. To view the original document, you can use the "Original mode".
Fig,
7
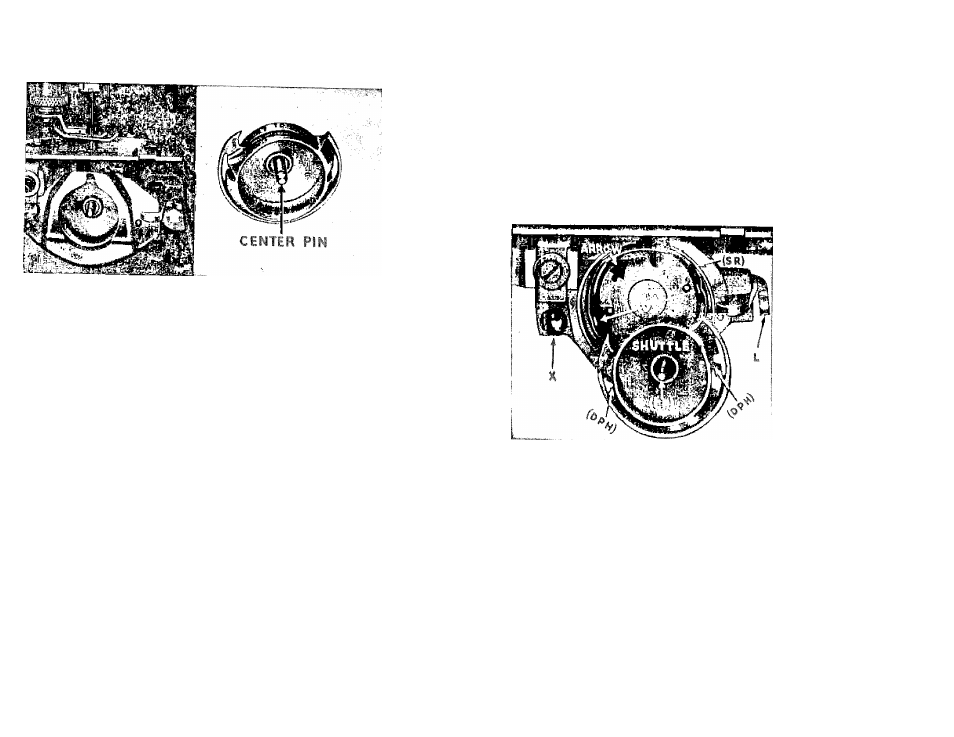
Hemoving Shuttle
See Figs. 7-8. Eemove cover plate, then remove bobbin case
and tip the sewing unit bach. Turn wheel until the point of
the needle just enters needle plate hole. Press lever at
white arrow. Fig. 7, to release the shuttle race cover. Lift out
shuttle by center pin. (Black arrow. Fig. 7)
Clean shuttle thoroughlj, being sure that no thread is wound
around center pin. Clean shuttle race cover and the shuttle
race. (SR, Fig. 8), removing any threads or lint that may be in
it,
and be sure that
driving
pins (DP) are
clean. Before
replacing,
place
a
drop
of oil on
finger
tip and
apply
to outer edge of shuttle,
shuttle
race and center pin.
Replacing the Shuttle
See higs. 7-8. With the sewing unit tipped back, turn disc
wheel until the point of needle just enters the needle plate
hole so that arrow and the word ‘hop” are exactly in the position
and without forcing. The shuttle race
cover
will then go into
place easily, the fork at one end
fitting
back of pin
(X)
and
the
slot in other end passing over latch (L), which will snap back
to its holding position over shuttle race cover.
I his assembly goes together
very smoothly when
parts are
properly placed. Be certain of needle position and arrow before
attempting to
replace
shuttle, and do not force the ODeration.
Fig. 8
The Attachments
The iollowing pages will acquaint you with the use of the many
time-saving attachments that come wdth your machine.
Like
your new machine, they are neither difficult nor complicated to
use. Try them on scraps of materia! first—youTl be delighted
with the results.
Once ’ou have become familiar with the attachments you will