Oven or broiler door, Maintenance, Oven bottom – Maytag X9112VUV User Manual
Page 10: Oven light
Attention! The text in this document has been recognized automatically. To view the original document, you can use the "Original mode".
OVEN OR BROILER DOOR
Do not place excessive weight on an
open oven door or stand on an open
oven door as, in some cases, it could
damage the door, cause the appliance
to tip over and possibly cause injury.
When opening oven door, allow steam
and hot air to escape before reaching in
oven to check, add or remove food.
Do not attempt to open or close door
until door is completely seated on hinge
arms. Never turn on oven unless door is
properly in place. When baking, be sure
door is completely closed. Baking
results will be affected if door is not
securely closed.
To remove door:
Open door to the
“stop” position (opened about 4 to 6
inches) and grasp door with both hands
at each side. Do not use door handle to
lift door. Lift up evenly until door clears
the hinge arms.
MAINTENANCE
OVEN BOTTOM
Protect oven bottom against excessive
spillovers especially acid or sugary
spillovers as they may discolor the
porcelain. Use the correct size cooking
utensil to avoid boilovers. Never place
cookware or aluminum foil directly on
the oven bottom.
To remove:
When cool, remove the
oven racks. Push the oven bottom to the
rear of the oven and lift up at front until
the front edge of the oven bottom clears
the oven front frame. Remove oven
bottom from oven.
(
1
h
iA—
\y-íTír
wll
_ _ If
OVEN LIGHT
The oven light switch is located on the
control panel. Push in rocker switch to
turn oven light on and off.
Before replacing oven light bulb,
disconnect
power
to
oven
.
Be
sure bulb and oven parts are cool. Do
not touch a hot bulb with a damp cloth as
the bulb may break.
To replace oven light:
Use a dry pot
holder, to prevent possible harm to
hands;
very carefully
remove bulb.
Replace with a 40 watt APPLIANCE
bulb. Reconnect power to the oven.
electrical
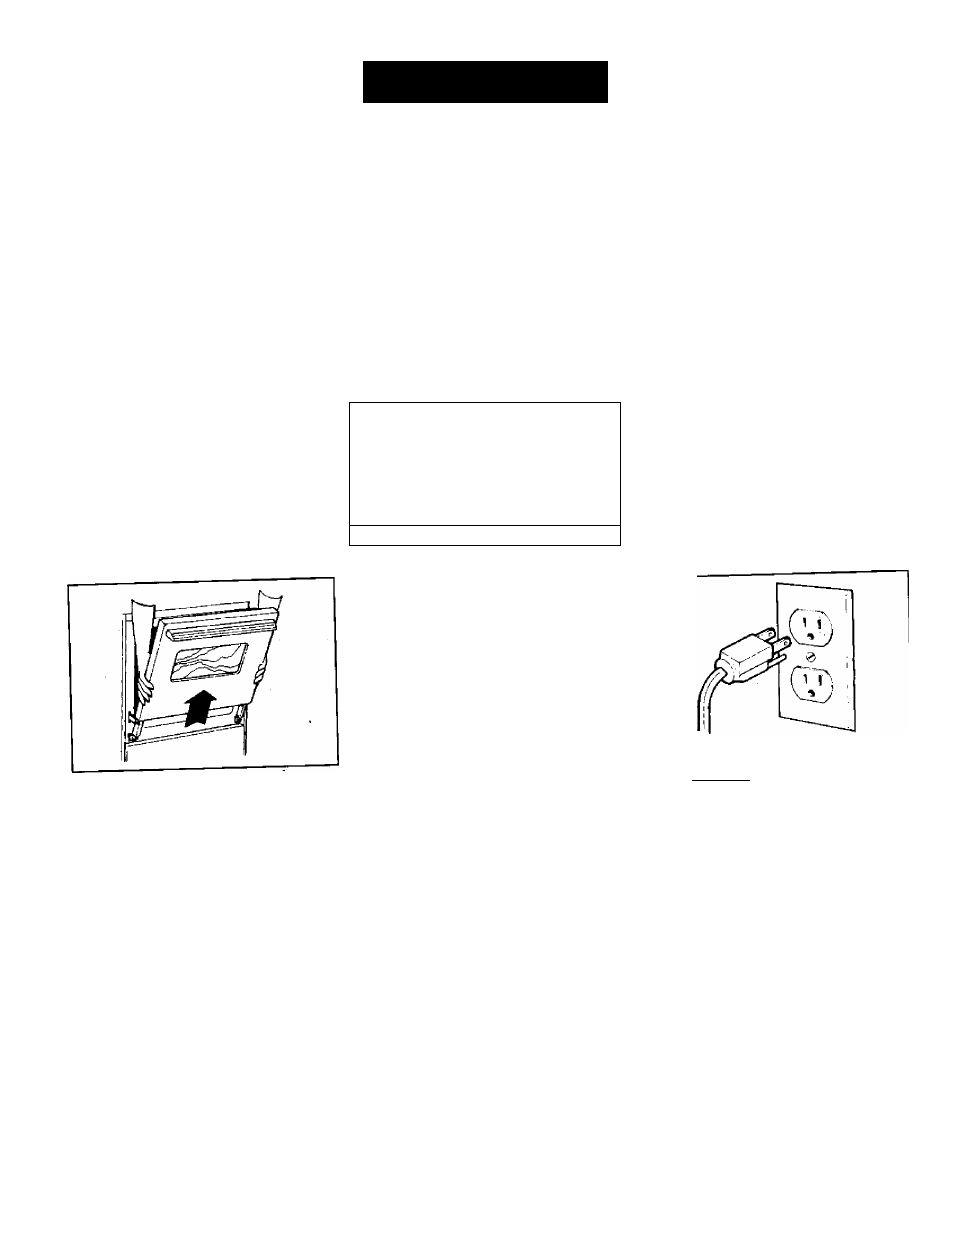
connection
Appliances which require electrical
power
are
equipped
with
a
three-prong grounding plug
which
must be plugged directly into a properly
grounded three-hole 120 volt electrical
outlet.
CiWJflQH: Winge-
mounted and will slam shut against the
hand or fingers between the hinges
ahdthbtfphtbi^^
bei :ih|yfed ;ff ;hing0;S
V ■ ^ ■:
To replace door:
Grasp door at each
side, align slots in the door with the
hinge arms and slide door down onto the
hinge arms until completely seated on
hinges.
To replace:
Fit the rear edge of oven
bottom into the pin located at the center
of the channel on the rear oven wall.
Push toward rear of oven and lower
oven bottom into place.
BROILER BOTTOM
To remove:
When cool, remove broiler
pan and oven rack. Lift up front edge of
broiler bottom. Then lift rear end up and
remove broiler bottom from oven.
To replace 12-inch broiler bottom:
Place two slots along rear flange over
two screws in rear wall. Then, lower
front edge into place.
To replace 6-inch broiler bottom:
Push bottom to rear and lower into
place.
Alwsiys disconnect power to applience
before servicing.
The three-prong grounding plug offers
protection against shock hazards.
Do
not cut or remove the third
grounding prong from the power
cord plug.
If an ungrounded, two-hole or other
type electrical outlet is encountered,
it
is the personal responsibility of the
appliance owner to have the outlet
replaced with a properly grounded
three-hole electrical outlet.