Sewing buttonholes – SINGER 30518 User Manual
Page 26
Attention! The text in this document has been recognized automatically. To view the original document, you can use the "Original mode".
SEWING BUTTONHOLES
SETTINGS:
Pattern: Zig-Zag
Presser foot: Special Purpose presser foot
Needle position: Left needle position
Stitch length: Q
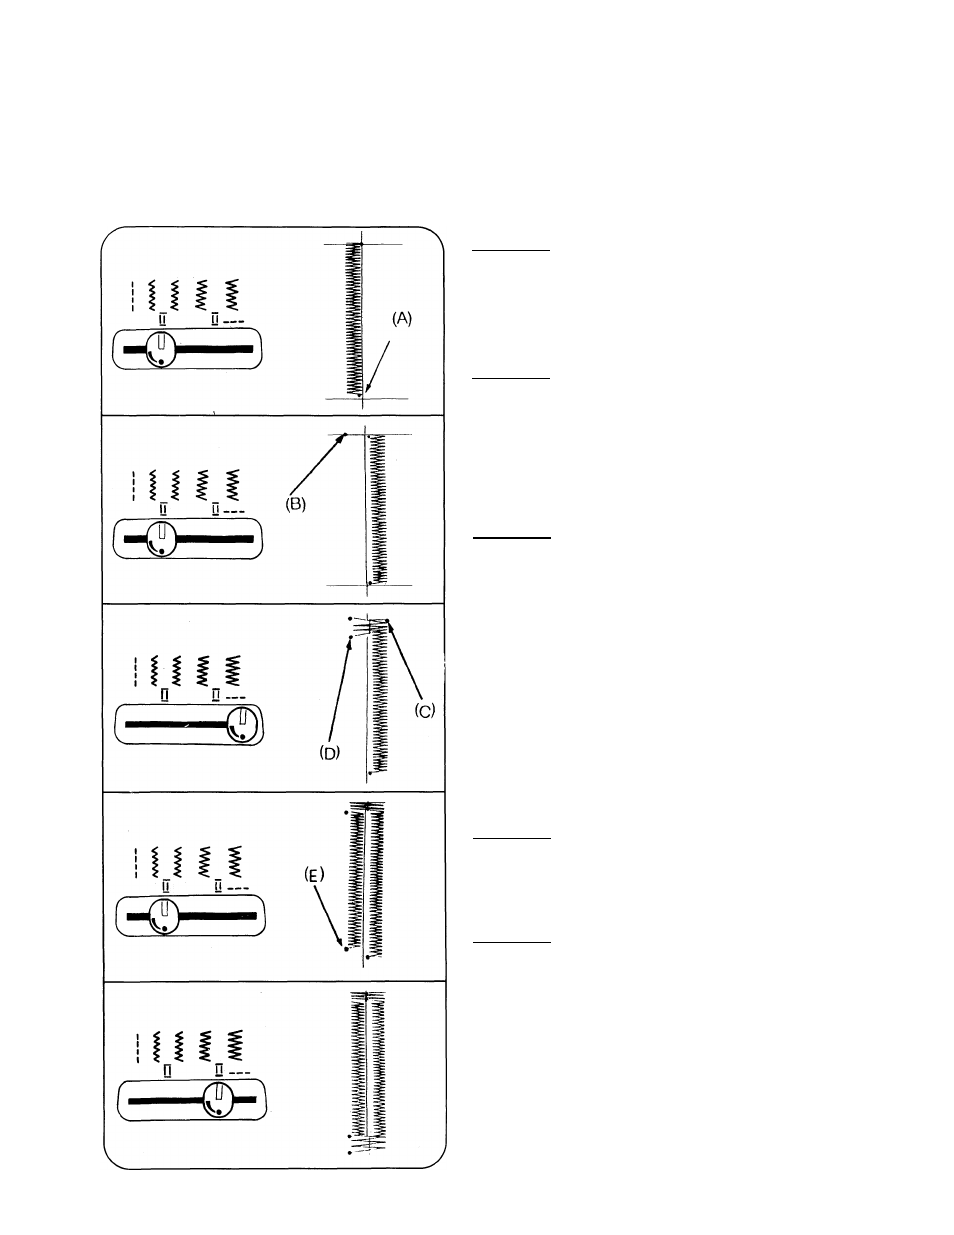
(step 1.]
Mark buttonhole length on fabric.
Set stitch width to leg graphic.
Stitch down to point (A) and leave
needle in fabric.
(step 2.)
Raise presser foot and turn fabric
clockwise around needle.
Sew one stitch bringing needle to
point (B) and raise needle close to
fabric.
(step 3.)
Set stitch width to bar tack
graphic. Wider setting (towards
right) makes larger buttonhole and
wider cutting space. Moving
needle to opposite side above
point (C).
Raise presser foot, adjust fabric
slightly and lower needle into
point (C). Lower presser foot.
Make 4 or 5 stitches, ending at
point (D).
(step 4.)
Set stitch width to leg graphic,
stitch down to point (E) and raise
needle close to fabric.
(step 5.)
Set stitch width to bar tack
graphic. Make 4 or 5 stitches.
To secure stitching, move stitch
width selector to i , and take 3~4
stitches.
Raise needle and presser foot.
Remove fabric from machine, clip
thread ends and cut buttonhole
opening.
21