Installing sewing head in cabinet – SINGER W1444 User Manual
Page 5
Attention! The text in this document has been recognized automatically. To view the original document, you can use the "Original mode".
To Assemble Legs on
Cabinets
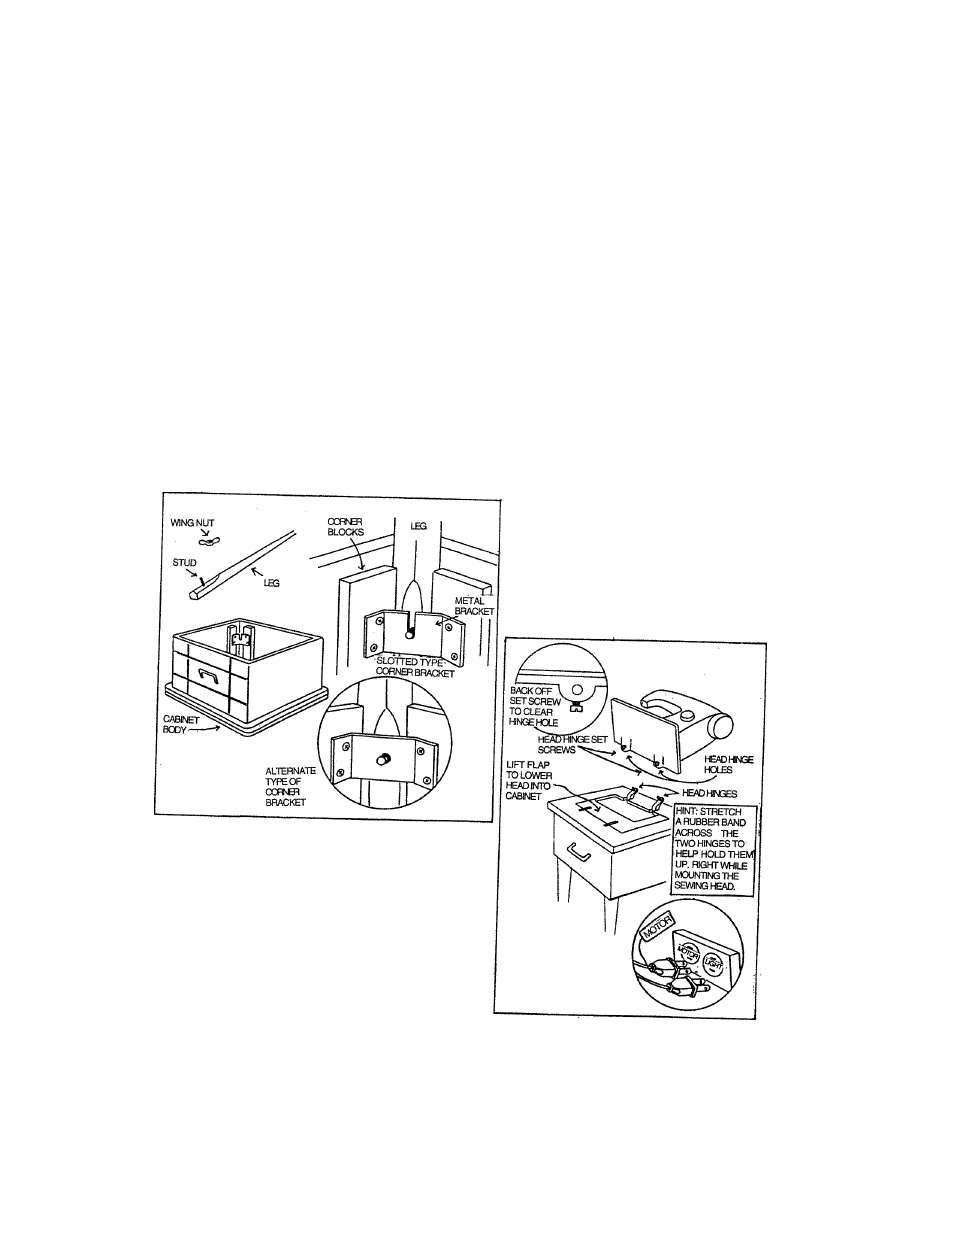
1. Place cabinet body upside down
on smooth level surface (use
packing material as cushion to
prevent marking top.)
2. Siip ieg into position between
corner biocks and down as far as it
will go with stud fitting into slot or
hole in metal bracket.
S.Add wing nut and tighten securely.
Installing Sewing Head in
Cabinet
1. Back off both head hinge set screws
until head hinge hole is clear.
2. Tilt head hinge tongues up and
back as far as they will go.
3. Carefully slip head onto head hinges
making sure tongues are inser
ted as far as they can go into head
hinge holes.
4. Allow the head to rest in its tilted-
back position.
5. Tighten both set screvys securely
with screw driver.
Plug electrical leads into sockets
located inside cabinet. Cord inden-
tified with “motor" tag must be
plugged into socket marked
"motor". Untagged cord goes to
"light" socket.
6
.
Name of Par
Accessories.
Before sewin
Winding the
Removing be
Inserting bob
Inserting bob
Threading u|
Drawing up b
Chariging sew
Control dial 8
Regulating thi
Drop feed . .
Changing neec
Fabric. Threac
Sewing (patter
To start sewini
To finish seam
Straight stitch
Zigzag sewing
Blind stitch .
Button sewing
Binding.......
Zipper sewing
Hemming. . .
Twin Needle.
Embroidery .
Quilter . . . .
Seam guide. . ,
Maintenance ((
Checking Perfc