Filter assembly, Rr- _ s", ns v, F . c i j. "s i ‘'■i :ic – Sears 113.177020 User Manual
Page 5: I anen an.-vi-ml!l," g, 2 ■* ^ l, B ^ . , r* w t > j. tj’3, Rh« i*ji, rtef
Attention! The text in this document has been recognized automatically. To view the original document, you can use the "Original mode".
’Lij own saf-aty=
1
HO
i
‘ l i ^
’fOWiJ SOUr’€0 I ^
rr- _ S", ns
V'
c ,s"sJ , i.i n..'
: * t,d arK'l j
. ■ j K f i i
ifir: i>eaawlV s^sid wi.jO'fStii
' i
|
>.<
-.r
i
’"^,1 ■ n1
f
■’-i‘ Vi-.’
A ',
j
f . C i
J. "s
i
‘'■i
:iC
1
' .1 '■ . !i
r-
1
1-
!
' ! ^ >1 :
I ; 1
L 1 . ,.
;v. 11 •> *30^ s
' M'J V
l A
t| J / 1
- 'rS 03^ f t
f Cl ^
I Anen an.-vi-mL!l," g
J
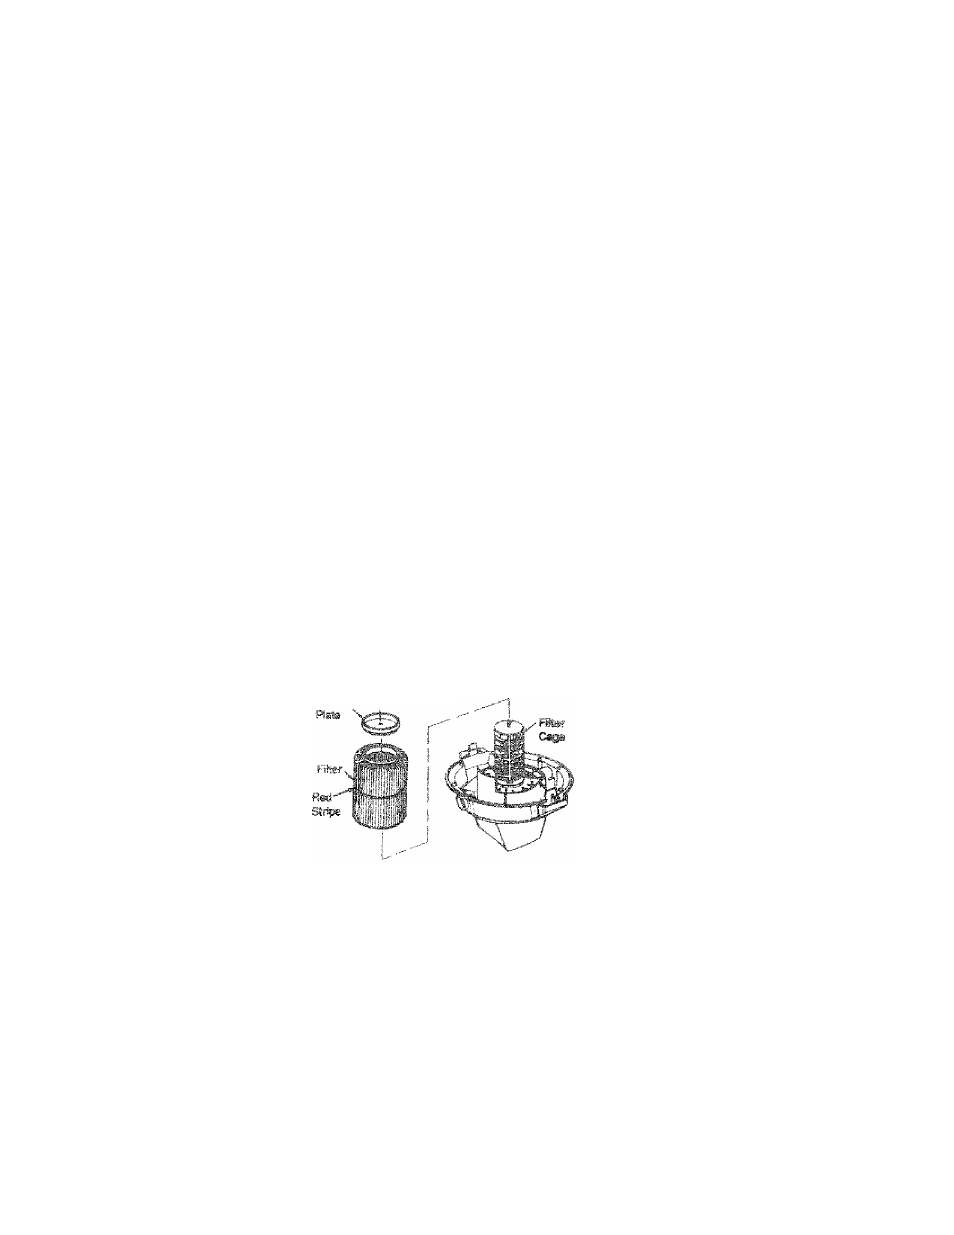
3. Line Lip iilier cape tabs with the siots in
ttie center ring of the cd assenibiy
4 Push on tire fitter cage until the tabs
snap into file slots tor a ssccre til.
>¿2 ■* ^
L ^
.^1 ^ b ^ . , r* W T > J. tj’3 ' Filter Assembly ‘ 1. Caretaiiy slide the filter over the Tilter cage, sliding it over the center ring cov ering tire 3 slots until tire filter stops agaiiisf the lid 2. Place the hole in the filter plate over threaded screw of the fiiter cage. 3 Gentiv push on fire tiller plate to seat the rubcet ting of the fitter inside the circular chanrrei of rhe filter plate 4. Place filter nut onto threaded screw arrd tighten down, uingsr tighten oniy. NOTE; i. ever of iiits' nsi' should bo away from pbite Cri sirown IMPORTANT: Do not ovortghfon as tills may deiomi o; crock lire iilfe; plate or til- tei cage NOTE: Your filter has a red stripe that matches an in-store displayeir When you visit your local Sears afore, just rsrnernbar the color of your stripe for the correct size filter, RH« i*ji, Rtef s.