Installation – Sears 565.69401 User Manual
Page 9
Attention! The text in this document has been recognized automatically. To view the original document, you can use the "Original mode".
INSTALLATION
Remove all packing material and accessories.
Examine the oven for any damage such as dents or broken door.
Do not install if oven is damaged.
1
,
2
,
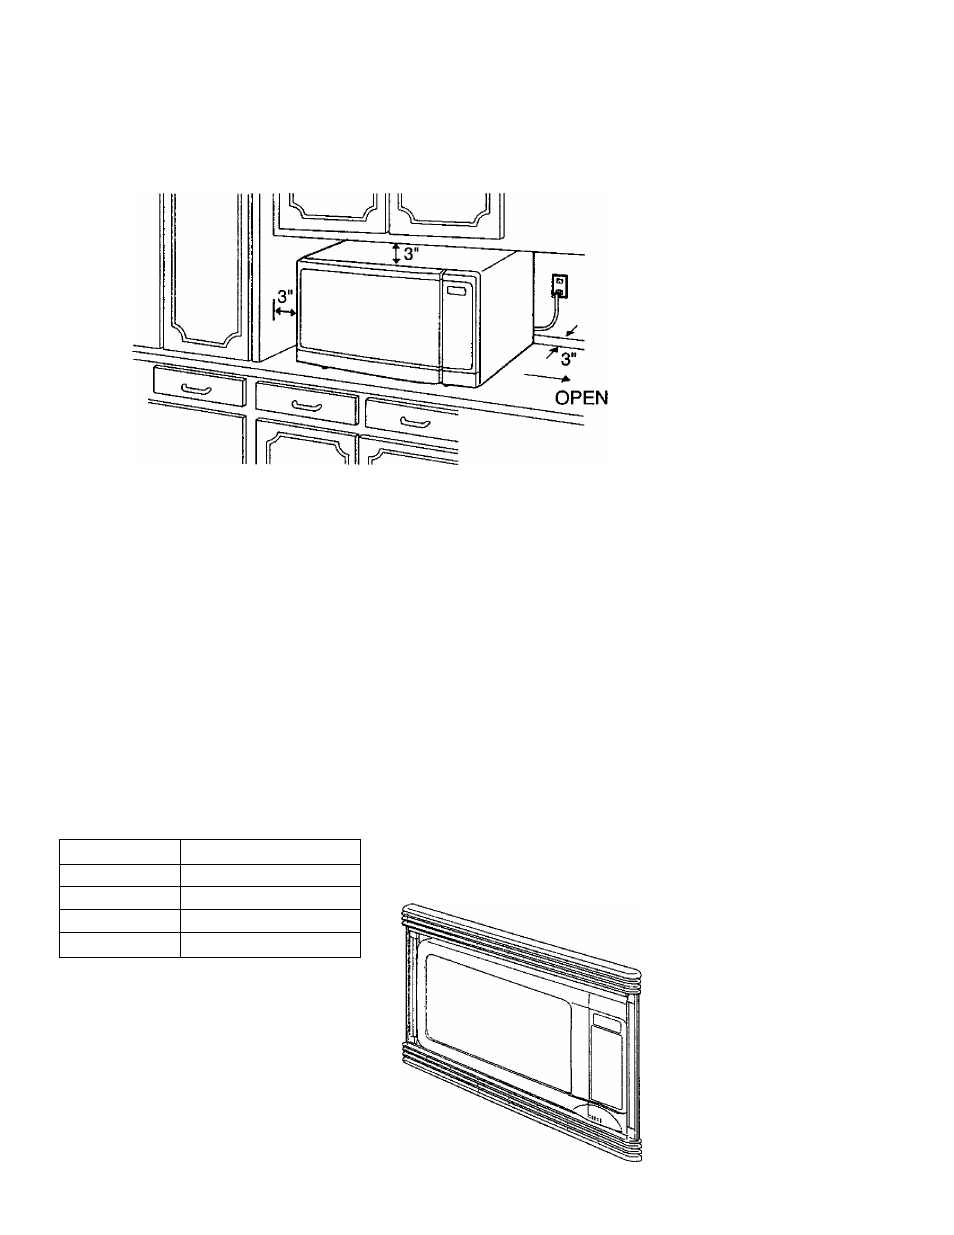
Select a level surface that provides enough open space for the intake and/or
outlet vents,
A minimum clearance of 3 inches (7.5 cm) is required between the oven and any
adjacent wall. One side must be open.
• Leave a minimum clearance of 3 inches (7.5 cm) above the oven.
• Do not remove the legs from the bottom of the oven.
• Blocking the intake and/or outlet openings can damage the oven.
• Do not install oven over a range, cooktop or other heat-producing appliance.
Plug your oven into a standard 120-volt / 60-Hz household outlet.
Be sure the electrical circuit is at least 15 amperes and that your microwave oven
is the only appliance on the circuit.
27 inch Built-in Kit
Your oven can be built into a cabinet by
using an optional built-in kit. Contact the
store where you purchased your oven.
Model No.
Built-in Kit Stock No.
565,.69300
20-69920
565. 69301
20-69921
565. 69400
20-69910
565, 69401
20-69911
• The oven requires an opening of 25”
(w) X 17" (h) X
21
” (d) for installation.
NOTE:
This unit is not designed for 50
Hz or any circuit other than a 120-volt/
60-Hz AC circuit. This oven is designed
for countertop or built-in installation.
When using the built-in kit, a
minimum clearance of
2
feet is
required between the oven and heat-
producing appliance. For example,
next to or above a conventional gas
or electric range or above
conventional wall oven. Leave a
minimum clearance of
2
feet around
the oven. If installed near or over a
heatsource, the oven could be
damaged and the warranty would be
void.