Removable oven bottom, Oven shut-off valve, And electrical disconnect – Sears KENMORE 36745 User Manual
Page 20: Replacing the oven light
Attention! The text in this document has been recognized automatically. To view the original document, you can use the "Original mode".
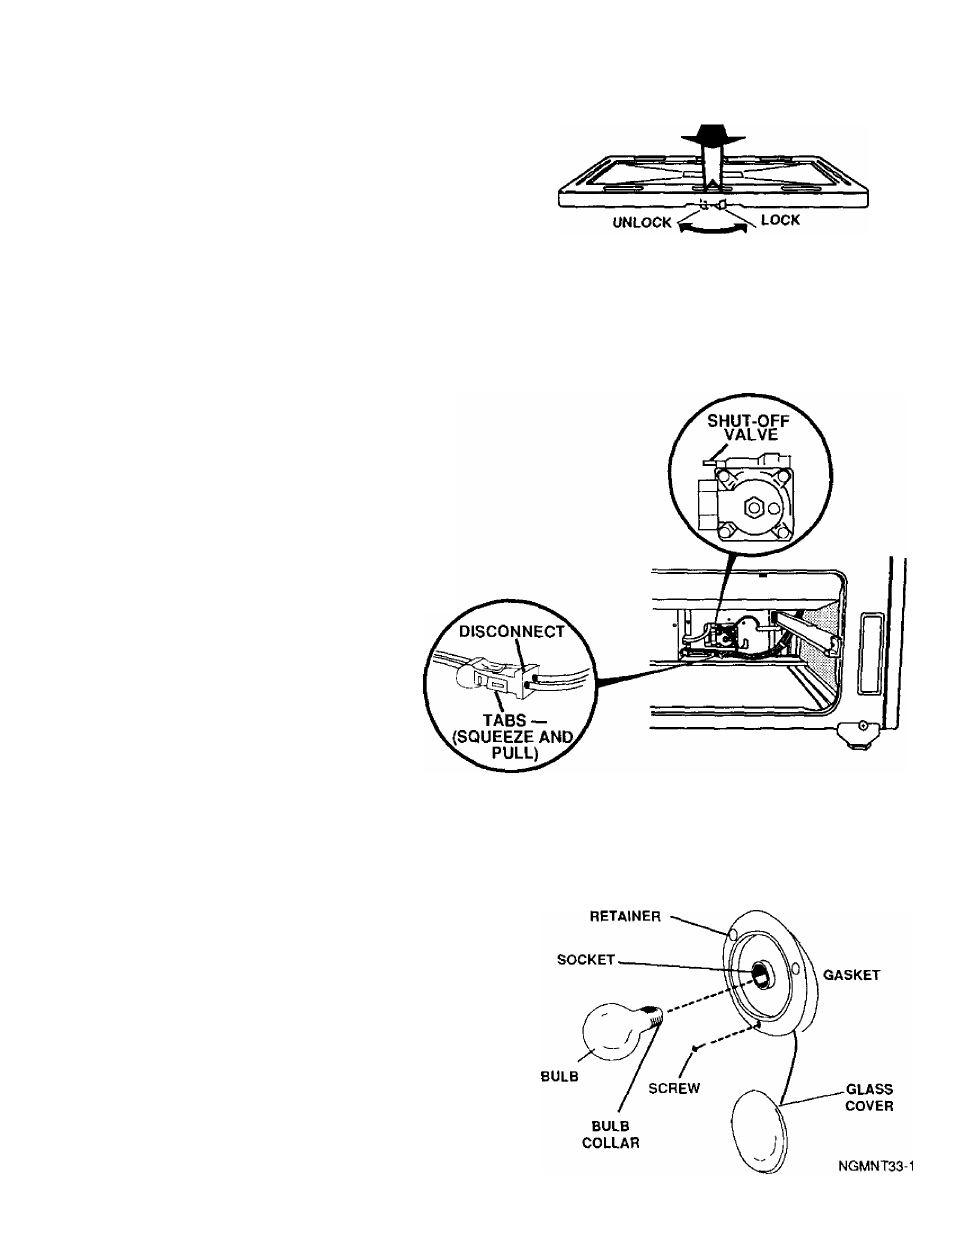
REMOVABLE OVEN BOTTOM
The oven bottom may be removed for cleaning heavy
spillovers or to reach the oven burner.
Be careful not to scratch the oven finish when
removing or replacing the oven bottom.
To remove:
1. Slide the tab at the center front of the oven bottom to
the left.
2. Lift the oven bottom up and out.
To replace:
1. Slip the oven bottom into the oven so the tabs in the
rear of the oven bottom fit Into the slots in the oven
back.
2. Lower the front of the oven bottom into place and
slide the tab at the front right to lock the oven bottom
into place.
OVEN SHUT-OFF VALVE
AND ELECTRICAL DISCONNECT
The pressure regulator (on range back)
contains a lever which turns on or shuts off
the gas supply to the oven. The lever is
accessible from the front of the range by
removing the storage drawer and reaching
through the storage compartment and the
range back. Seethe Installation instructions
for more information.
The electrical disconnect is located behind
the storage drawer in the lower compartment.
Remove storage drawer to access. Squeeze
tabs and pull to disconnect.
REPLACING THE OVEN LIGHT
Be sure that the light switch is In the OFF position.
A
Do not touch hot oven bulb with wet
hands. Do not wipe oven light area
with wet cloth. Unplug or disconnect
the electrical supply to range before
removing.
Never touch the electrically live collar on the butb when
replacing it.
Electrical power must be shut off if you have to
replace a broken bulb.
1. Removethethreescrews and lift off the glass retainer,
glass cover and gasket.
2. Replace the bulb with a 40 watt appliance bulb. An
appliance buib is smaller than a standard 40 watt
household bulb.
Replace the gasket, glass cover and glass retainer.
Tighten screws securely.
GLASS
19