Sears SR10095 User Manual
Free-standing electric range
Attention! The text in this document has been recognized automatically. To view the original document, you can use the "Original mode".
IKSTALLATION INSTRUCTIONS FOR YOUR NEW
FREE-STANDING
ELECTRIC RANGE
Beffor« you begin - Read these Instructions completely and carefully.
IMPORTANT - Save these instructions for local inspector’s use.
IMPORTANT - OBSERVE ALL GOVERNING CODES AND ORDINANCES.
Note to Installer • Be sure to leave these instructions with the Consumer.
Note to Consumer • Keep these instructions with your Use and Care Book for future reference.
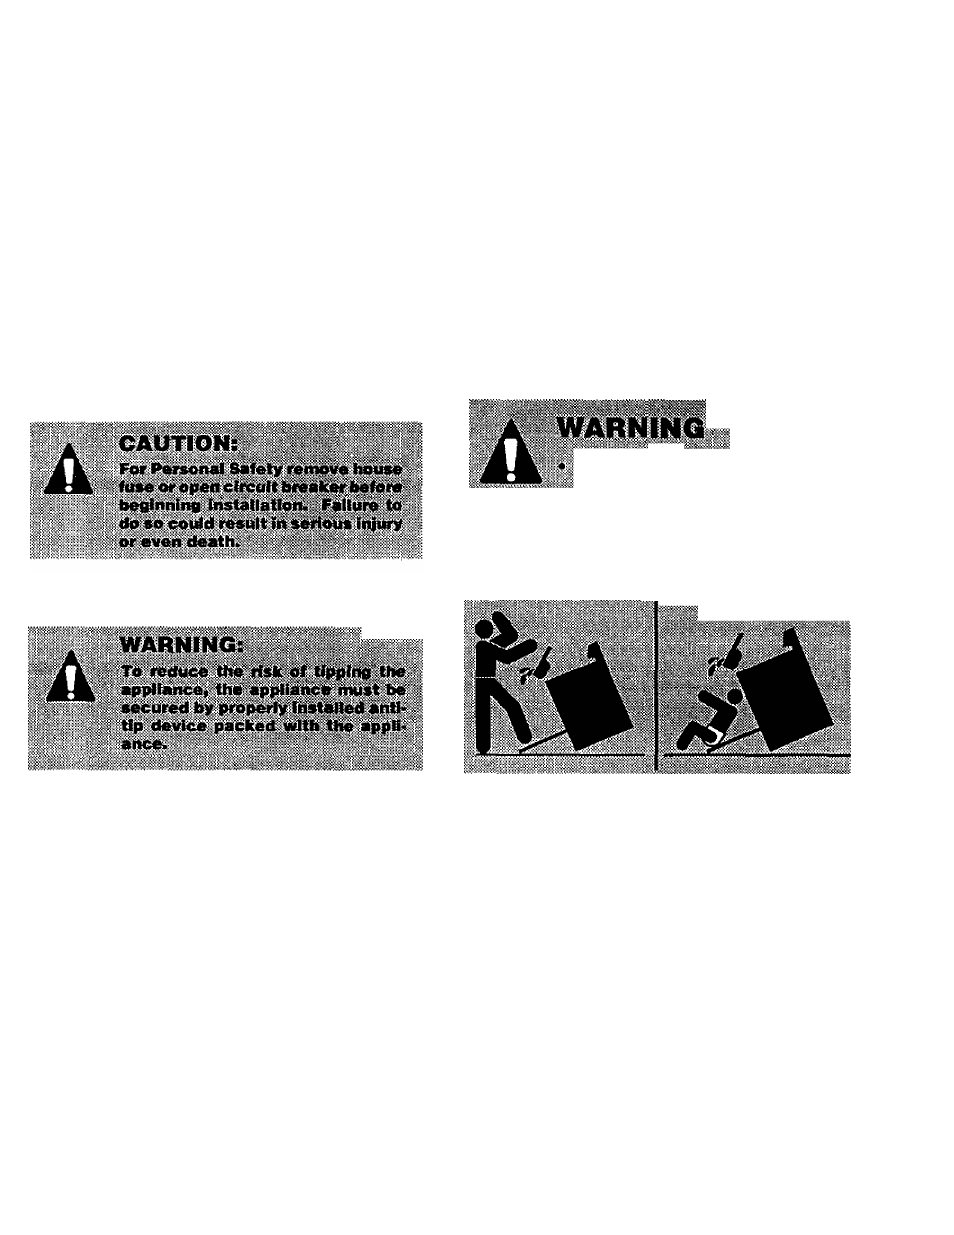
SAFETY
Be sure your afjpllance Is properly installed and grounded
by a qualified technician.
All rough-ln and spacing dimensions must be met for
safe use of your range. Electricity to the range can be
disconnected at the outlet without moving the range if
the outlet Is in the preferred location (remove lower
drawer).
To reduce the risk of bums or fire when reaching
over hot surface elements, cabinet storage space
above the cooktop should be avoided. If cabinet
storage' space is to be provided above the
cooktop, the risk can be reduced by installing a
range hood that sticks out at least 5" beyond the
front of the cabinets. Calrinets installed above a
cooktop may be no deeper than 13".
.
SR1009S
Pub. No. 31-10059
INT308-3
ALL RANGES CAN TIP
INSTALL
ANTt-TIP
DEVICE
PACKED Witff RANGE
• SEE INSTRUCTIONS
STABILITY DEVICE
TOOLS NEEDED:
Phillips head screwdriver
1 3/8" open end or adjustable wrench
Bracket attaches to floor or wall to hold either rig ht o r left
rear leg leveler. If fastening to floor, be sure that screws
do not penetrate electrical wiring or plumbing. If this
cannot be determined, use shorter screws that will not
penetrate through flooring.
If the bracket came with your range, it Is shipped at
tached to the lower range back. Remove and discard
the shipping screw that holds the bracket and then
follow instructions below.
1. Decide whether the bracket will be Installed on the
right or left side of range location.
(Stability device instructions continued on page 2...)