To remove snow thrower from carton {see fig. 1), How to set up your snow thrower, Assembly – Sears Craftsman 536.886531 User Manual
Page 7
Attention! The text in this document has been recognized automatically. To view the original document, you can use the "Original mode".
ASSEMBLY
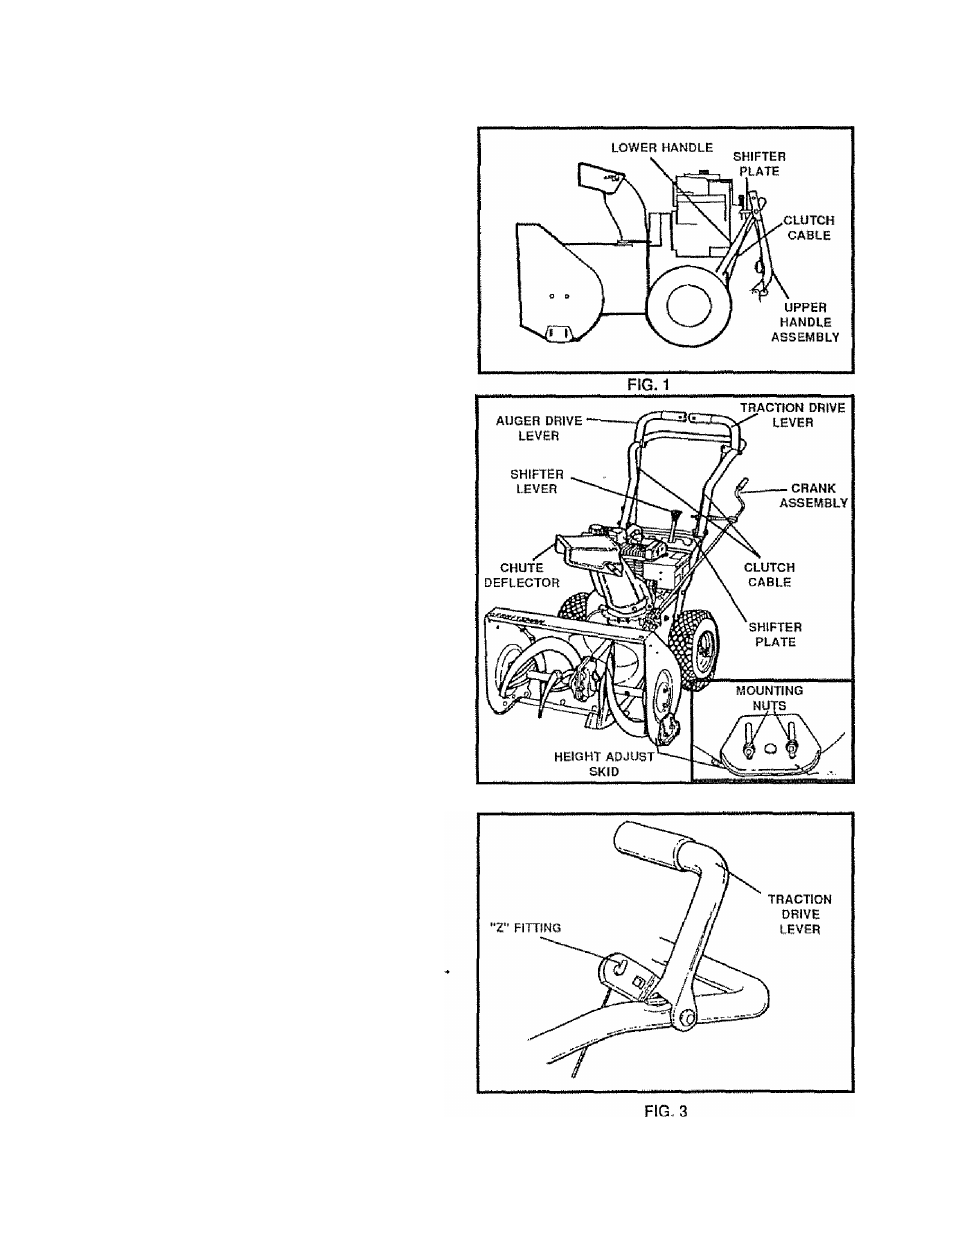
Figure 1 shows the snow thrower in the shipping position
Figure 2showsthesnQwthrowercomplete!y assembled
Reference to the right and left hand side of the snow
thrower is from the operator’s position at the handle,
TO REMOVE SNOW THROWER
FROM CARTON {See Fig. 1)
® Remove staples from the top of the carton
® Locate and remove container of 5W30 oil
@
Locate the crank assembly and place the assembly
aside
« Remove and discard the packing material from
around snow thrower
® Cut all four corners of the carton from top to bottom
and lay the panels flat
® Remove the packing materia! from the control panel
and upper handle assembly
® Roll the snow thrower off the carton by pu! ling on the
lower handle
CAUTtON: Do Not back over cables
® To complete upper handle installation and install
chute crank assembly, see To install The Upper
Handle and Crank Assembly paragraph on page 8,
NOTE: If the cables have become disconnected from the
clutch levers, reinslai! the cables as shown in Fig, 3.
HOW TO SET UP YOUR SNOW
THROWER
® Your snow thrower is equipped with height adjust
skids (See Fig 2) on the outside of the auger hous
ing. To adjust the skid height for different conditions,
see To Adjust Skid Height paragraph on page 17.
A
CAUTION: IF YOU ARE REMOVING
SNOW FROM ANY GRAVELED OR UfJ-
EVEN SURFACE, RAISE THE FRONT OF
THE SNOW THROWER BYMOVINGTHE
SKIDS DOWN. THIS WILL HELP TO PREVENT
STONES AND OTHER DEBRIS FROM BEING
PICKED UP AND THROWN BY THE AUGER.
FIG. 2