Sears 831.28742 User Manual
Page 4
Attention! The text in this document has been recognized automatically. To view the original document, you can use the "Original mode".
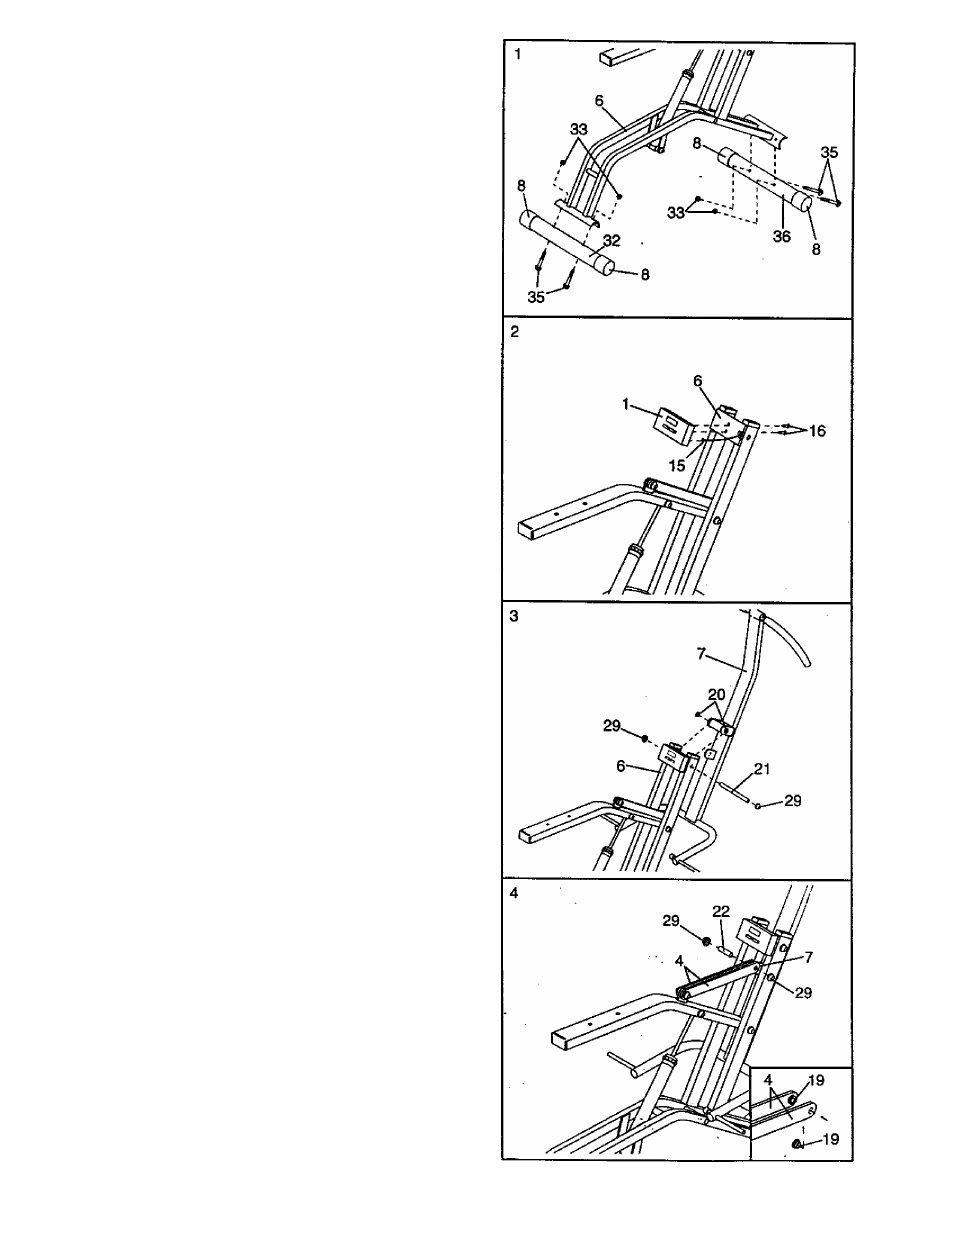
1. Find the Front Stabilizer {36), which has a decal on it.
Make sure that there is a Large Round Endcap (8) on
each end of the Front Stabilizer.
Attach the Front Stabilizer (36) to the Frame (6) with
two 3/8" X 2,7/8" Carriage Bolts (35) and 3/8” Nylon
Locknuts (33). Make sure that the indented holes in
the Front Stabilizer are turned toward the frame.
Attach the Rear Stabilizer (32) to the Frame (6) in the
same manner.
2. Plug the Sensor Wire (15) into the back of the Monitor
(1). Attach the Monitor to the bracket on the Frame (6)
with the two #6 X 3/8" Screws (16).
Make sure that
the Sensor Wire is not pinched between the
Monitor and the Frame.
3.
iMPORTANT NOTE: Before assembling the 1/2”
Dome Caps (29) in steps 3 and 4, be sure that aii
parts are oriented as shown in the drawings. The
Dome Caps can be used oniy once; if the Dome
Caps must be removed, it will be necessary to
order new Dome Caps.
Make sure that there are two 1/2" Pivot Bushings (20)
in the indicated bracket on the Pedal Frame (7). Hold
the Pedal Frame so the bracket is between the holes
near the upper end of the Frame (6). Tap the 6" Pivot
Rod (21) through the Pedal Frame and the Frame. Tap
a 1/2” Dome Cap (29) onto each end of the Pivot Rod.
4. Make sure that there is a 1/2” Link Arm Bushing (19)
in the end of each Link Arm (4) (see the inset draw
ing). Align the ends of the Link Arms with the indicated
bracket on the Pedal Frame (7). Insert the 1 3/4" Rod
(22) through the Link Arms and the bracket. Tap a 1/2"
Dome Cap (29) onto each end of the Rod.