Jgpiy – Sears 303.147012 User Manual
Page 5
Attention! The text in this document has been recognized automatically. To view the original document, you can use the "Original mode".
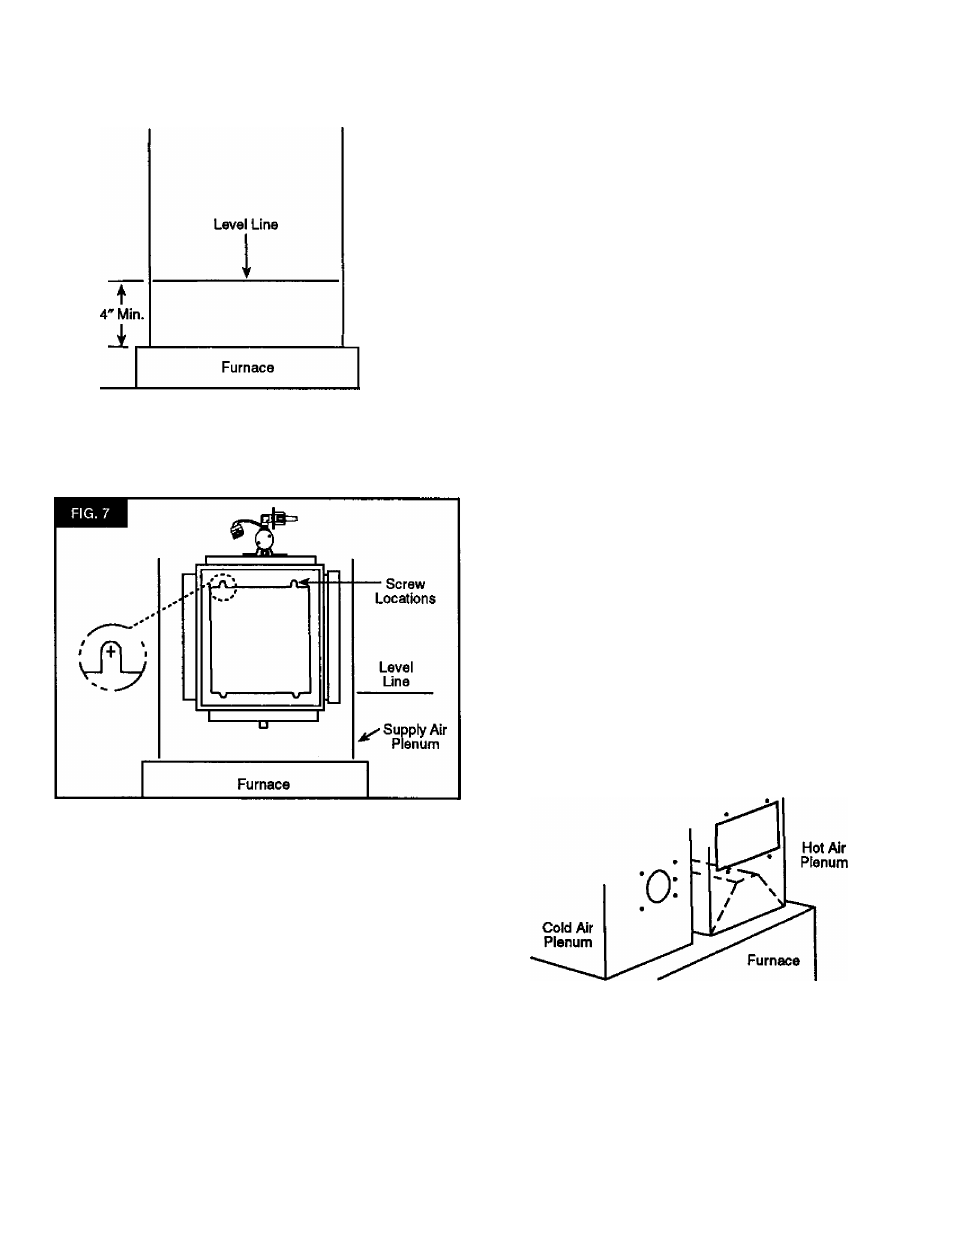
O 1 Mark a level line on the supply air plenum (Fig. 6).
Plenum
n 2
Hold case assembly against the plenum with bottom
edge of rear opening on level line. Mark four comers of rectangU'
lar opening and four screw locations on plenum. Screw holes must
be located at end of slot (Fig. 7).
n 3
Connect corner marks to outline rectangular opening.
Center punch four screw locations (Fig. 8].
G 4
Drill or punch a large hole in one corner of rectangle.
This will allow you to insert the tin snips or metal saw.
CAUTION: Be sure not to drill or cut into air conditioning
coil or tubing.
G
5
Cut out the area inside the rectangle. If any of the edges
are rough, file them smooth (Fig, 8).
Q G Drill the four holes marked on the plenum with a 1/8"
drill bit. Holes must be located at end of slot (Fig. 7).
G
7
Attach the humidifier case assembly on the plenum
using 4 #8 screws provided.
Drill 4-
1/8" Holes
Cut Along •
This Line
Cut Out
This Area
Level
Line
Sui
Furnace
jgpiy
Plenum
g
8
Hold collar and flexible tube assembly against cold air
plenum at desired location.
G
3
Mark round opening inside collar and five mounting
holes (Fig. 9).
□
10
Center punch five screw locations. Drill or punch a large
hole within the round opening. Cut out the area inside the round
opening. Drill the five holes (Fig. 9).