Applications and gaming > qos, Advanced configuration, Qos (quality of service) – Cisco WRT110 User Manual
Page 25
Chapter 3
Advanced Configuration
24
RangePlus Wireless Router
much time is left for the current IP address). To remove
a DHCP client, click Delete. To retrieve the most up-to-
date information, click Refresh. To exit this screen and
return to the DMZ screen, click Close.
Click Save Settings to apply your changes, or click Cancel
Changes to cancel your changes.
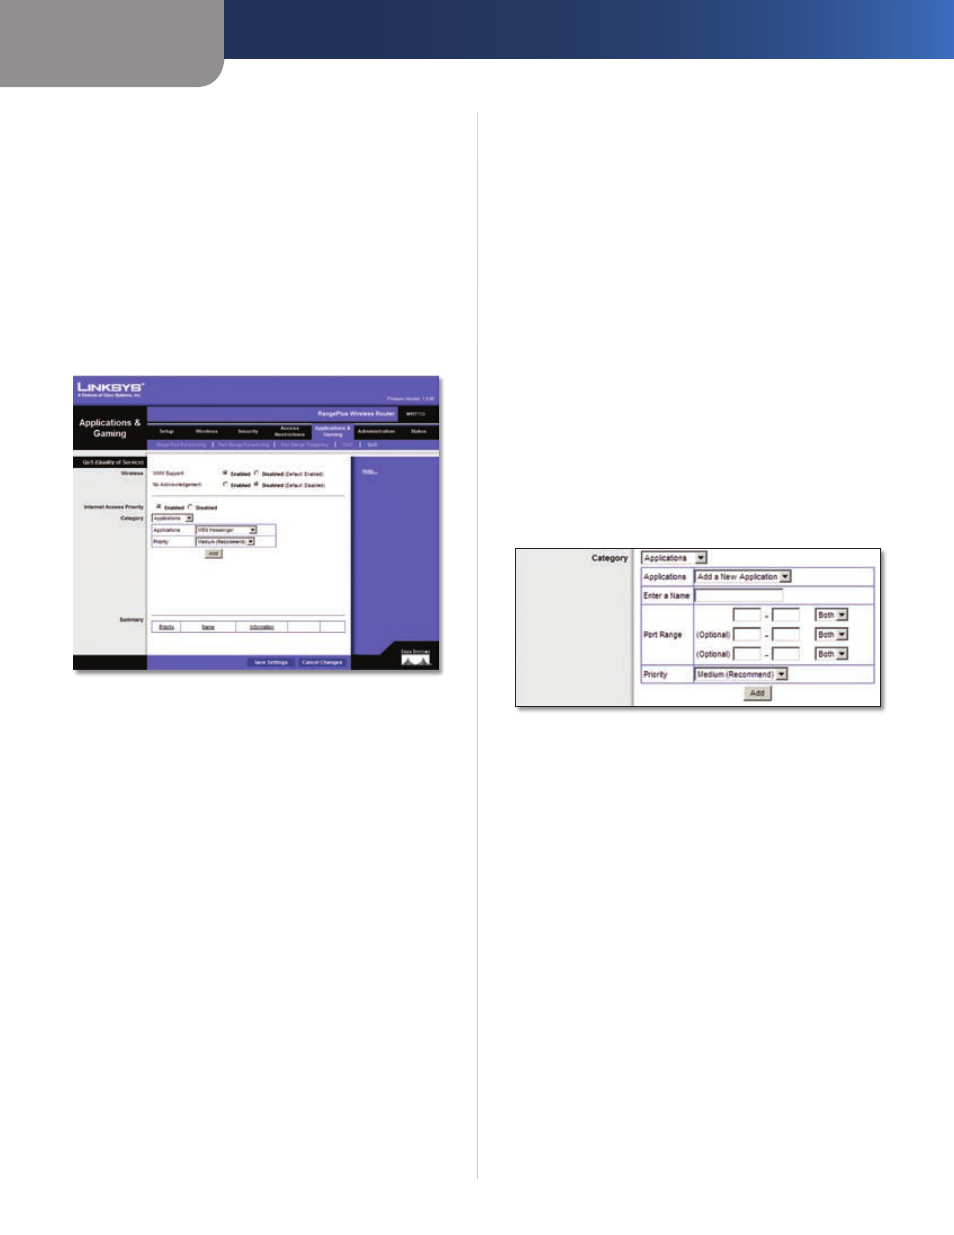
Applications and Gaming > QoS
Quality of Service (QoS) ensures better service to
high-priority types of network traffic, which may
involve demanding, real-time applications, such as
videoconferencing.
Applications and Gaming > QoS
QoS (Quality of Service)
Wireless
The Router features Wi-Fi Multimedia (WMM™) Support.
The No Acknowledgement feature is available only when
the WMM Support feature is enabled.
WMM Support
If you have other devices on your network
that support WMM, keep the default, Enabled. Otherwise,
select Disabled.
No Acknowledgement
If you want to disable the Router’s
Acknowledgement feature, so the Router will not re-send
data if an error occurs, then select Enabled. Otherwise,
keep the default, Disabled.
Internet Access Priority
In this section, you can set the bandwidth priority for a
variety of applications and devices. There are four levels
priority: High, Medium, Normal, or Low. When you set
priority, do not set all applications to High, because this will
defeat the purpose of allocating the available bandwidth.
If you want to select below normal bandwidth, select Low.
Depending on the application, a few attempts may be
needed to set the appropriate bandwidth priority.
Enabled/Disabled
To use the QoS policies you have set,
keep the default, Enabled. Otherwise, select Disabled.
Category
There are four categories available. Select one of the
following: Applications, Online Games, MAC Address,
Ethernet Port, or Voice Device. Proceed to the instructions
for your selection.
Applications
Applications
Select the appropriate application. If you
select Add a New Application, follow the Add a New
Application instructions.
Priority
Select the appropriate priority: High, Medium,
Normal, or Low.
Click Add to save your changes. Your new entry will appear
in the Summary list.
Add a New Application
QoS > Add a New Application
Enter a Name
Enter any name to indicate the name of
the entry.
Port Range
Enter the port range that the application will
be using. For example, if you want to allocate bandwidth
for FTP, you can enter 21-21. If you need services for an
application that uses from 1000 to 1250, you enter 1000-
1250 as your settings. You can have up to three ranges
to define for this bandwidth allocation. Port numbers
can range from 1 to 65535. Check your application’s
documentation for details on the service ports used.
Select the protocol TCP or UDP, or select Both.
Priority
Select the appropriate priority: High, Medium
(Recommend), Normal, or Low.
Click Add to save your changes. Your new entry will appear
in the Summary list.