Setup & installation – WaterChef U9000 User Manual
Page 6
www.waterchef.com
SETUP & INSTALLATION
4
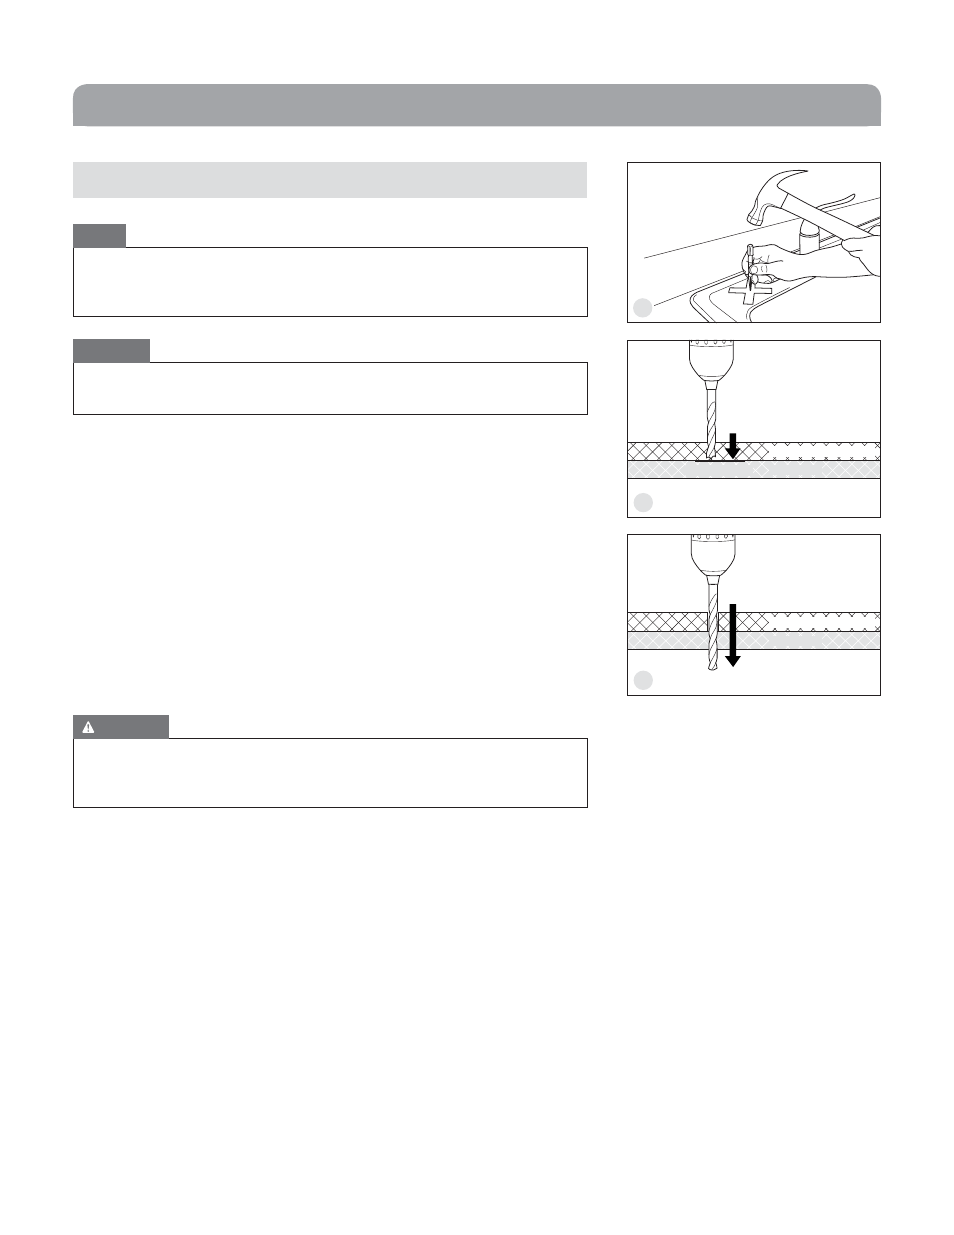
1. Locate an area on your sink to install the System Water Faucet
(make certain that there are no support ribs under the sink
in that location). Cover the designated location for the Faucet
installation on sink with masking tape. Use the punch and
hammer to lightly score the porcelain at the designated location
for the faucet installation.
(fig. D)
2. Use the 5/8” masonry drill bit to remove the porcelain down
to the metal. Drill slowly or at half speed.
(fig. E)
3. Use the 5/8” high speed drill bit to drill through the exposed
surface of the metal. Hold the drill in the upright position to avoid
catching the edge of the porcelain with drill bit.
(fig. F)
Proceed to “Faucet Installation” instructions on page 6.
5/8” Masonry Drill Bit
5/8” High Speed Drill Bit
Sink Cross-Section:
Sink Cross-Section:
Porcelain/Ceramic Layer
Porcelain/Ceramic Layer
Metal Layer
Metal Layer
STOP at Metal
NOTE
CAUTION
If your sink has another hole that currently has a spray attachment, you may decide to
remove the spray attachment and use the existing hole to continue your installation
(skip the next section and go to “Faucet Installation” on page 6).
This type of sink can chip easily. Use extreme care. If you have any doubts about
doing this yourself, consult a licensed plumber.
WARNING
Use EXTREME CAUTION with electric power tools near water. Ensure that there is no
standing water in the sink and that the area is dry. Failure to follow this warning could
result in serious injury or death.
Drilling a Hole in a PORCELAIN/CERAMIC Sink:
D
E
F