Replacing the filter cartridge – WaterChef U9000 User Manual
Page 12
www.waterchef.com
REPLACING THE FILTER CARTRIDGE
10
6. Make certain O-Ring is still seated on Lid Assembly. Place Lid
Assembly onto Filter Housing, and place Clamp around Lid
Assembly and Filter Housing. Tighten Knob on Clamp securely.
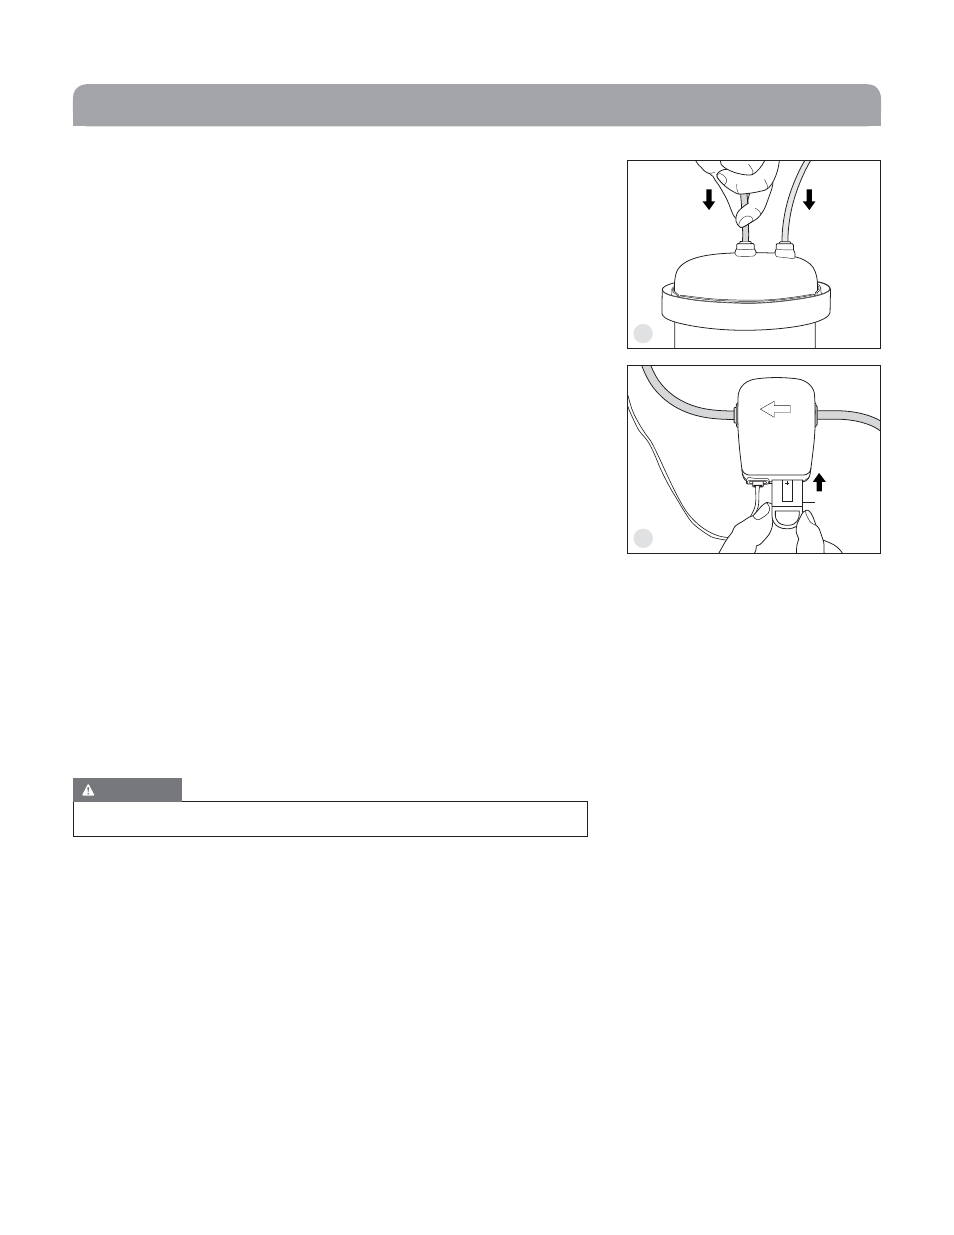
7. Place Filter Housing into Base. Insert Blue Tubing end into Blue
Outlet Connector and Red Tubing end into Red Inlet Connector
on Lid Assembly. Re-position System under your sink.
(fig. X)
8. Remove Battery Shuttle from Intelligent Monitor
™
and discard.
9. Insert new Battery Shuttle (included with Filter Cartridge)
into Intelligent Monitor
™
.
(fig. Y)
The LED Indicators located on
the System Faucet will flash GREEN, YELLOW and RED three
times. This resets the rated capacity counter to zero gallons.
Do NOT remove Battery Shuttle until it is time to replace the
Filter Cartridge. Removing Battery Shuttle prematurely may
result in a loss of data.
10. Slowly turn your cold water supply “ON” and check for leaks.
11. Turn System Faucet “ON”. Water will begin to fill the Filter Housing.
Once water begins to flow from the System Faucet, the GREEN
LED Indicator will begin flashing to indicate peak operational
performance. Check to see that all hose, clamp and housing
connections are tight and do not leak.
12. Allow System to flush into sink for 15 minutes. This removes
any fine, black carbon particles left over from the manufacturing
process, expels trapped air and conditions the Filter Cartridge for
normal use. (This water may be used to water plants.)
New Battery
Shuttle
Y
IMPORTANT
Repeat flushing procedure each time a new Filter Cartridge is installed.
Blue Tubing from
Intelligent Monitor
™
Red Tubing from
3/8” T-Valve
Blue Tubing
Red Tubing
Blue Outlet Connector
Red Inlet Connector
X
Intelligent
Monitor
™