Installation instructions – Vogelzang TR002B User Manual
Page 9
TR002B | 20120125.0
www.vogelzang.com
SHILOH™ |
Page 9
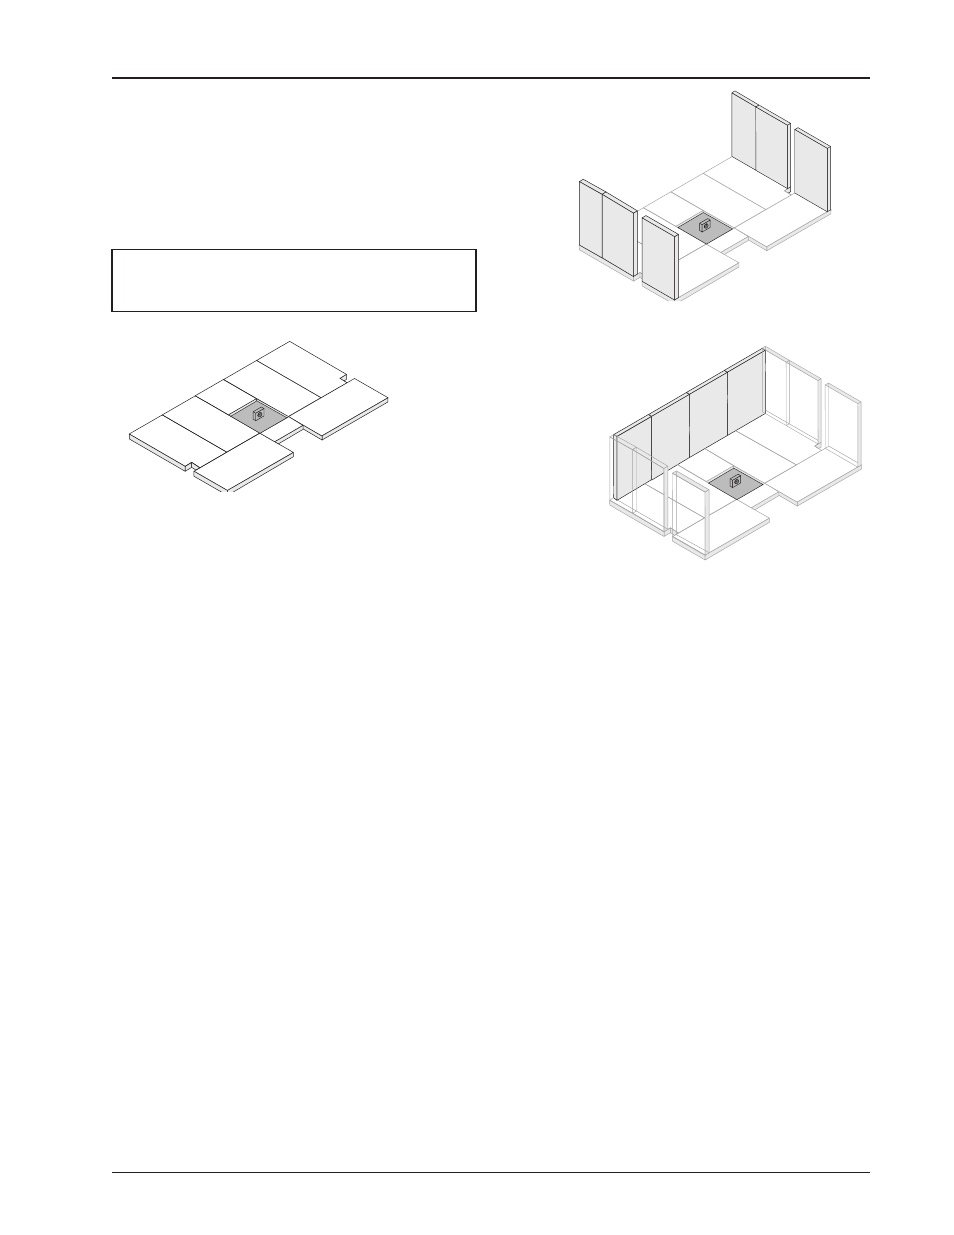
FIREBRICK ASSEMBLY
Firebrick extends the life of your stove and radiates
heat more evenly. Check to see that all firebricks are in
their correct positions and have not become misaligned
during shipping or assembly. If removed for ease of
locating stove, firebrick and ash dump cover must be
replaced before firing. See diagrams, fig. 13a – 13c, for
proper positioning.
CAUTION: NEVER OPERATE STOVE WITH
MISSING OR CRACKED FIRE BRICKS!
Fig. 13a– Step 1, Bottom Firebrick Installation
Two (2) FF-Size; Two (2) T-Size; Two (2) X -Size;
One (1) Y-Size; One (1) Z-Size
X
T
FF
Y T
X
FF
Z
Fig. 13b– Step 2, Side Firebrick Installation
Four (4) A-Size; Two (2) M-Size
Fig. 13c– Step 3, Back Firebrick
Installation
Four (4) A-Size
A
A
A
A
X
T
FF
Y T
X
FF
Z
M
A
A
M
A
A
F
G
FF
Y T
X
FF
Z
M
A
A
M
A
A
A-Size: 9˝x4
1
/
2
˝x1
1
/
4
˝
FF-Size: 9˝x4
1
/
4
˝x1
1
/
4
˝
M-Size: 9˝x2
1
/
4
˝x1
1
/
4
˝
T-Size: 9˝x3
1
/
4
˝x1
1
/
4
˝
X-Size: 9˝x4
1
/
2
˝x1
1
/
4
˝**
Y-Size: 4
1
/
2
˝x3˝x1
1
/
4
˝
Z-Size: 3˝x2
1
/
2
˝x1
1
/
4
˝
** X Firebricks are notched
for air tube clearance
INSTALLATION INSTRUCTIONS