Installation guide, For fusion shower pan recessed into conrete, Step 1 – Trending Accessibility Fusion shower pan recessed into concrete User Manual
Page 4: Step 2, Step 3, Step 4
Installation Guide
www.trendingaccessibility.com
4
for fusion shower pan recessed into conrete
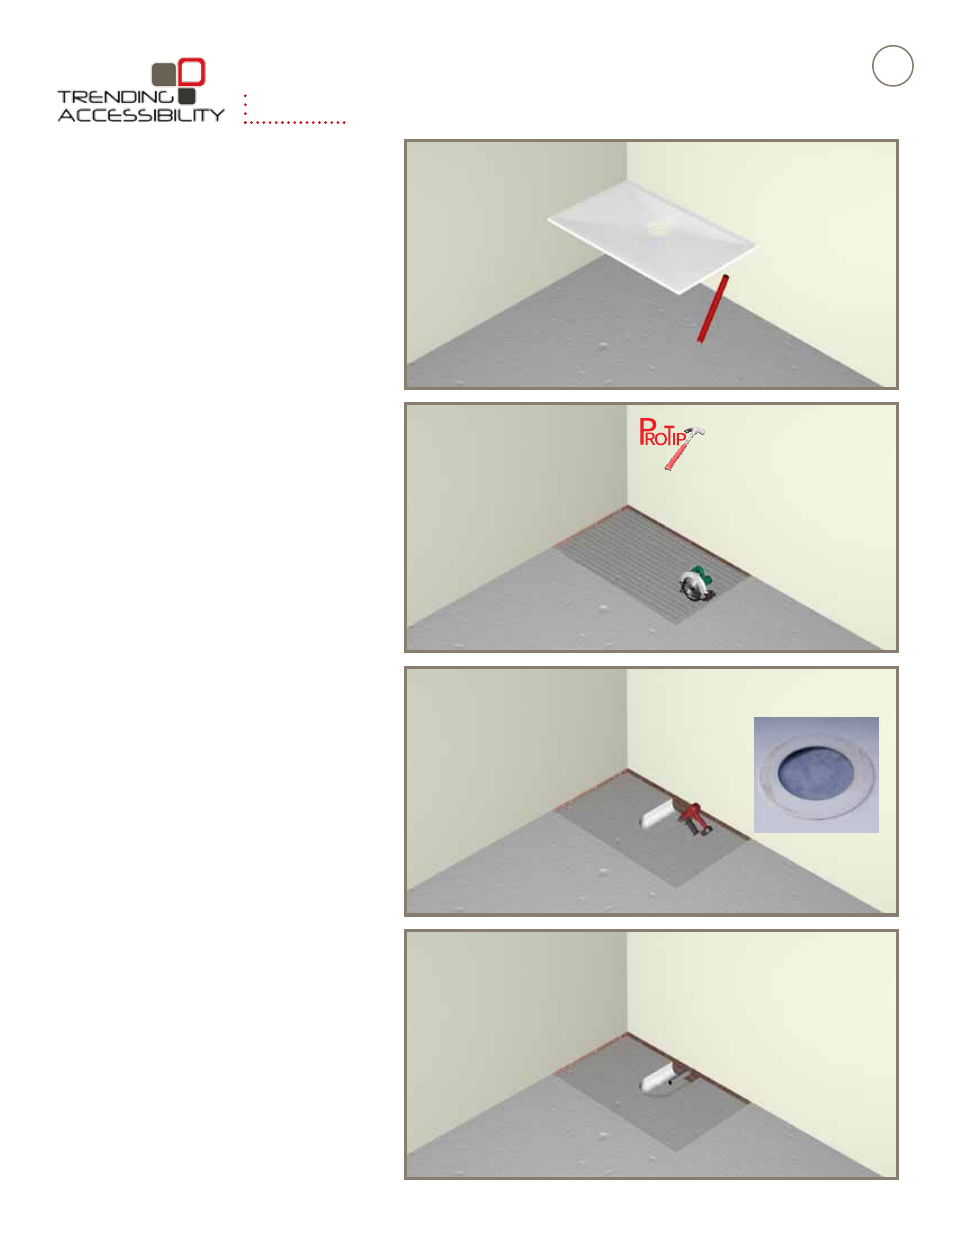
Step 1
For optimal performance, it is imperative there is
a level surface prior to installation of new Fusion
Pan. Check existing floor to make sure it is level. If
it is not, please correct prior to installation. Place
the pan in desired location and mark the edge of
the pan on the concrete.
Step 2
Using suitable equipment, and proper safety
gear, carefully cut along your line as accurately
as possible to a minimum depth of 1”. It may
be easiest to score the concrete approximately
every 1” to 2” inside your perimeter line, to make
the removal of the concrete more efficient. Now,
excavate all of the remaining concrete in the
marked area.
Note: If possible, please check or mark location
of existing plumbing and electrical to avoid
damaging them
Step 3
Place the Fusion Pan into place. Once the pan
is set to the desired location, note the location
of drain and remove enough concrete for the
installation of the waste pipe, and drain body,
making sure the diameter of the hole is at least 10”.
Step 4
Install the drain in accordance with current
plumbing and building codes.
Using a dust free saw makes the
work area more pleasant.
Reinforcement ring on
the underside of pan