ThermoWorks TW-WIFI-TC EASYLOG WIFI TEMPERATURE & HUMIDITY DATA LOGGERS WITH CLOUD STORAGE User Manual
Page 2
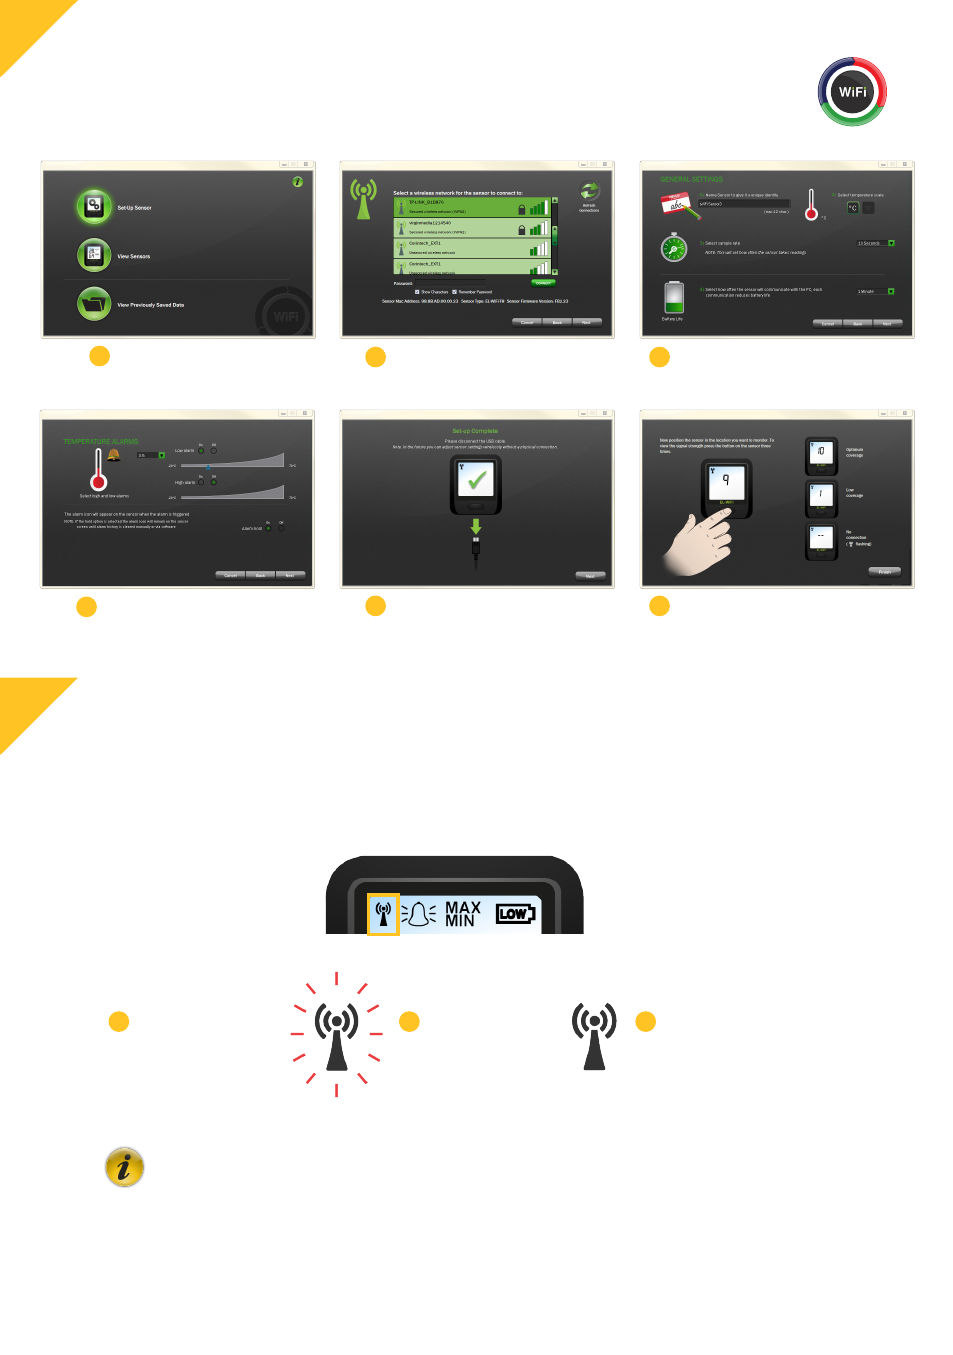
Note: These screens will vary depending on which sensor model purchased.
Connect the TW-WiFi Sensor to the PC’s USB port with the USB cable provided.
Double click on the EasyLog WiFi icon on your Windows™ desktop. This will load the wizard
configuration software. Follow the on-screen instructions to set up your sensor.
Use the
button on the home screen to get more help on setting up your sensors.
Sensors can be configured over the air without reconnecting the USB cable.
Version 01 - 2.12.2013
When placing the sensor consider local heat sources and radio obstructions. Any physical obstructions between
router and sensor will affect the signal range.
The signal icon has three states:
Sensor Set-up
Hints and Tips
Changing Sensor Settings over Air
Sensor Placement
EasyLog WiFi
2
2
3
Click on the ‘Set-Up
Sensor’ button
1
Set High & Low Alarms
4
Name your Sensor, Select
Temperature Scale, Sample
Rate & Transmission Rate
3
Position your Sensor where
you wish to take readings
6
Click on your network
and enter your password
if required
2
Sensor Set-up is now
complete
5
the sensor is not
c o m m u n i c a t i n g
with the EasyLog
WiFi software
Flashing
2
the sensor has not
yet been set-up
and configured to
a WiFi network
Not Displayed
1
the sensor is successfully
communicating with the
EasyLog WiFi software
Solid
3