Inputs, outputs, controls, Power input, Mic jack – microphone input – TC-Helicon Ditto Mic Looper - Reference Manual User Manual
Page 10: Out jack – audio output, Loop footswitch, Stop footswitch, Loop level control knob, Usb port
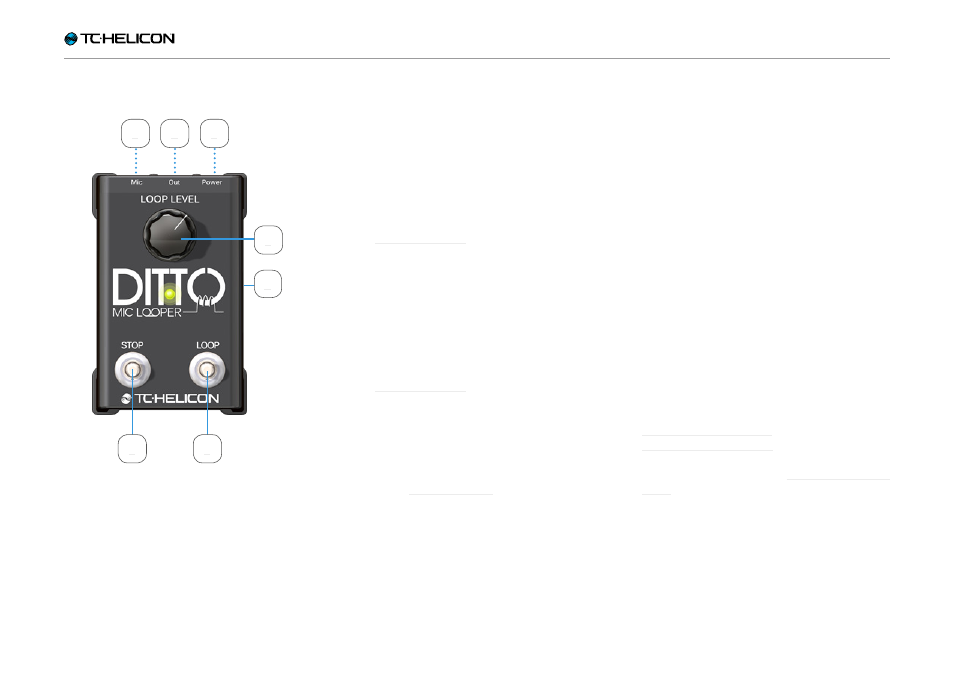
Inputs, outputs, controls
Ditto Mic Looper English Manual – 2014-11-17 8
Inputs, outputs, controls
1.
Power input
Connect the included power supply to Ditto Mic
Looper here.
2.
MIC jack – Microphone input
This pedal has a standard XLR microphone in-
put. If you are not using any vocal effects, con-
nect your microphone here. For other setups,
see “Setup examples”.
3.
OUT jack – Audio output
This pedal has a standard XLR output. Connect
the OUT jack to your PA using an XLR cable. If
necessary (most of the time it’s not), adjust your
mixer channel trim for the correct level accord-
ing to your mixer’s instructions. For other setups,
see “Setup examples”.
4.
LOOP footswitch
Use this footswitch to control all loop-related
functions of the pedal (record, playback, undo/
redo). See “Creating loops”.
5.
STOP footswitch
Use this footswitch to stop loop playback or to
clear the loop.
6.
LOOP LEVEL control knob
Use the Loop level control knob to control the
level of your loops.
This control knob attenuates the signal – i.e., it
turns the level down. If you turn the knob fully
to the right, the loop will be played back at the
same level it was recorded.
7.
USB port
Use the USB port to connect Ditto Mic Looper
to a computer to update the device’s firmware.
If firmware updates are released, you will find
them at
For more information, see “Updating the firm-
ware”.