Grill assembly – Sure Heat Sonoma PF30LP User Manual
Page 9
Grill Assembly
9
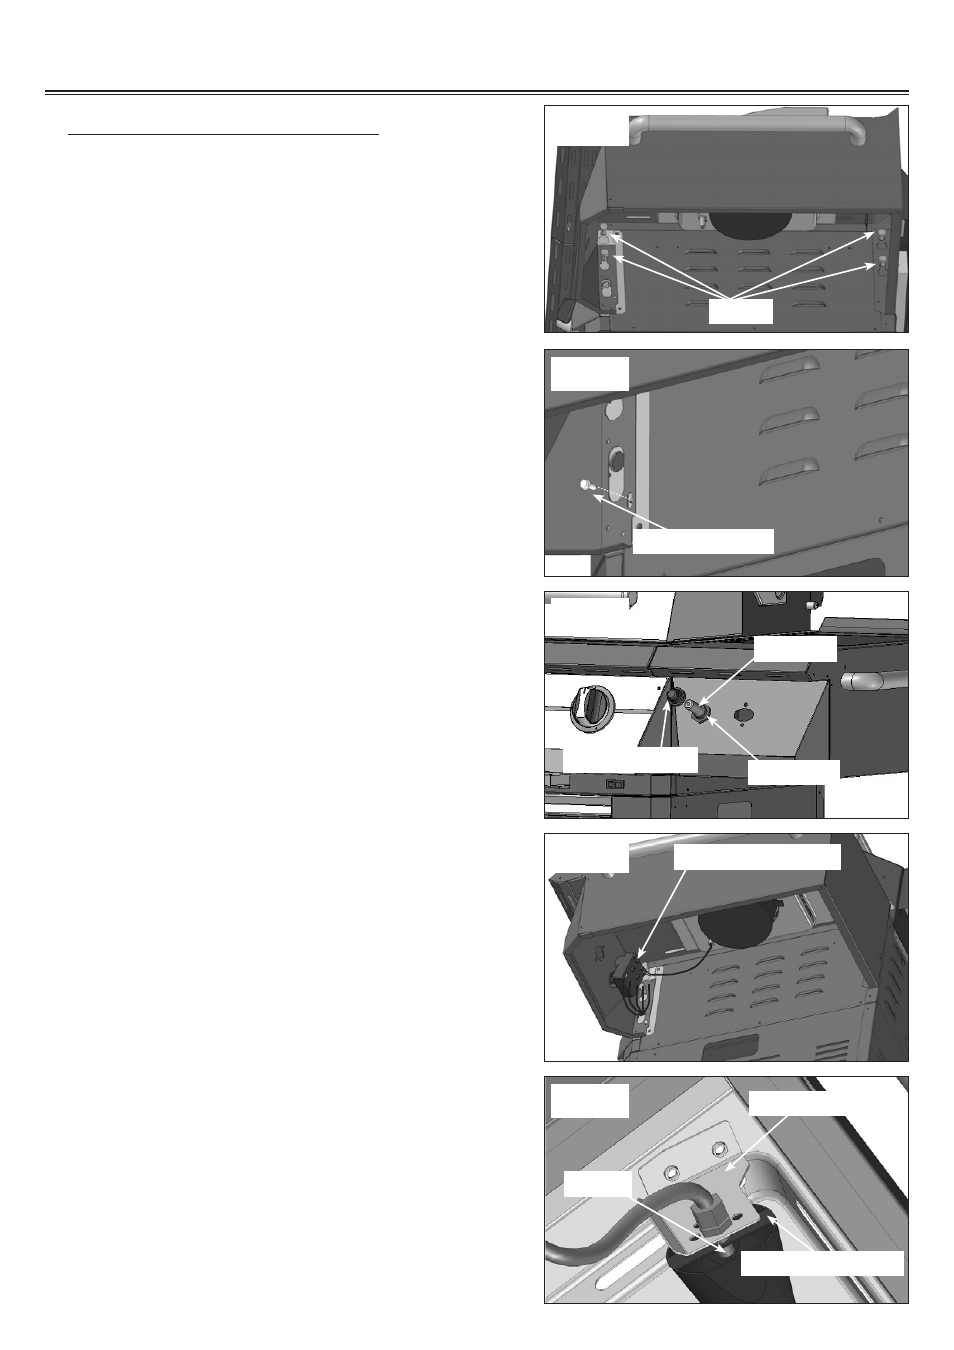
Fig. 6
Fig. 7
Fig. 8
Fig. 9
Fig. 10
SIDE BURNER PARTS ASSEMBLY
1 . R e m o v e s i d e b u r n e r v a l v e a s s e m b l y f r o m
packaging. Feed the valve assembly through
the large cut out in the side of the cart. Loosen
the four hex head bolts on the side of the grill
by approximately 1/4".Attach the side burner by
inserting the four bolt heads into the holes on the
side burner. Tighten the four bolts securely with a
1/2" wrench. (See Fig. 6)
2. Install a self tapping secrew through the slotted
hole on the front bottom of the side shelf to the
right side of the grill. (See Fig. 7)
3. Unscrew the push button igniter capfrom the igniter
module. Insert the neck of the igniter module
through the open hole on the side burner shelf.
Use the plastic nut to secure it. Install the battery
with the positive side facing outward. Replace and
tighten the push button igniter cap. (See Fig. 8)
4. Connect loose igniter wires from the grill to the
open terminals of the igniter. (See Fig. 9)
Note: The igniter is designed in such a way that
it does not matter which terminal tab is used
when connecting igniter wires.
5. Remove the two phillips pan head M5 x 10 screws
from the orifice bracket. Align the orifice into the
center of the side burner bracket. (See Fig. 10)
Bolts
Plastic Nut
Push button cap
6 pole igniter module
Orifice bracket
side burner bracket
Self tapping screw
AA battery
Orifice