Hardware installation – StarTech.com SV231HDMIUA User Manual
Page 6
Instruction Manual
3
Hardware Installation
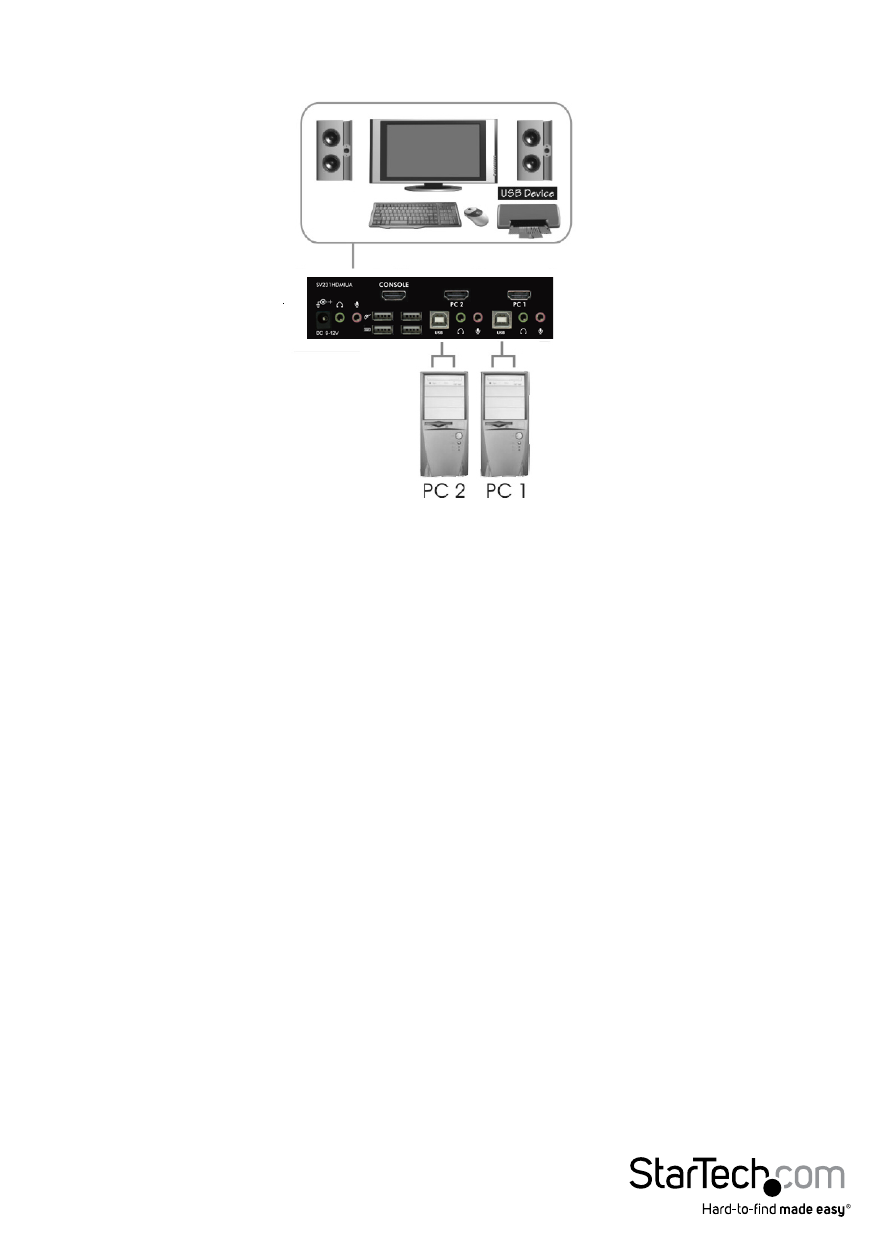
1. Plug a monitor/display into the Console HDMI connector; plug a USB keyboard and
a USB mouse into the dedicated USB keyboard and mouse ports on the KVM switch.
2. Use a male-to-male HDMI video cable to connect the HDMI connector on the
computer’s/devices’ video card, to one of the KVM’s PC ports (ie. PC1)
3. Use a USB type A-B Cable to connect the KVM’s USB port (type B, square connector) for the
PC port used in Step 2, and the USB port on the computer/device (type A, flat connector).
4. Use a male-to-male 3.5mm mini-jack audio cable to connect the speaker and
microphone connectors on the computer/device to the KVM’s speaker/mic ports for
the PC port used in Step 2.
5. Repeat for Steps 2 thru 4 for each PC port on the KVM switch, or each computer/
device you wish to use on the KVM.
6. OPTIONAL: Connect any other USB peripherals you wish to share between the
connected computers/devices to the extra USB Hub ports on the Console side.
7. Connect the external power adapter from a wall outlet to the power connector on
the rear panel of the KVM switch.
8. Power up the first computer/device and wait for it to fully boot and test keyboard/
mouse functionality.
9. Once operation has been successfully confirmed, switch to the next port and power
up that computer/device and confirm.
10. Once completed for all computers/devices connected to the KVM switch, you
should be able to switch between ports freely.
*Console setup