Loading the magazine and rifle – SIG SAUER SHR 970 User Manual
Page 10
10
11
Loading the Magazine and Rifle
Loading the magazine:
1. Make sure you check the bore for any obstructions before loading the rifle.
Obstructions could be anything from a forgotten cleaning patch to excess oil
or grease. Make sure the barrel is clean and ready to fire, if it is not, injuries
could occur to yourself or those nearby.
2. Load the correct caliber cartridges, as engraved on the side of the barrel, into
the magazine by pressing one cartridge at a time into the magazine until it is
retained firmly by the magazine lips.
3. Push the cartridges to the rear, making sure the base of each cartridge is located
against the rear wall of the magazine. The magazine capacity is four (4) rounds.
Figure 5
Figure 6
Figure 7
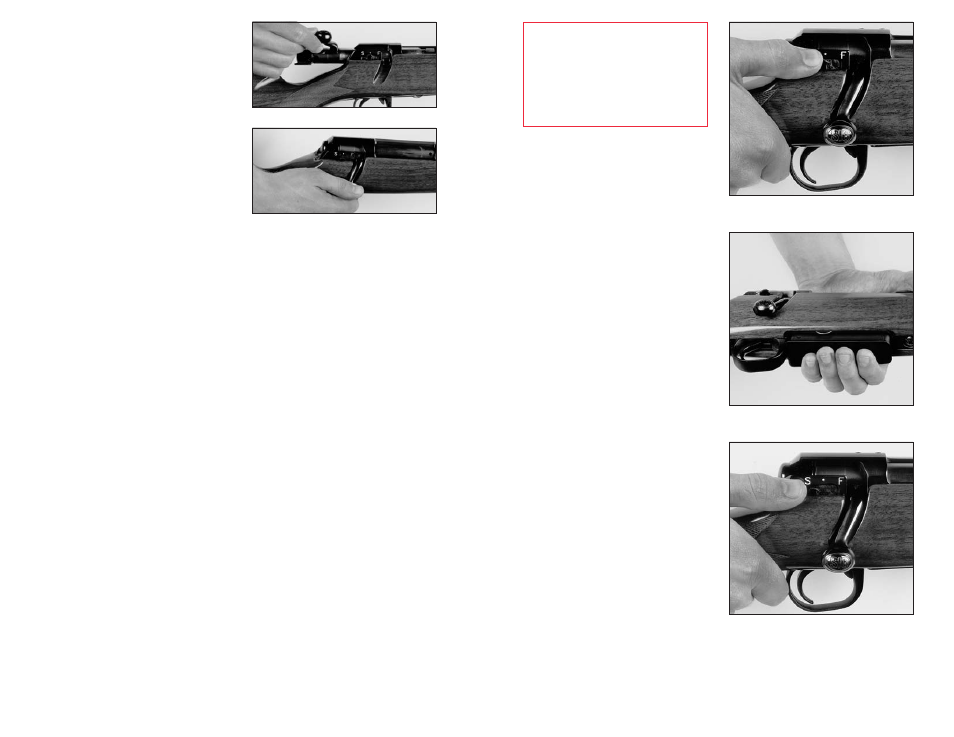
WARNING
Before loading a magazine
into the rifle make sure the
safety is in the center (load/
unload) position.
Loading the rifle:
NOTE:
Your SIGARMS
™
SHR 970
comes from the factory with a light
coating of protective lubricants. Before
you fire the rifle, clean and lubricate it
as recommended on page 15.
1. Point the rifle in a safe direction.
2. Put the safety lever in the center
position (See Figure 5).
3. Raise the bolt handle and pull it all
the way back.
4. Insert a loaded magazine from the
bottom and make sure it has engaged
the magazine catch (See Figure 6).
5. Push the bolt forward so that the top
round in the magazine is engaged and
loaded into the chamber.
6. Push the bolt handle down to the
locked position, keeping your finger
away from the trigger.
7. Activate the safety by positioning
the safety lever into the “S” (SAFE)
position.
The rifle is now loaded (See Figure 7).
Assembling the bolt
(continued)
4. Holding the rifle securely, with the
muzzle pointed in a safe direction,
insert the bolt with the handle
pointing straight up from the stock
(12:00 o’clock position) and gently
push the bolt into the receiver until
it is past the bolt stop/release
mechanism located on the left hand
side of the rifle (See Figure 2A).
Push the bolt fully forward and
rotate the bolt handle downward to
check engagement of the bolt.
This completes bolt installation
(See Figure 2B).
Figure 2A
Figure 2B