Swpk installation – Shellab SWPK User Manual
Page 11
11 |
P a g e
SWPK INSTALLATION
9)
I
NSTALL A
P
USH
-T
O
-C
ONNECT
F
ITTING
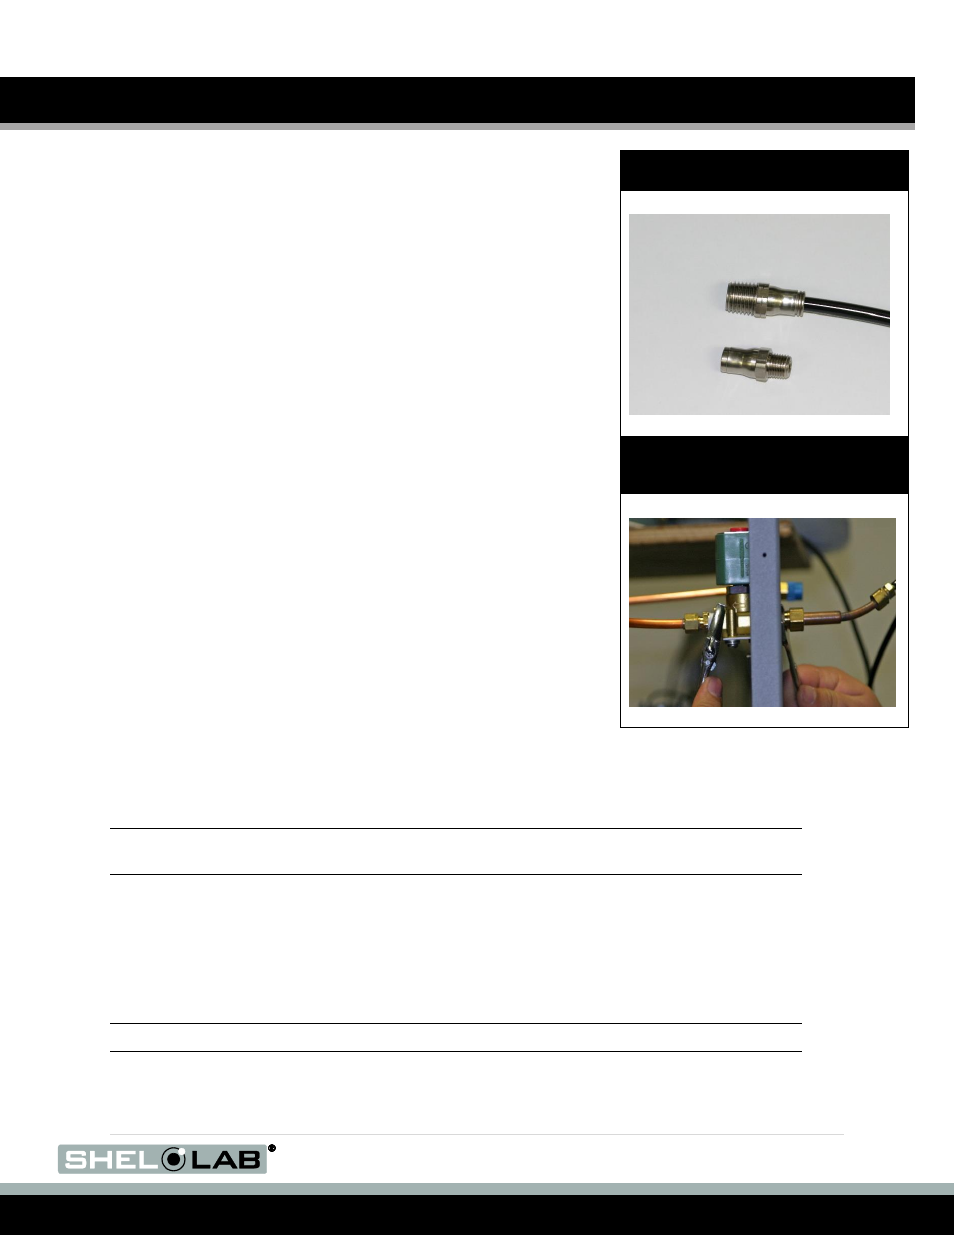
The SWPK comes provided with two steel push-to-connect fittings to
replace the copper compression fitting on the back of your humidifier or
incubator. See Figure 11. The push-to-connect fittings allow the output
OD tubing from the water filter to be connected to the unit’s water
injection solenoid.
1. Remove the top cover of the chamber or incubator to access
the water injection solenoid in the control box (the space on top
of the unit where the major electrical components are housed.)
2. Use one wrench inside the control box to stabilize the solenoid.
At the same time, use a second wrench to loosen and remove
the exterior compression fitting that came with your unit. See
Figure 12.
3. Install the push-to-connect fitting (1) on the outside of the unit
that fits the solenoid.
a. Use of thread seal tape (aka PTFE thread tape) on
the threads of the push-to-connect fitting is
recommended to form a durable and tight seal.
b. Use two wrenches when tightening the push-to-
connect fitting. One to tighten, and one to stabilize
the solenoid in the control box.
10)
C
ONNECT THE
O
UTPUT
L
INE TO
U
NIT
1. Make sure that the end of the
SWPK’s OD output tubing is cut
so that it forms and even, straight end.
2. Insert the output line into the
chamber or incubator’s newly installed exterior push-to-
connect fitting.
Note: To remove the OD tubing from the push-to-connect fitting, hold down the sliding ring on the
end of the fitting that mates with the tubing. Then withdraw the line.
11)
C
ONNECT TO
W
ATER
S
OURCE
1.
Connect the SWPK’s Water Input Line to your workspace tap water source.
Note: Do not connect to a deionized water source!
Figure 11: Push-to-Connect
Fittings
Figure 12: Stabilizing the
Solenoid During Compression
Fitting Removal