Attach psb to the display, Install the display, Remove the display – Chief Manufacturing PST 2000 Series User Manual
Page 6
Installation Instructions
PST 2000 Series
6
ATTACH PSB TO THE DISPLAY
To attach the PSB to the display, do the following:
To help your identify the correct PSB that
matches the model number of your display, refer
to the cross-reference chart at
To download the corresponding PSB installation
instructions, refer to
INSTALL THE DISPLAY
To install the display, do the following:
NOTE: Verify that all
power/audio/video cables
are
disconnected from the display and the latching
flag is lowered in the down position before
attempting to mount the display.
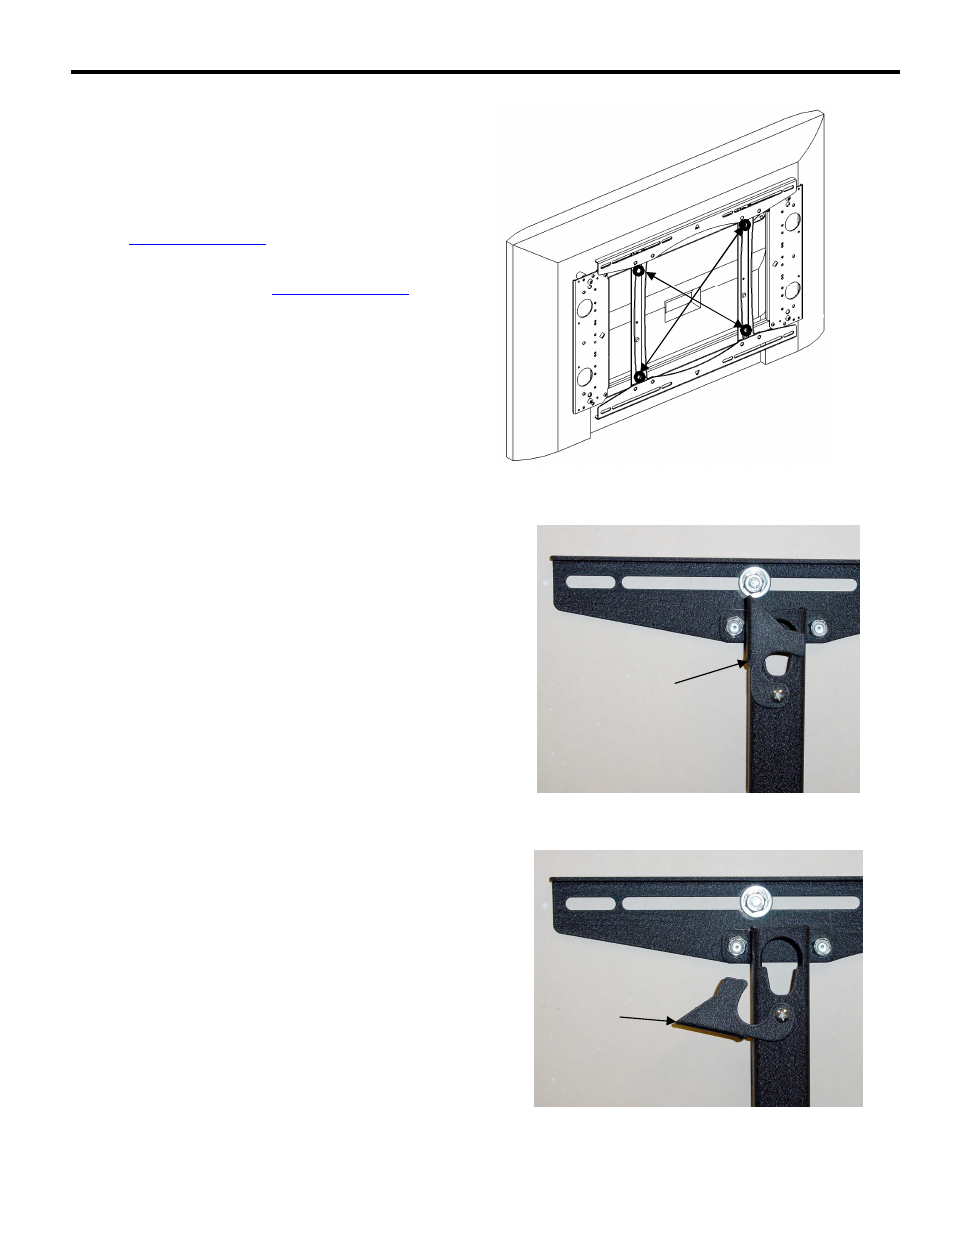
1. With the aid of another person, lift the display up to
the mount (10) on the wall, aligning mounting
buttons on the PSB with the teardrop slots on the
mount, and lower the display firmly into place
(Figure 8).
2. Raise the latching flag (2 places) to secure the display
(see Figure 9). If the flag does not fully engage,
check to ensure the mounting buttons are fully seated
in the slots.
NOTE: A padlock may be installed through the hole in
the latching flag for additional security.
REMOVE THE DISPLAY
To remove the display from the mount, do the following:
1. Disconnect all power/audio/video cables.
2. Lower the latching flag to unlock the display
(see Figure 10).
3. With the aid of another person, lift the display up and
out of the teardrop slots in the mount to remove the
display.
Figure 8. Mount Plasma Static Bracket to Wall
Figure 9. Raise Latching Flag to Lock
Figure 10. Lower Latching Flag to Unlock
Raise
latching
flag to
lock
display
Lower
latching
flag to
unlock
display
To install display, align
the mounting buttons on
the PSB with teardrop
slots on the mount.