Pst installation – Chief Manufacturing PST 2000 Series User Manual
Page 4
Installation Instructions
PST 2000 Series
4
PST INSTALLATION
Perform the following procedures to mount the PST.
Select Mounting Location
To select the mounting location, do the following:
WARNING: It is the responsibility of the installer to
verify that the wall to which the mount is
anchored will safely support the
combined load of all attached
components and equipment.
1. Determine the exact mounting location to install the
wall mount prior to installation, keeping in mind the
screen size.
NOTE: Mount the PST on dual wall studs or some other
equivalent supporting framework that is vertical
or horizontal.
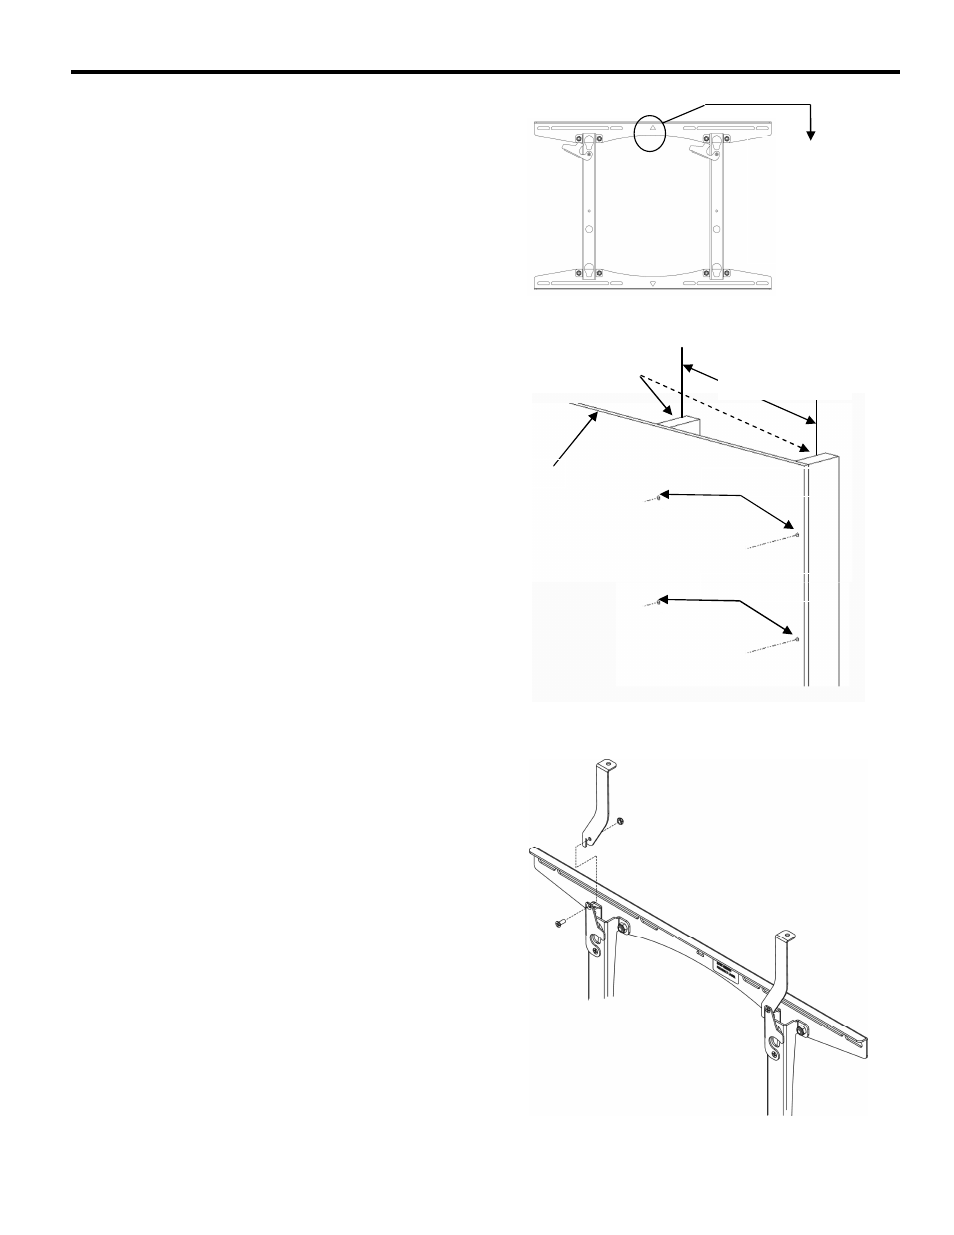
2. Using a stud sensor, locate the two wood studs where
you will mount the PST. Refer to Figure 3 for dual
wood studs that are 16” or 24” apart on center.
3. Using a nail as a temporary hook, hang the mount on
the wall using the triangular hole located in the center
of the mount (see Figure 2).
4. Use a pencil to mark the mounting holes where the
four pilot holes will be drilled into the center of the
wood stud. Make sure the mounting holes are square
and straight. Remove the mount from the wall,
placing it on the floor or a table.
5. Drill the pilot holes using a 7/32” drill bit.
Flag Extender Installation (OPTIONAL)
To install the optional flag extenders, perform the
following (Refer to Figure 4):
1. Insert extender (20) slot into top of latching flag.
2. Install screw (30) through latching flag and extender
(20) into nut (40).
3. Repeat for opposite side.
Figure 2. Use Triangular Hole to Hang the Mount
Figure 3. Wood Studs 16” or 24”Apart on Center
Figure 4. Optional Flag Extenders
Hang the mount on
the wall temporarily
using a nail in the
center hole. Level the
mount before drilling
pilot holes.
Wall
Pilot Holes
Wood Studs
16” or 24”
Pilot Holes