Stand-alone mode, Xlr connectors and terminator – OmniSistem PR Planet User Manual
Page 6
planet manual.doc
6/14
SETUP OPTIONAL
CODE
CHOICE
FUNCTION
Y
Pan inversion enable-Pan is inverted
1
N
Pan inversion disable-Pan is norma
Y
Tilt inversion enable-Tilt is inverted
2
N
Tilt inversion disable-Tilt is normal
Y
Sound activation enable
3
N
Sound activation disable
Y
Automatic programmes enable
4
N
Automatic programmes disable
5
Reserved for possible future development
6
Reserved for possible future development
Y
Reset enable
7
N
Reset disable
8
Reserved for possible future development
9
Reserved for possible future development
A
Reserved for possible future development
B
Reserved for possible future development
Without connecting the controller and the control cable, with the setup option 3 (sound activation)
or 4 (auto process) enable, the projector will run in Stand-Alone mode.
If you enable a combination of setup options 3 (sound activation) and 4 (auto process), the
projector will run in auto programmes.
You may set the DMX start address at random in Stand-alone mode.
When the projector is activatived by sound, the red indicator will flash according to the rhythm of
the music. And when the projector is running in auto programmes, the indicator will be contantly
red.
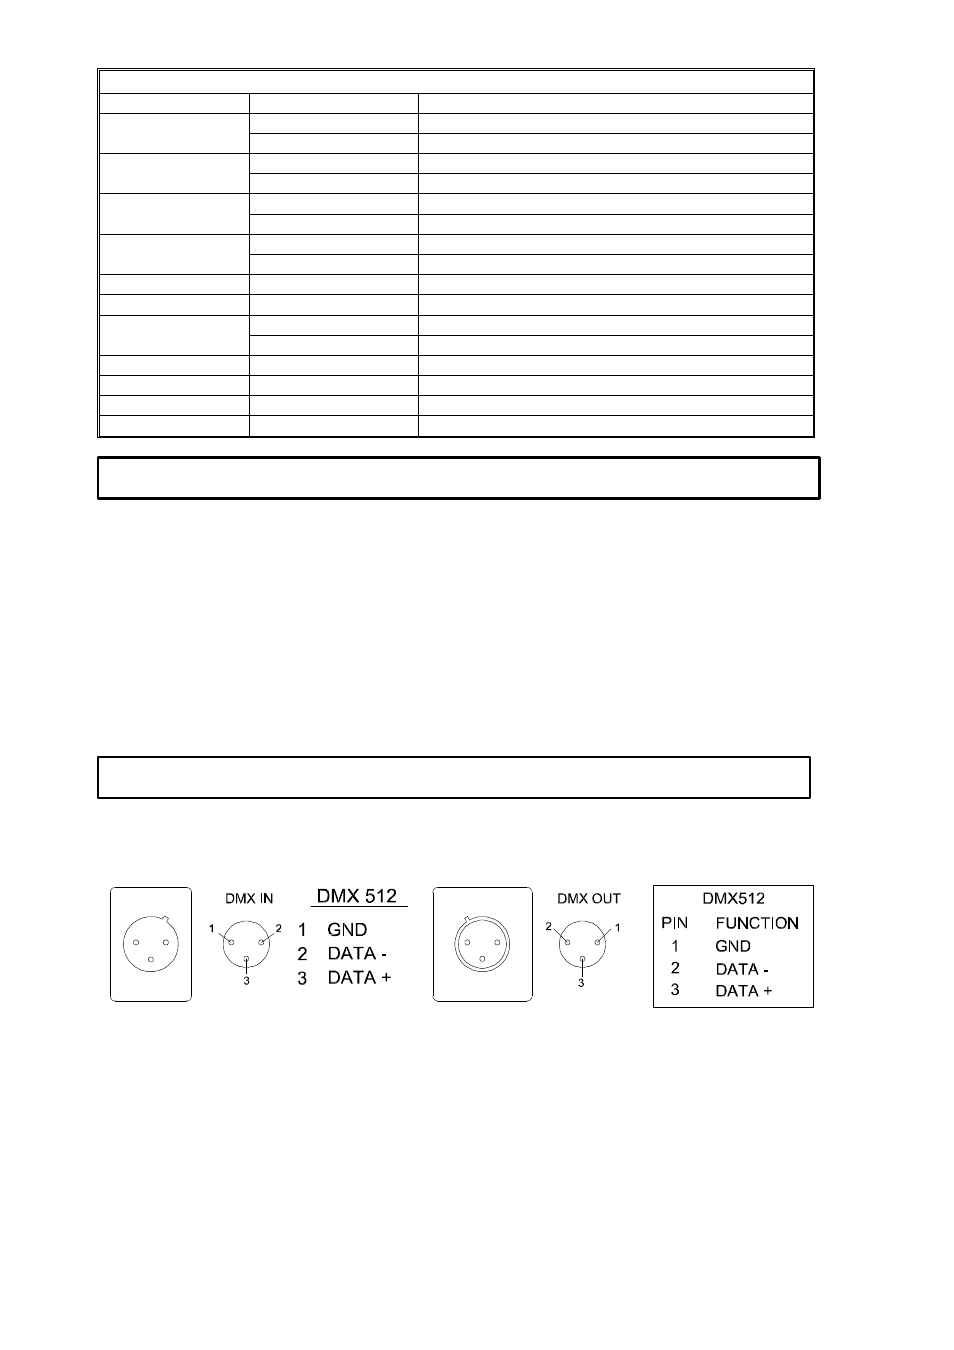
XLR CONNECTORS
Connection between controller and projector and between one projector and another must be
made with 2 core screened cable, with each core having at least a 0.5mm diameter. Connection
to and from the projector is via cannon 3 pin XLR plugs and sockets which are included with the
projector. The XLR's are connected as shown in the table above.
Note, care should be taken to ensure that none of the connections touch the body of the plug or
each other. The body of the plug is not connected in any way. The PLANET accepts digital
control signals in standard DMX512 (1990) format.
STAND-ALONE MODE
XLR CONNECTORS AND TERMINATOR