Power supply - mains, Operation, Stand – alone mode – OmniSistem PR Panda II (KB) User Manual
Page 5: Xlr connectors and terminator
POWER SUPPLY - MAINS
Use the plug provided to connect the
mains power to the projector. Paying
attention to the voltage and frequency
marked on the panel of the projector. It
is recommended that each projector is
supplied separately so that they may be
individually switched on and off. It is
recommended that
the projector
must be earthed correctly
and
the
power convertor must be
switched in the correct position.
The projector may be operated in Stand-Alone mode or be linked with each other for multi-units for
Master/Slave synchro mode or be controlled via standard DMX512 by a controller. And even you may
use a remote controller to operate the projectors for shutter, strobe and fast/slow control.
OPERATION
When the power is on, the projector will run self-test programmes. After finishing these, the projector is
ready for operation.
TO SET THE DIP SWITCHES
The 10 DIP switches of the PANDA II are with the numbers from 1 to 10, which may be set on the
“ON” or “OFF” position. In Stand-Alone mode, the DIP switches may be set at random. But in
Master/Slave synchro mode and Controller mode, you should set the DIP switches correctly. (How to
set the DIP switches please refer to “Controller mode” and “Master/Slave synchro mode”)
STAND – ALONE MODE
Without connecting a controller with the projector, the projector will run in Stand-Alone mode with
setting the DIP switches at random.
In Stand-Alone mode, the programmes having been set may be actived by sound via the MIC inside
the projector. The projector will change the colours and gobos according to the rhythm of the music.
5/12
panda II manual.doc
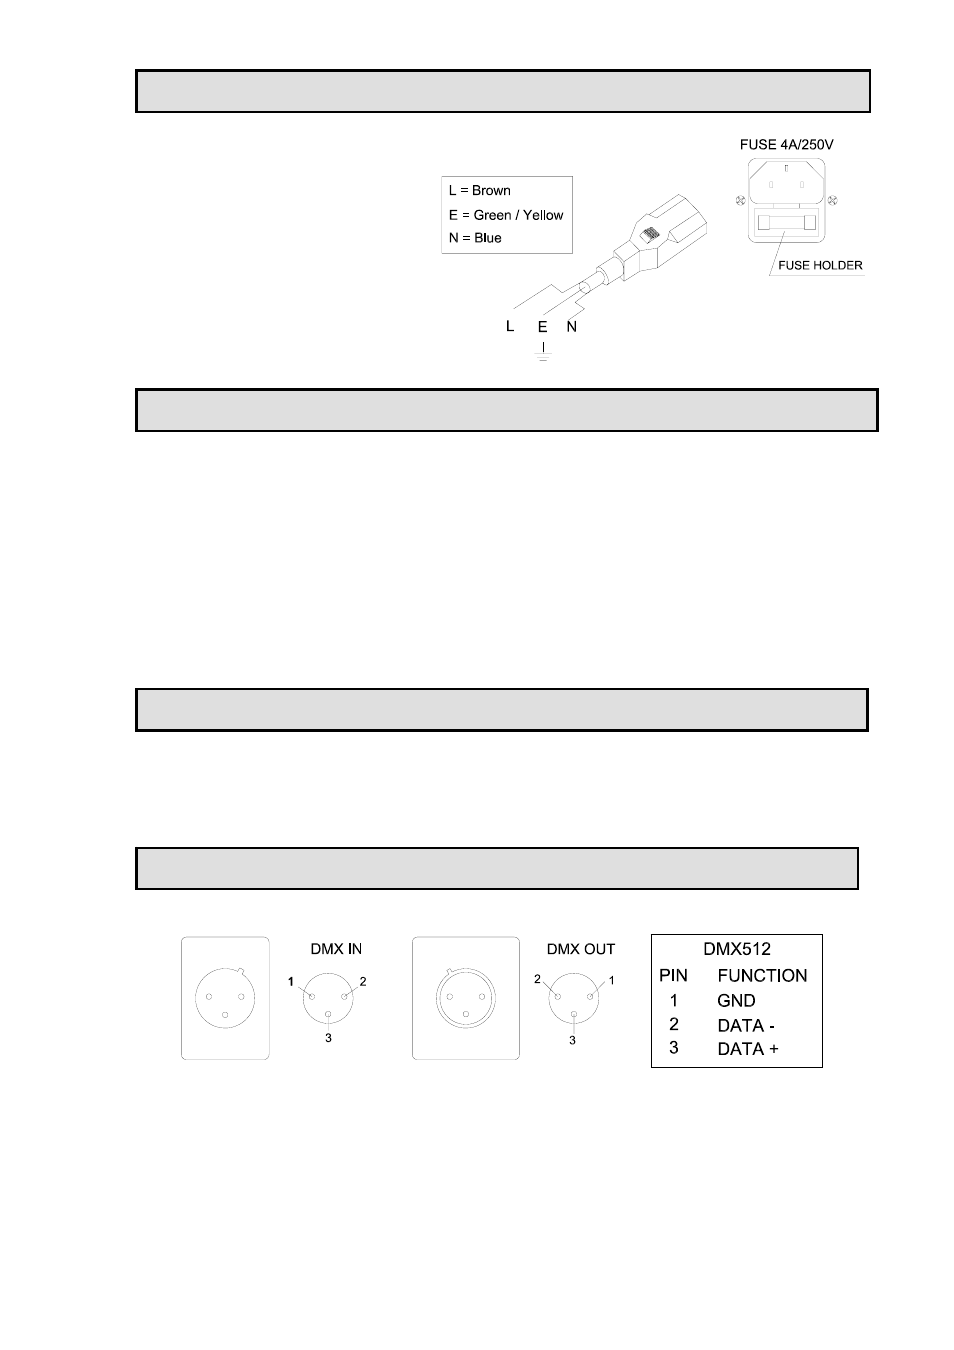
XLR CONNECTORS
XLR CONNECTORS AND TERMINATOR
Connection between controller and projector and between one projector and another must be made
with 2 core screened cable, with each core having at least a 0.5mm diameter. Connection to and from
the projector is via cannon 3 pin XLR plugs and sockets which are included with the projector. The
XLR's are connected as shown in the figure above.
Note, care should be taken to ensure that none of the connections touch the body of the plug or each
other. The body of the plug is not connected in any way. The PANDA II accepts digital control signals
in standard DMX512 (1990) format.