Stand-alone mode, Xlr connectors and terminator – OmniSistem PR Century Color User Manual
Page 6
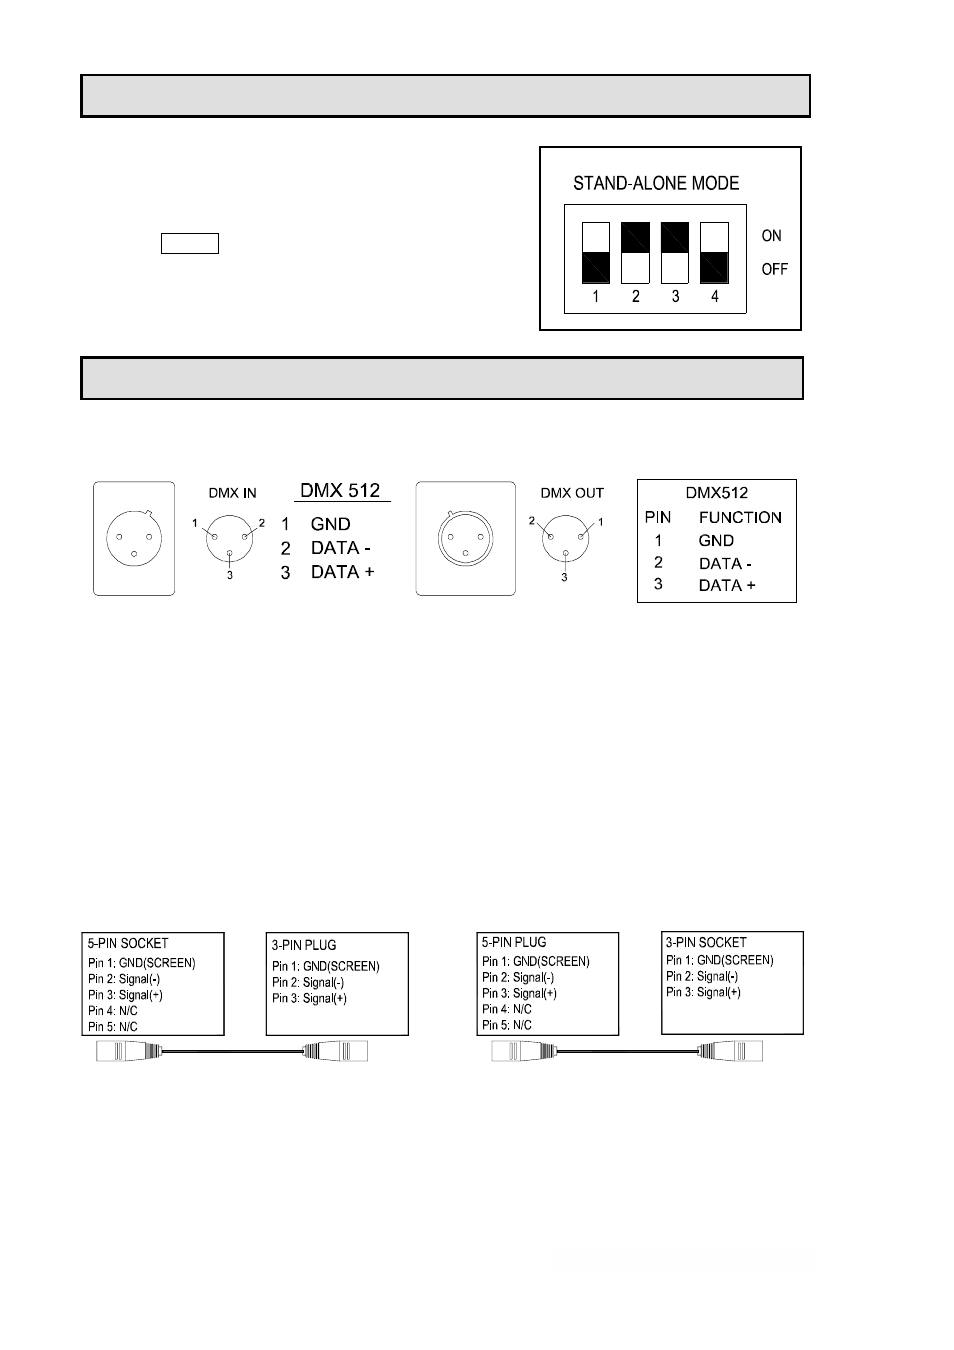
STAND-ALONE MODE
Without connecting the controller, regulating the DIP switch
as shown right, the apparatus will run in stand-alone mode.
6/14
Century Colour 2500.manual.doc
In stand-alone mode, you should only regulate the values
of the rotary DIP switches with the tens and units, and then
press the RESET button. After 30 seconds, the appratus
will run automatically the selected one program of the 15
bulit-in programmes. (How to set the rotary DIP switches,
please refer to “auto programmes table” above.)
XLR CONNECTORS
Connection between controller and projector and between one projector and another must be
made with 2 core screened cable, with each core having at least a 0.5mm diameter. Connection
to and from the projector is via cannon 3-pin XLR plugs and sockets which are included with the
projector. The XLR's are connected as shown in the table above.
XLR CONNECTORS AND TERMINATOR
Note, care should be taken to ensure that none of the connections touch the body of the plug or
each other. The body of the plug is not connected in any way. The Century Colour accepts digital
control signals in standard DMX512 (1990) format.
5-PIN AND 3-PIN CONVERSION
Century Colour uses 3-pin XLR plug / socket. If your controller uses 5-pin XLR plug / socket, you
should convert 5-pin plug / socket into 3-pin socket / plug as shown below.