Altimeter, How the altimeter works, Understanding the altimeter screen – Casio 2271 User Manual
Page 3: About altitude measurements, Selecting auto or manual measurement, Setting a reference altitude
2271-3
ALTIMETER
A built-in altimeter uses a pressure sensor to detect the current air pressure,
which is then used to estimate the current altitude. The watch is pre-
programmed with ISA (International Standard Atmosphere) preset values,
which are used to convert air pressure readings to altitude values. If you
preset a reference altitude, the watch will also calculate the current relative
altitude based on your preset value. Altimeter functions also include data
storage memory and an altitude alarm.
Important!
• This watch estimates altitude based on air pressure. This means that
altitude readings for the same location may vary if air pressure changes.
• This watch employs a semiconductor pressure sensor, which is affected by
temperature changes. When taking altitude measurements, be sure to do
so while ensuring that the watch is not exposed to temperature changes.
• Do not rely upon this watch for altitude measurements or perform button
operations while engaging in sports where there are sudden altitude
changes, while sky diving, hang gliding, or paragliding, or while riding a
gyrocopter, glider, or any other aircraft.
• Do not use this watch for measuring altitude in applications that demand
professional or industrial level precision.
How the Altimeter Works
With the Preset Values (No Reference Altitude)
• The watch measures the air pressure at your current location and uses the
built-in ISA values to convert it to the equivalent altitude.
With a Reference Altitude
• After you set the reference altitude, the watch adjusts its air pressure to
altitude conversion calculation accordingly.
• To determine the height of a tall building,
set the reference altitude to 0 on the
ground floor. Note, however, that you may
not be able to get a good reading if the
building is pressurized or air-conditioned.
• When mountain climbing, you can set the
reference value in accordance with a
marker along the way or altitude
information from a map. After you do this,
the altitude readings produced by the
watch will be more accurate than they
would without a reference altitude.
• Note that the following conditions will
prevent you from obtaining accurate readings:
When air pressure changes because of changes in the weather
Extreme temperature changes
When the watch itself is subjected to strong impact
Understanding the Altimeter Screen
Press E to enter the Altimeter Mode.
• Altitude is displayed in units of 5 meters (20 feet).
• The measurement range for altitude is –700 to 10,000 meters (–2,300 to
32,800 feet).
• The measured altitude may be a negative value in cases where there is a
reference altitude value set or because of certain atmospheric conditions.
• The displayed altitude value changes to
xxxx
meters (or feet) if a
measured altitude falls outside the measurement range. The altitude value
will be displayed again as soon as the measured altitude is within the
allowable range.
• You can change the unit of measurement for the displayed altitude values
between meters (m) and feet (ft). See “To change the Altitude Units”.
About Altitude Measurements
There are two types of altitude measurements: those for displayed data
(Altimeter Mode measurements) and those for memory data (Memory
measurements).
Altimeter Mode measurement
This type of measurement is performed only when the watch is in the
Altimeter Mode. As soon as you enter the Altimeter Mode, measurements are
taken every five seconds for the first three minutes. After that, measurements
are taken every two minutes.
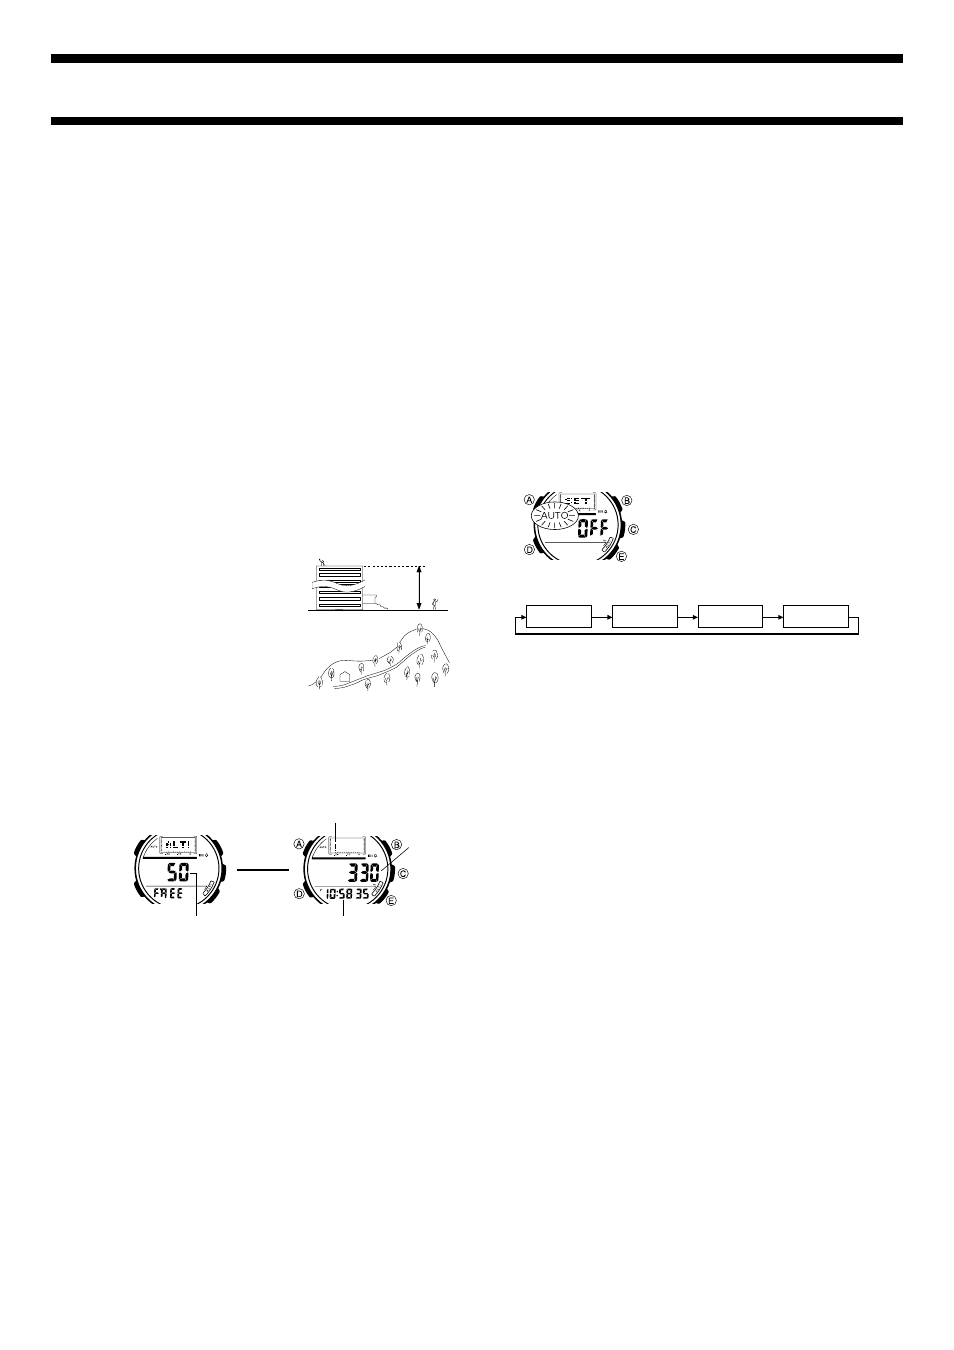
• The ALTI indicator flashes on the display while a measurement is in progress.
400
A
B
Remaining memory
1 second later
Altitude graph (current altitude flashing) (unit: 10m/40 ft.)
Altitude
Timekeeping Mode time
▲
Memory measurements
Memory measurements are taken independently of Altimeter Mode
measurements and stored directly into memory (along with the date and time
of the measurement) for later recall. There are two types of memory
measurements: “Auto measurements” and “Manual measurements”.
Auto measurements
With Auto measurement, the watch continuously performs measurements
whenever the minutes in the Timekeeping Mode reach 00, 15, 30, or 45, until
you switch Auto measurements off. The watch continues to take
measurements regardless of whether or not you change modes, so you can
keep a running log of altitude changes automatically.
Manual measurements
You can use the manual procedure to take a reading anytime you want to
store your current altitude data into memory for later recall. Manual memory
measurements can be performed only while the watch is in the Altimeter
Mode.
Selecting Auto or Manual Measurement
Use the following procedure to switch between Auto or Manual measurement.
Note that you cannot perform this operation while a preset Auto measurement
is already in progress.
To select Auto or Manual measurement
1. In the Altimeter Mode, hold down A until
the display clears. After four or five
seconds, either
OFF
or the current
reference altitude value (if set) will start to
flash, which indicates the setting screen.
2. Press D twice to move the flashing to the
memory measurement setting (AUTO or
MANUAL).
• Press D to move the flashing in the sequence shown below.
Reference
Altitude
Altitude
Alarm
Memory
Measurement
Altitude
Unit
3. While the memory measurement setting is flashing, press B or E to
select AUTO (Auto measurement) or MANUAL (Manual measurement).
4. Press A to exit the setting screen.
• An indicator on the display shows the type of measurement (AUTO or
MANUAL) that you currently have selected.
To use Auto measurement
1. Confirm that the AUTO indicator is shown on the display.
• If it is not, use the procedure under “To select Auto or Manual
measurement” to select Auto measurement.
2. In the Altimeter Mode, hold down E until the watch emits a short beep,
indicating the start of the measurement.
3. To stop measurements at any point in the Altimeter Mode, hold down E
again until the watch emits a short beep.
• The data that is measured when you first start Auto measurement is
also stored into memory.
• The AUTO indicator flashes on the display when you start Auto
measurements. The AUTO indicator continues to flash (indicating that
measurements continue) even if you change modes.
• Auto measurement cuts off automatically whenever there are 49
records stored in memory. The 50th record measurement when you
stop measurement in step 3 above is also stored in memory.
• A final measurement is taken when you turn off Auto measurement,
and that data is also stored into memory. Such data is indicated by
FIN
during the recall operation.
To use Manual measurement
1. Confirm that the MANUAL indicator is shown on the display.
• If it is not, use the procedure under “To select Auto or Manual
measurement” to select Manual measurement.
2. In the Altimeter Mode, hold down E until the watch emits a short beep,
indicating that a measurement is taken.
• Repeat step 2 whenever you want to take a reading.
• Button operation becomes impossible during the four or five seconds
that it takes to complete a measurement. Normal operation will return
once the operation is finished.
Setting a Reference Altitude
After you set a reference altitude, the watch adjusts its air-pressure-to-altitude
conversion calculation accordingly. The altitude measurements produced by
this watch are subject to error caused by changes in air pressure. Because of
this, we recommend that you update the reference altitude whenever one is
available during your climb.