Before installing the engine, Installation procedure, Installing the glow plug – O.S. Engines 160FX-FI User Manual
Page 11
NOTE:
Be sure to secure large enough air intake and outlet area for cooling the engine
in order not to overheat the engine.
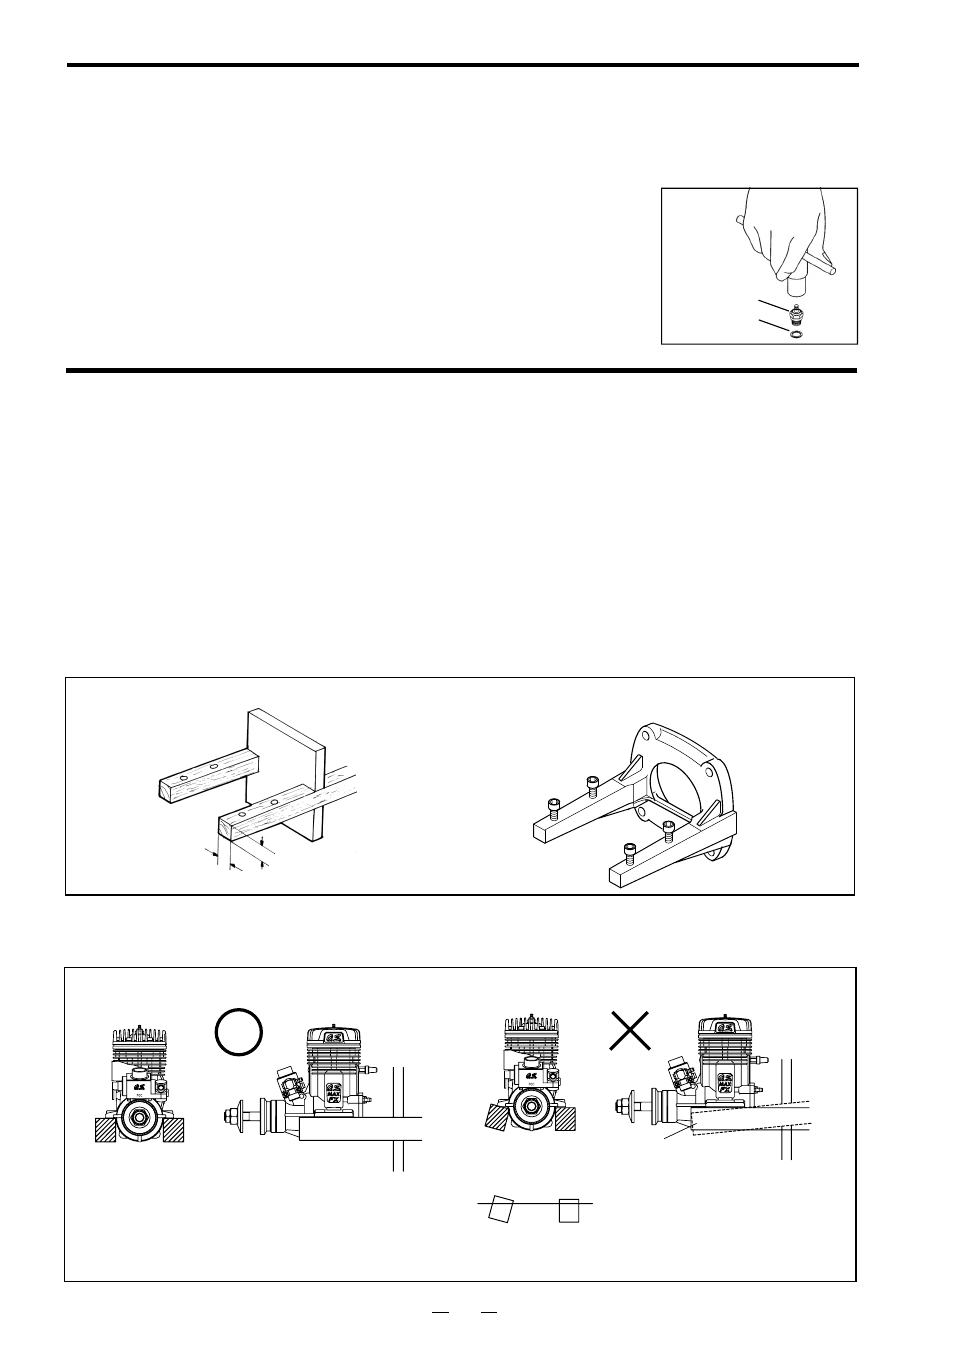
INSTALLING THE GLOW PLUG
Glow plug
Carefully insert plug, with washer, fingertight only, before final
tightening with the correct size plug wrench.
Washer
BEFORE INSTALLING THE ENGINE
In addition to the general tools, the following tools are convenient to use.
14-17mm open end wrench
Large capacity electric starter and battery
Hex wrench to secure the silencer (supplied with the engine)
•
•
•
The following components are required during installation: EC-2, y harness, check valve, fuel
filter, E-5010 silencer, extension cord (sold separately), double-sided, sponge-backed
cushioning tape.
INSTALLATION PROCEDURE
Install the 160FX-FI while taking the following matters into consideration.
(1) MAX-160FX-FI Engine
(2) Engine Mount
Front view
CORRECT
Side view
Top surfaces are in the
same plane.
Re-align the surfaces
as necessary
INCORRECT
Top surfaces are not
in the same plane.
Opposite beam
Top surfaces are not in the
same plane.
Engine does not seat firmly.
Rigid hardwood
(e.g. maple)
Installation in the model
A typical method of beam mounting
is shown below,left.
O.S. radial motor mount
(Available as an optional extra part.
See parts list)
Make sure that the mounting beams are parallel and that their top surfaces are in the same
plane.
At least
15mm(5/8")
At least
15mm(5/8")
Fig.3
Fig.4
10