Guide, Cd/dvd inkjet printer – MF Digital OptiEC Inkjet QuickStart User Manual
Page 3
TP 000 023 (1.03) For Windows 2000 & XP only
ZZ 004 805
CD/DVD Inkjet Printer
Guide
Printing a CD
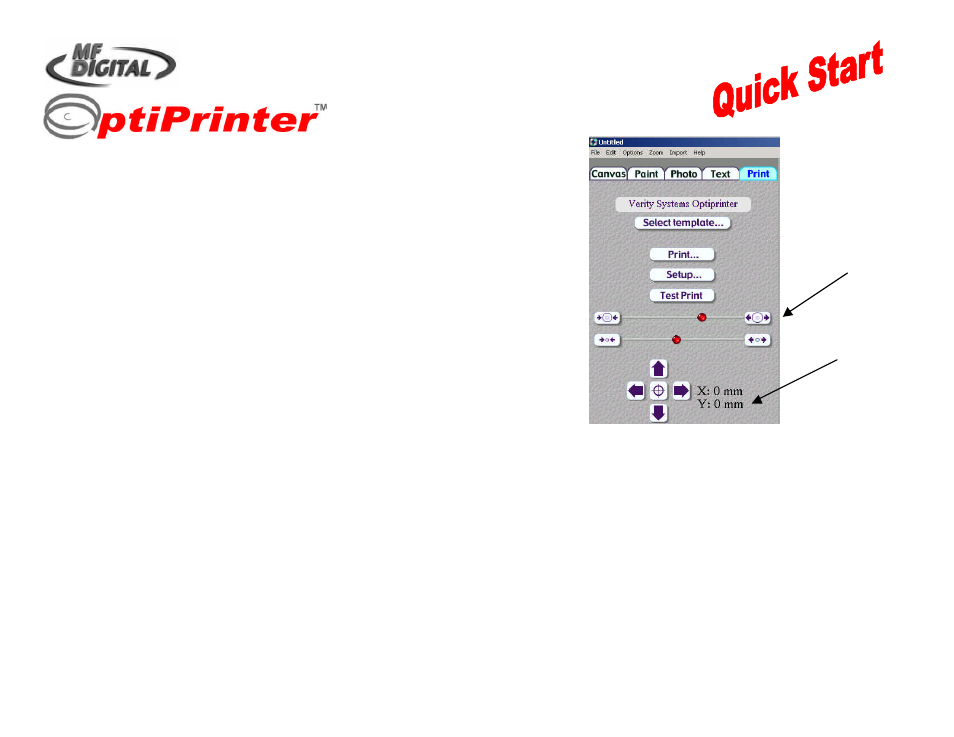
6. Open Discus
Set Outer & Inner
Diameter
Ensure X & Y at
to 0mm
•
With Discus open, select the CD/DVD label type
•
Select the
tab and click the
Setup
Button (see Fig.1).
•
Select
M F Digital OptiPrinter
from the drop-down list of printers. For paper size,
select
A4 (210 x 297mm)
and for source select
Upper Tray
•
Click
OK
•
Next, click the
Select template
Button and choose the
M F Digital OptiPrinter
•
Adjust the position of the red slider buttons to set the Outer Diameter to
119.5mm
and the Inner Diameter to
39.5mm
Ensure that the
X & Y Nudge Button
dimensions are set at 0mm & 0mm
7. Run a Test Print
Ensure you have a blank CD loaded into the OptiPrinter’s tray.
Now click the
Test Print
button and the
Print Properties
box appears. Ensure the M F Digital OptiPrinter is selected from the list of printers
(click icon once to highlight it).
•
Under the
Setup
tab, set Print Quality to
Normal
, and Disk Surface Type to
Inkjet Quality/Other Inkjet
•
Under the
Features
tab, remove the tick from the
Enable HP Preview
•
Under
Mask Settings
, remove the tick from
Enable Masking
•
Select
.
A command box appears asking if you are “Ready To Print?”, select
OK
A series of circles will print onto the blank CD and should look like Fig. 2 on the next page. However, minor adjustments may be required if the
circles on the test print do not print centrally (as shown in Fig. 3). Adjust the template on the Discus interface by using the X & Y nudge keys to
move the template up, down, left, & right.
Note: Every OptiPrinter is factory set for the correct position, however, CDs can vary in size and it may be necessary to make minor adjustments
using the nudge feature.