Vii. install the two leving feet, Viii. mount the enclosure, Ix. reassemble the vehicle – Clarion PSWFF150 User Manual
Page 4
4
VI. INSTALL THE SUPPLIED L SHAPED BRACKETS TO THE ENCLOSURE
A. Position “L” bracket on enclosure.
B. Bracket will be screwed in using two 3/4" pilot point screws.
C. The lower hole on the shorter leg of the “L” bracket should line
up with the dimple on the enclosure.
Clarion Corporation of America
661 West Redondo Beach Blvd Gardena, CA 90247
800-Go-Clarion
www.clarion-usa.com © 2000 Clarion Corporation, Gardena, CA
10 - PSWFF150 Rev. 1 (04/00
)
VII. INSTALL THE TWO LEVING FEET
A. Fasten (2) leveling feet to the "L" brackets located on the front
edge of enclosure with the (2) supplied 5/16" hex-nuts.
B. Place enclosure into vehicle and adjust leveling feet to desired
height (the top/rear edge of the subwoofer enclosure should
line up with the I.P. so that the foam is slightly being com-
pressed uniformly around the I.P.).
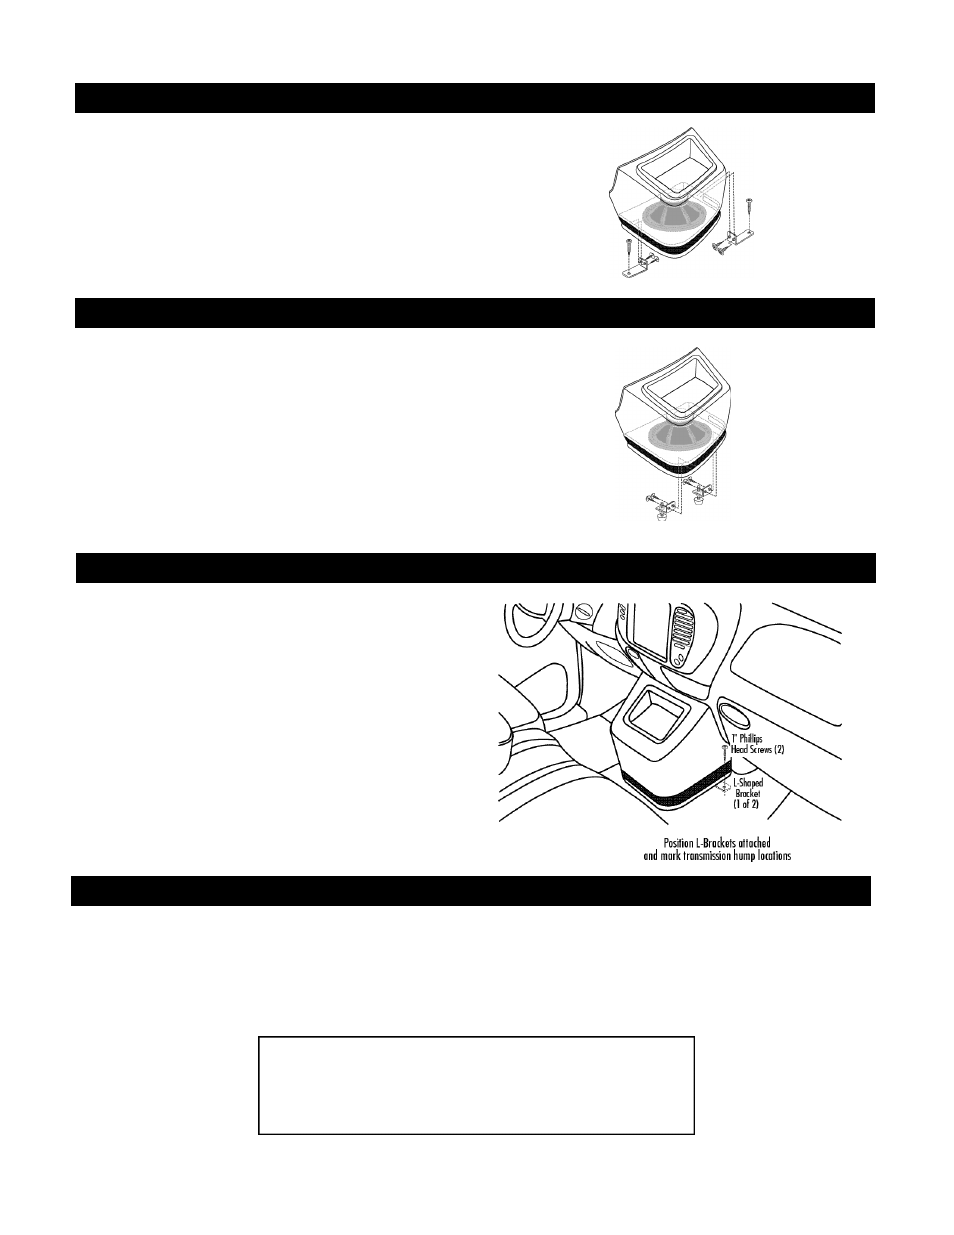
VIII. MOUNT THE ENCLOSURE
A. Place enclosure into vehicle.
B. Plug in the harness.
C. Position enclosure into proper location.
D. Cut a “U” shaped slit in the carpet at the two bracket locations.
E. Fold up carpet slits over the brackets.
F. Screw in the two brackets to the vehicle floor.
G. Fold carpet back over brackets.
IX. REASSEMBLE THE VEHICLE
A. Make sure all the wires are hidden.