The chimney system – Vermont Casting 1920 User Manual
Page 22
22
Aspen Woodburning Stove
30000369
Gasket Replacement
Your Aspen uses rope-type fiberglass gaskets to make
a tight seal between some parts. With use, particularly
on those parts that move, gaskets can become brittle
and compressed and can begin to lose their effective-
ness. These will need periodic replacement.
The sizes of replaceable gasket are listed below, along
with their applications.
Gasket Diameter...
...And the Parts it Seals
5/16” Round
Flue Collar Gasket
3/8” Round
Top
7/16” Round
Door Gasket
1/2” Flat, two
Vertical Gasket for glass
1/2” Flat
Horizontal Gasket for glass
Wait until the fire is out and the stove has cooled. Be
sure to follow the standard safety procedure for working
with dusty materials: Wear safety goggles and a dust
mask.
Step 1. Remove the existing gasket by grasping an
end and pulling firmly.
Step 2. Use a wire brush or a screwdriver to clean
the channel of any remaining cement or bits of gasket.
Remove stubborn deposits of cement with a cold chisel
if necessary.
Step 3. Determine the correct length of the appropri-
ate-sized gasket by laying it out in the channel. Allow an
extra 1-2” (25-51 mm), and mark the spot to be cut.
Step 4. Remove the gasket from the channel, place it
on a wood cutting surface, and cut it at the marked spot
with a utility knife.
Twist the ends slightly to discourage the gasket from
unraveling.
Step 5. Lay an unbroken 1/8” (3 mm) bead of gasket
cement in the newly-cleaned channel.
Step 6. Starting at one end, press the gasket into the
channel.
Ensure a good joint where the gasket meets before
trimming any excess. Do not overlap the gasket ends or
leave ends with ragged edges.
Step 7. Press the gasketed part firmly against its
normal mating surface to seat the gasket evenly in its
channel. Close and latch the door to do this; close the
door on a piece of waxed paper to keep the cement
from migrating onto the non-gasketed part, or tap other
parts
Step 8. Clean excess cement from around the channel.
Let the cement that holds the new gasket dry thor-
oughly.
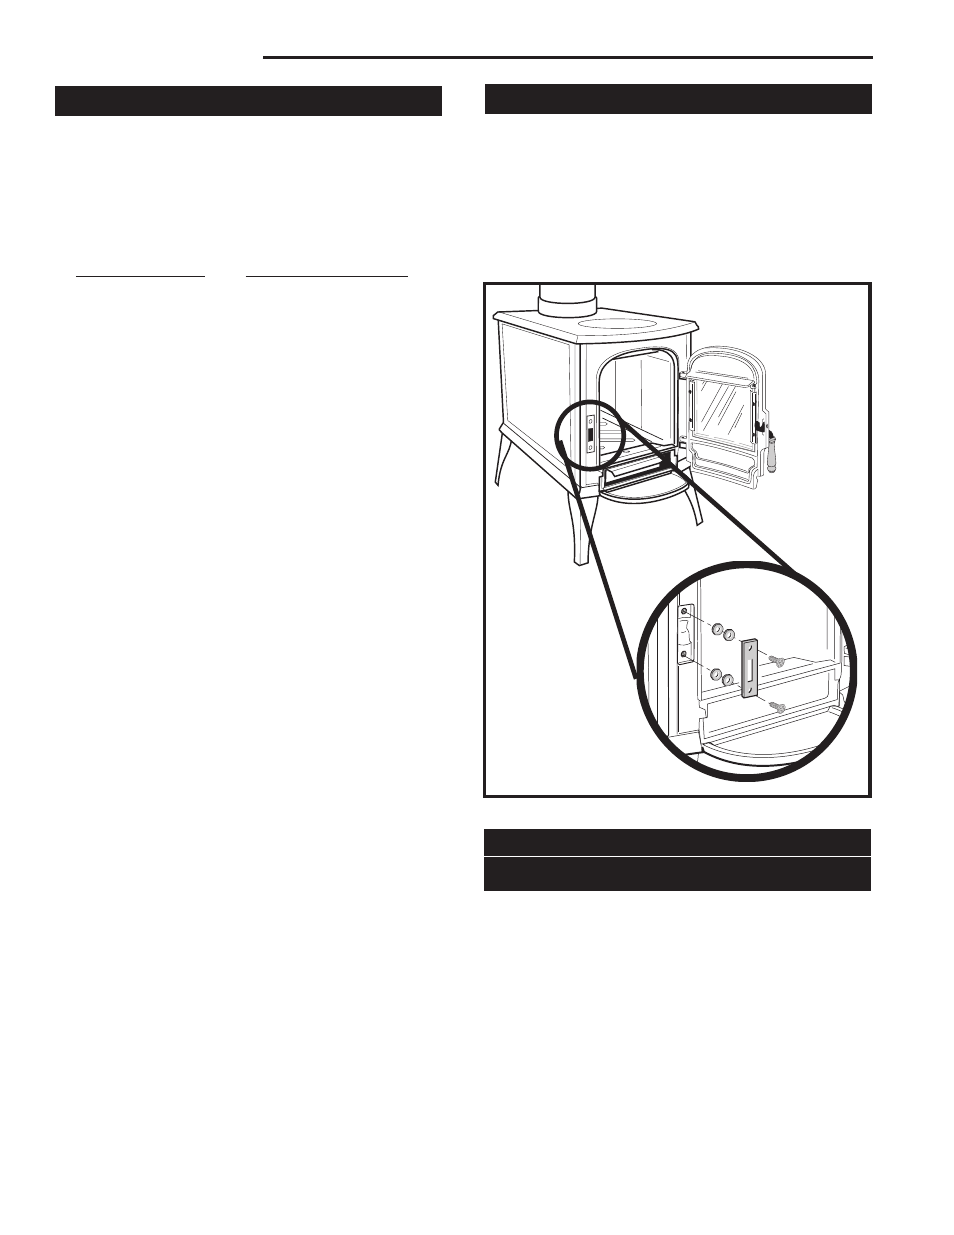
Adjust the Door
The door latch may need adjustment as the gasket
material compresses over time. The latch engagement
may be tightened by removing the shim washers that
are under the Latch Plate. (Fig. 33) Remove only one
pair at a time. When a tight engagement can no longer
be achieved with no shim washers in place, the entire
door gasket should be replaced. Use only CFM Corpo-
ration part no. 700-0910.
The Chimney System
Creosote
Your Aspen is designed to reduce creosote buildup
significantly. However, regular chimney inspection and
maintenance must still be performed. For safety, good
stove performance, and to protect your chimney and
chimney connector, inspect your chimney and chimney
connector on a regular schedule. Clean the system if
necessary. Failure to keep the chimney and connector
system clean can result in a serious chimney fire.
ST267
door latch
12/99
ST268
door latch detail
12/99
Shim Washers
Latch Plate
ST267
ST268
Fig. 33 Remove shim washers to tighten latch engagement.