Tool set up – Harbor Freight Tools Model 99637 User Manual
Page 9
SKU 99637
For technical questions, please call 1-800-444-3353.
Page 9
discharge the tool in a safe fashion
after disconnecting to ensure that the
tool is disconnected and unpowered.
OPERATING INSTRUCTIONS
Read the ENTIRE IMPORTANT
SAFETY INFORMATION
section at the beginning of this
manual including all text under
subheadings therein before set
up or use of this product.
Inspect Stapler before use,
looking for damaged, loose,
and missing parts. If any
problems are found, do not use
tool until repaired.
Tool Set Up
TO PREVENT
SERIOUS INJURY
FROM ACCIDENTAL
OPERATION:
Turn off the Stapler, detach
the air supply, safely
discharge any residual air
pressure in the tool, and
release the Trigger (39) to its
off position before performing
any inspection, maintenance,
or cleaning procedures.
TO PREVENT SERIOUS
INJURY:
Do not adjust or tamper with
any control or component in a
way not specifically explained
within this manual. Improper
adjustment can result in
tool failure or other serious
hazards.
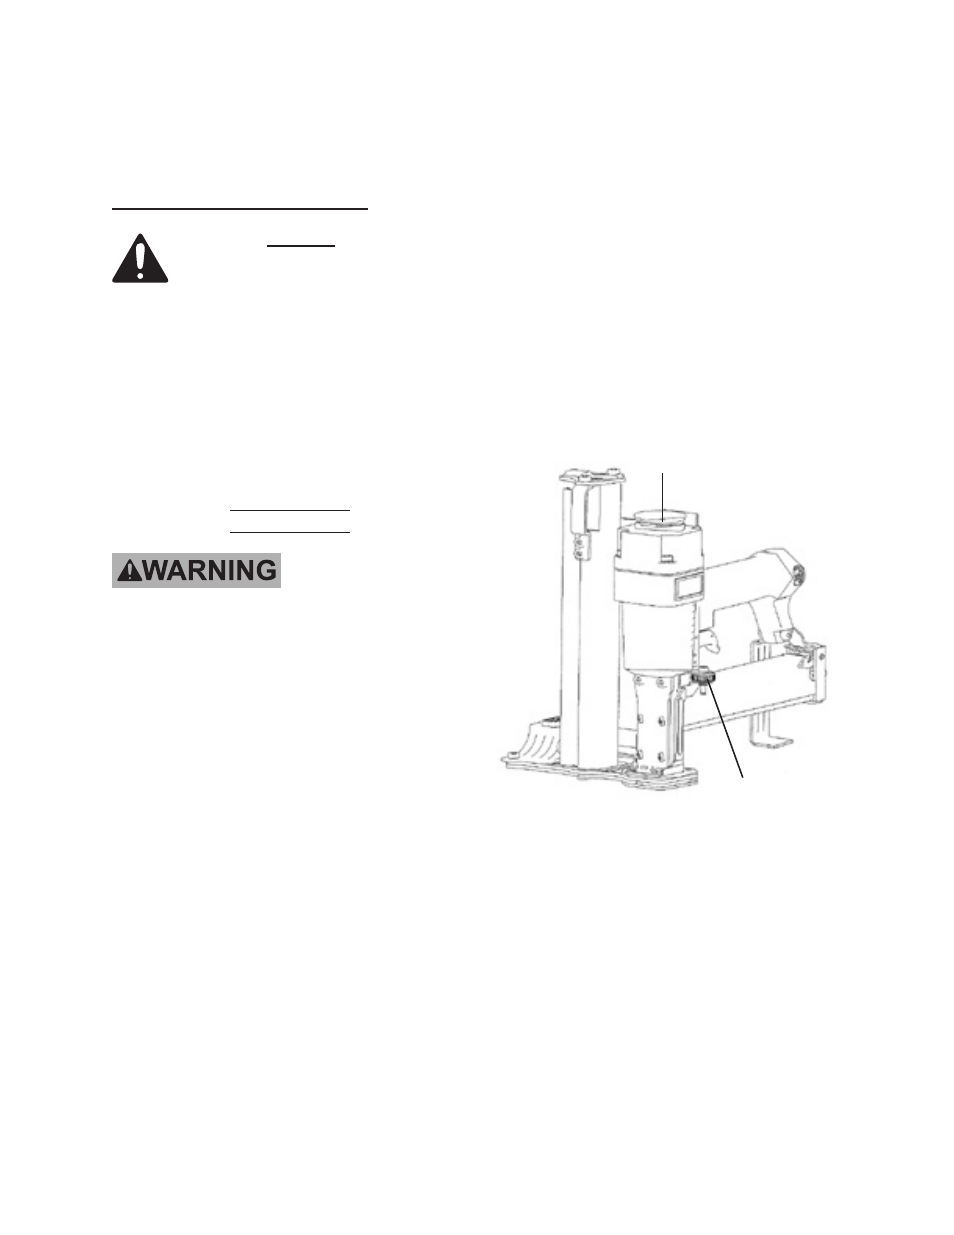
1. Each time the Stapler is fired, com-
pressed air is exhausted through the
Exhaust Cap (1). The Exhaust Cap
can be turned a full 360°. Prior to
using the Stapler, always adjust the
Exaust Cap so that the compressed
air is exhausted away from your face.
(See Figure B.)
2. Always test for proper fastener pene-
tration by driving staples into a scrap
piece of wood. If the fasterners do
not achieve the desired penetration,
turn the Drive Depth Adjuster (47) to
a higher setting until the desired pen-
etration is achieved.
(See Figure B.)
3. The Stapler is designed to accept
staples from 3/8” to 1-1/4” in length.
To load the tool with staples, depress
the Magazine Latch (63). Pull back
on the Magazine (73). Insert a strip
of staples (up to 100 staples) in the
Magazine. Then push the Magazine
forward until the Magazine Latch
catches.
(See Figures C and D, next page.)
DRIVE DEPTH
ADJUSTER
(47)
EXHAUST
CAP
(1)
FIGURE B