Grill assembly, Assembly guide – Char-Broil INFRARED 10401582 User Manual
Page 5
5
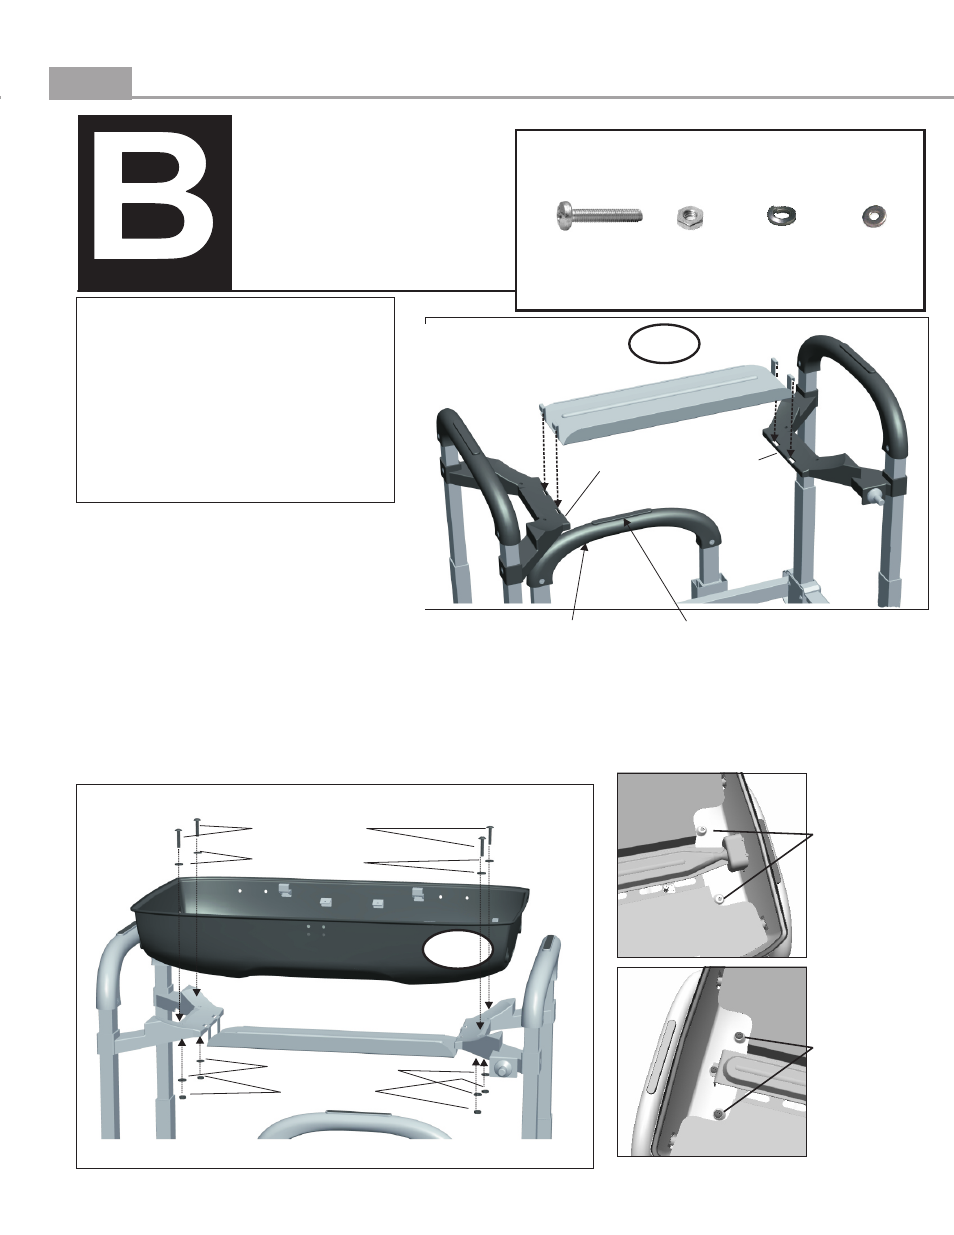
ASSEMBLY GUIDE
Part
Qty
Fasteners
#10-24 x 1 1/4"
GRILL Assembly
(qty 4)
screw
B1
– Heat Shield
1
B2
– Fire Box Assembly
1
Step 1 - Install the Heat Shield(B1) to
the firebox mounting brackets by
engaging the tabs into the slots located
in the mounting brackets as shown on
the right.
Step 2 - Install the Fire Box Assembly(B2) to the cart by first placing the firebox assembly onto the
firebox mounting brackets. Be sure that the lid clasp is toward the front of the cart. Align the firebox
screw holes with the corresponding holes in the mounting brackets. Insert 4 #10-24 x 1 1/4" machine screws
and 4 fiber washers through the firebox and mounting brackets. Secure with 4 #10-24 nuts and 4 #10
lock washers from below the mounting brackets as shown below.
Right hand side
Firebox screw
holes
Left hand side
Firebox screw
holes
#10-24
(qty 4)
nut
#10 Lock
(qty 4)
washer
(qty 4)
Fiber Washer
Fiber washers
#10-24 x 1 1/4"
machine screws
#10 lock washers
#10-24 nuts
B2
FRONT
B1
Firebox Mounting Brackets
FRONT
NOTE: As viewed
from the front of
the grill.
NOTE: As viewed
from the front of
the grill.
Note: Before beginning this step of the
assembly, raise the two side lifts to their
highest position by pressing the button at the
top of the handle and pulling upward on the
handle.
The pull handle at the rear of the cart also has
a locking button, press the button to raise or
lower the pull handle into the desired
position. During Assembly, the rear pull
handle should remain in its lowered position.
Rear Pull Handle
Pull Handle Locking Button
Assure FRONT marking on Heat Shield is to the front of the grill.