Set the sync mode – Interlogix TVD-7125VE-2 User Manual User Manual
Page 18
16
TruVision TVD-7120VE-2 / TVD-7125VE-2 Camera User Manual
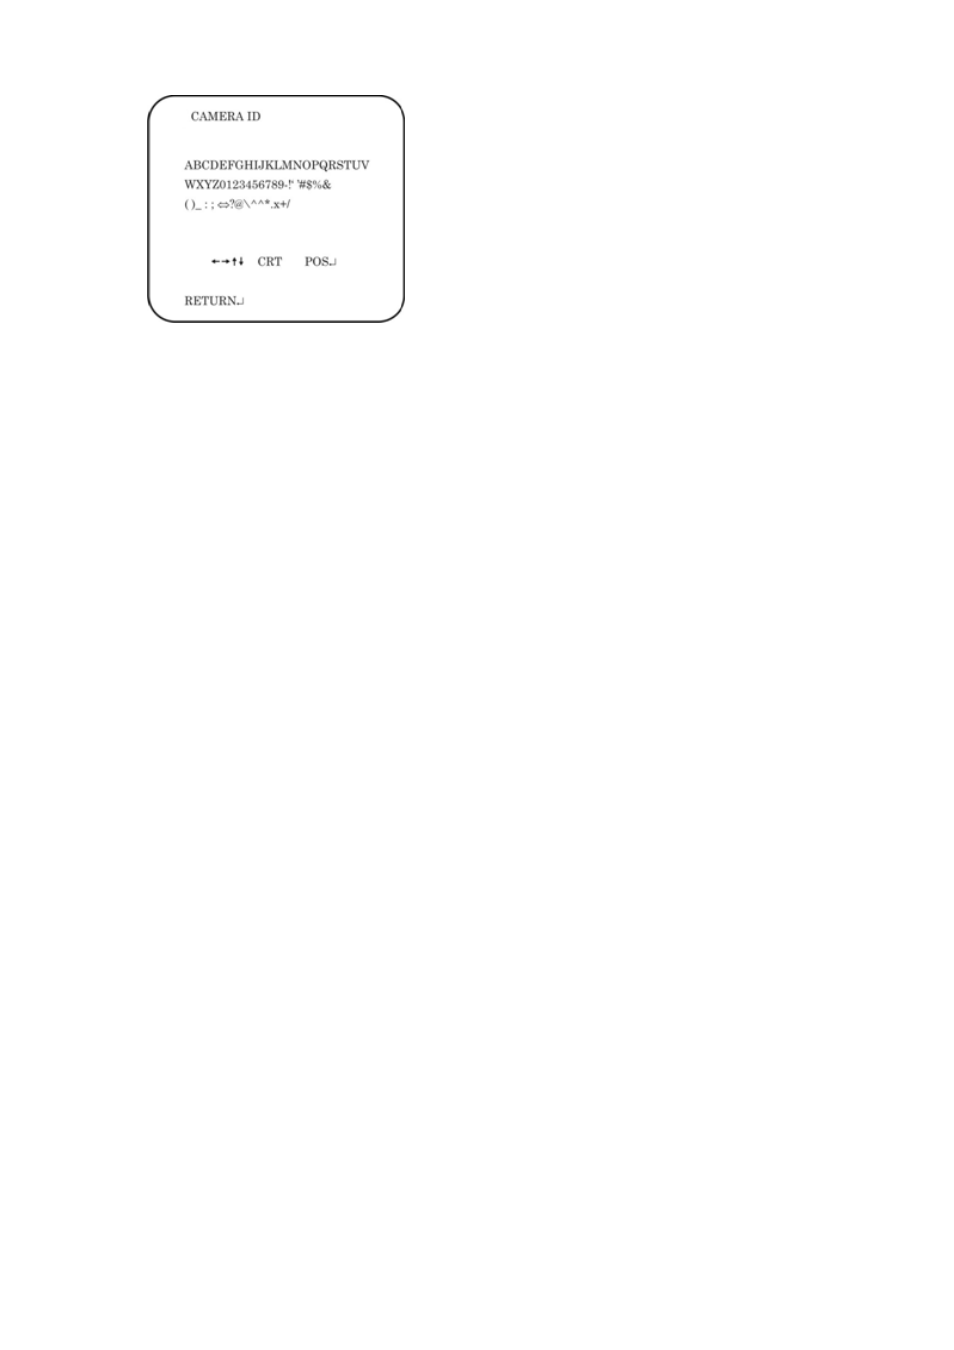
Camera ID input line
Command line
To enter a character, move the cursor to the desired character and press
Enter
to select it. It appears in the input line. Repeat the process until all characters are
entered.
To move the character input position in the input line, move the cursor in the
command line to ← or → and press
Enter
.
To clear the input line, move the cursor to CLR and press
Enter
.
To delete a character in the input line, select the character so that it blinks. Then
move the cursor to CLR on the command line and press
Enter
.
To position the camera ID on-screen, move the cursor to POS and press
Enter
.
The menu will then disappear on-screen and the camera ID will be displayed on
the monitor. Use the menu button to move the camera ID to the desired position.
Press
Enter
. The menu will reappear. Select
Return
to return to the previous
menu.
Set the sync mode
Only cameras that support both 12 VDC and 24 VAC have line lock
synchronization.
If 12 VDC power supply is applied, SYNC mode is internal synchronization. It
cannot be modified.
If 24 VAC power supply is applied, you can select either internal or line lock
synchronization.
Internal synchronization is the default SYNC mode. To change the SYNC
mode to line lock mode, exit the main menu. In live view mode push the OSD
control button to the right for two seconds. Repeat the operation to switch it
back from the line lock to internal synchronization.