Interlogix TVT-4101 User Manual
Overview, Installation, Specifications
P/N 1072700B-EN • REV 1.0 • ISS 17OCT13
1 / 2
TruVision TVT-2101/ TVT-4101 IR Turret
Camera Installation Instructions
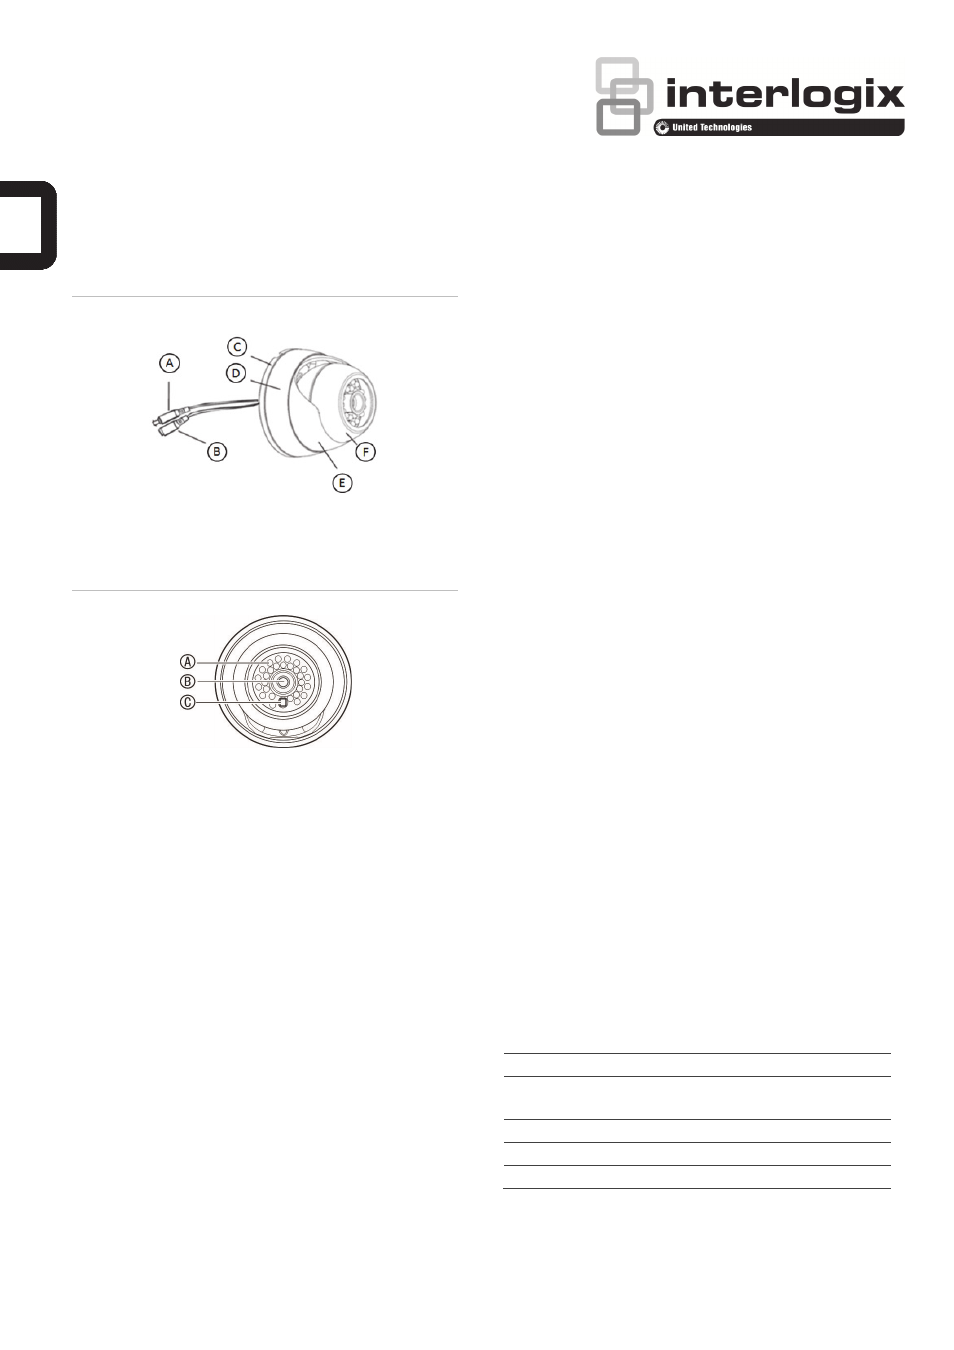
Figure 1: Parts of the camera
A. Video cable
B. Power cable
C. Mounting bracket
D. Fixed ring
E. Shroud
F. Camera
Figure 2: Camera front
LED IR lights; B. Lens; C. Light sensor
Overview
These are the TruVision IR Turret Camera installation
instructions for TVT-2101/4101. The instructions describe a
standard installation.
The camera consists of the following:
Camera with power and video output cables
Camera
shroud
Fixed ring to secure the camera and camera shroud to the
mounting bracket
One dual-power terminal block with its screw and anchor
4 anchors and 4 screws for wall or ceiling installation
Refer to Figures 1 and 2 when performing the camera setup
procedures.
Installation
When installing the camera, please use the mounting bracket
as a template.
To install the camera:
1. Unscrew the fixed ring and shroud assembly from the
camera.
2. Using the mounting bracket as a template, place it level
against the mounting surface and mark the position of the
mounting holes.
3. Following all local codes, drill and prepare the mounting
holes.
4. Route the camera’s cable through the mounting bracket,
and then install the mounting bracket with the four
provided screws. If your mounting surface requires it, use
the provided wall anchors or other appropriate fasteners.
5. While holding the camera in position, place the fixed ring
and shroud over the camera and tighten.
6. Adjust the camera position.
7. Connect a 75-ohm coaxial video cable to the camera’s
video cable, and connect a 12 VDC power supply to the
power cable.
Note: When installing the camera, tilting the camera housing
past 80° may result in reflection of IR illumination from the
camera base into the lens. This can distort or obscure the
picture in night mode.
8. Check the picture and adjust the camera position and
angle as required.
9. Tighten the fixed ring to secure it to the mounting bracket.
Ensure that the camera shroud is firmly attached to the
bracket.
Specifications
Power supply
12 VDC
Current
80 mA (IR Off)
200 mA (IR On)
Power consumption
2.4 W max.
Weight
0.86 lb. (390 g)
Dimensions (H Ч Ш)
2.7 x 3.7 (69 x 94 mm)