Interlogix NX-8E User Manual User Manual
Page 13
11
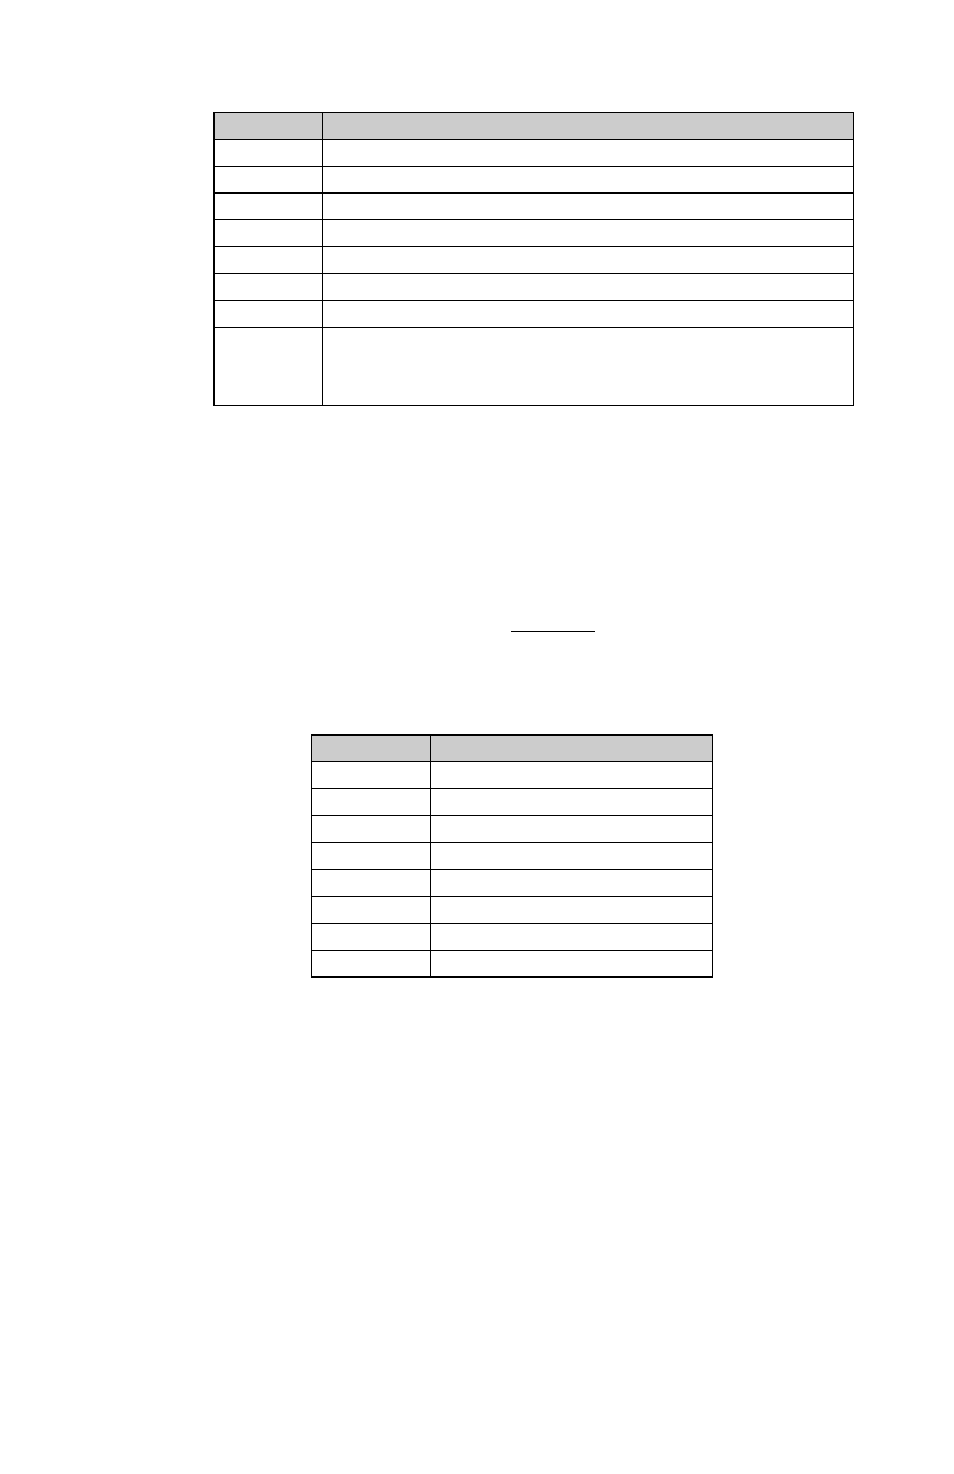
LIGHT
AUTHORITY LEVELS IF LIGHT 8 IS OFF
1
Reserved (Note: Do not change if on.)
2
Arm Only
3
Arm Only After Closing Time
4
Master Arm/Disarm (can program other codes)
5
Arm/Disarm
6
Bypass Zones
7
Open / Close Reporting
8
If this light is on, this code is programmed as a
function code. Do not change! Press [#] - [#] to
exit.
Step 6
Press the [
] key. The ready light will flash. This moves you to the
partition enable. (The user has access in partitions that are
illuminated.)
Step 7
The illuminated numbers indicate each partition where the user has
access. To change any of the partitions where the user has access,
press numbers corresponding to areas where you want to give the
user access or deny access. (Example: If zone light #2 is lit, then
the user is assigned access to partition #2. By pressing the [2] key,
the light will go off, denying access to partition #2. Refer to chart
shown below.
LIGHT
PARTITIONS ASSIGNED
1
Partition 1
2
Partition 2
3
Partition 3
4
Partition 4
5
Partition 5
6
Partition 6
7
Partition 7
8
Partition 8
Step 8
When the partitions are assigned, press the [
] key. This returns you
to Step 3 previously mentioned. At this point you may enter another
user number to assign authority level. Repeat Steps 4 - 8 until you
have assigned authority levels to all user numbers.
Step 9
Press the [#] key to exit the Assigning Authority Level Program.