3 ceiling mount, 1 installation components, 2 ceiling mount installation steps – IC Realtime 2 Megapixel Mini Network PTZ Dome Camera (ICIPP2012S) User Manual
Page 15
7
3 CEILING MOUNT
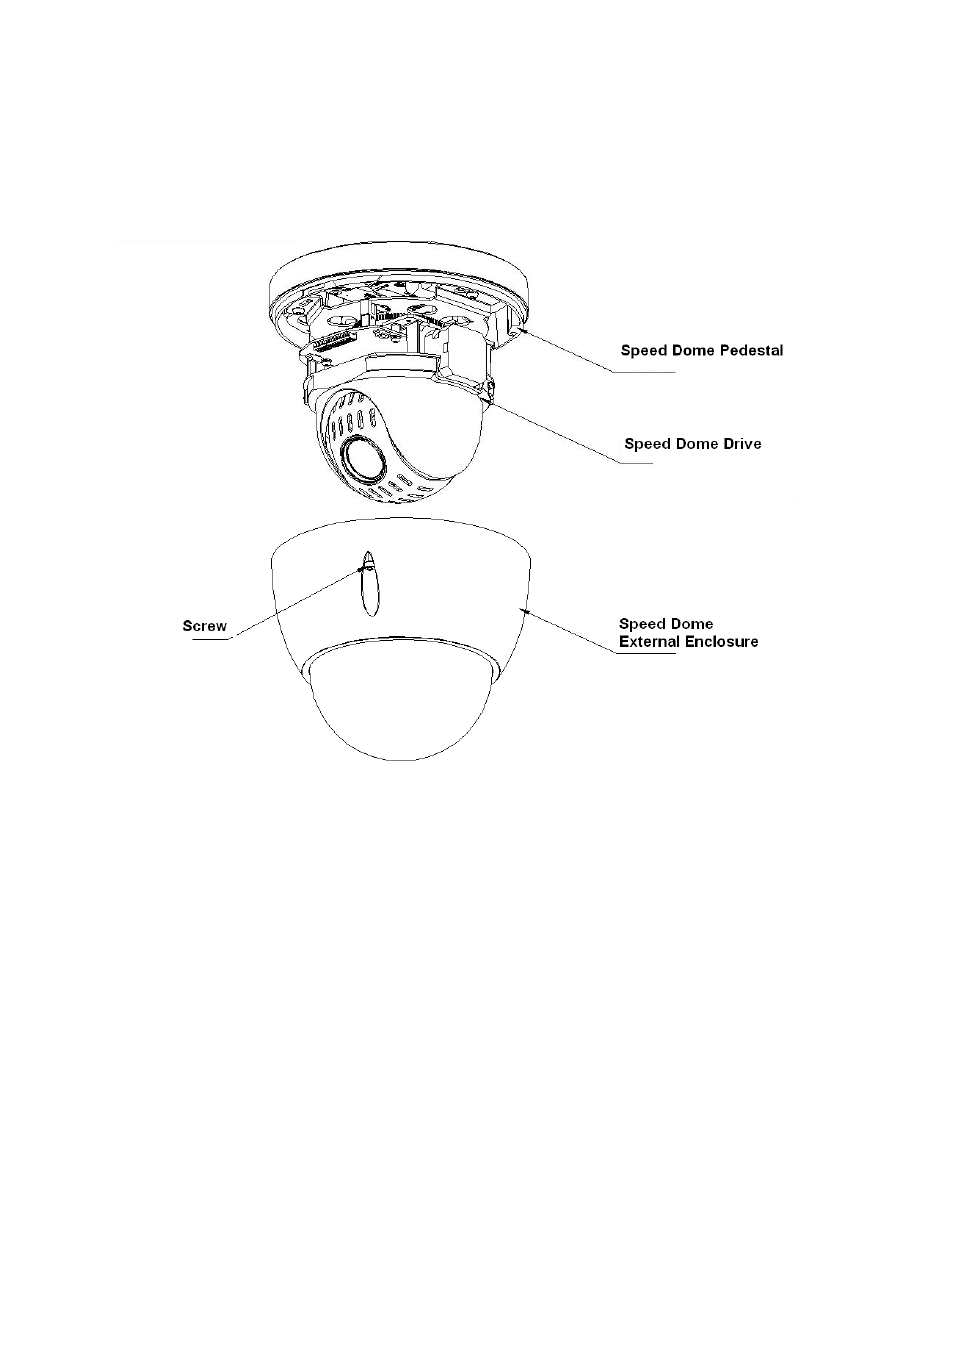
3.1 Installation Components
The ceiling mount installation component is shown as in Figure 3-1.
Figure 3-1
3.2 Ceiling Mount Installation Steps
3.2.1 Installation Environments
The ceiling mount speed dome can be installed in the hard construction wall in the indoor
environments. Before the installation, please make sure:
z
The wall is thick enough to install the expansion bolt.
z
The ceiling can at least sustain the 8x weight of the speed dome, bracket and the
accessories.
3.2.2 Installation Steps
1) The ceiling installation has two cable exit modes: One is to pull the cable through the
side cable exit of the speed dome without dig holes on the ceiling. The other is to dig
holes on the ceiling and pull the cable through the ceiling.
2) Confirm installation position and cable exit mode. Use the ceiling installation position
map to dig holes on the ceiling and then put the four plastic expansion bolts firmly.