Haltech HT045505 User Manual
Page 8
Ignition
The Ignition wiring within the Haltech RB30 series terminated harness has been
wired to allow the user to keep the standard distributor ignition setup or upgrade
to direct fire ignition.
Ignition Option 1 (Distributor Ignition using LS1 Coil)
Replace the OEM coil with the supplied LS1 Coil and mounting bracket.
Connect the harness to the coil via the pre-terminated connector on the harness
labeled “IGN-LS1”
Connect the high tension lead from the distributor to the coil.
Your installation is complete
Ignition Option 2 (Direct fire ignition)
Create a custom harness using the Haltech 6 Channel flying lead harness #HT045504
which connects to the 8 pin deutsch ignition breakout connector located on the Haltech
RB30 Series terminated harness near the firewall.
Many options for coil and ignitor combinations are available.
Please consult your tuner for the best direct fire ignition system that will suit your
application.
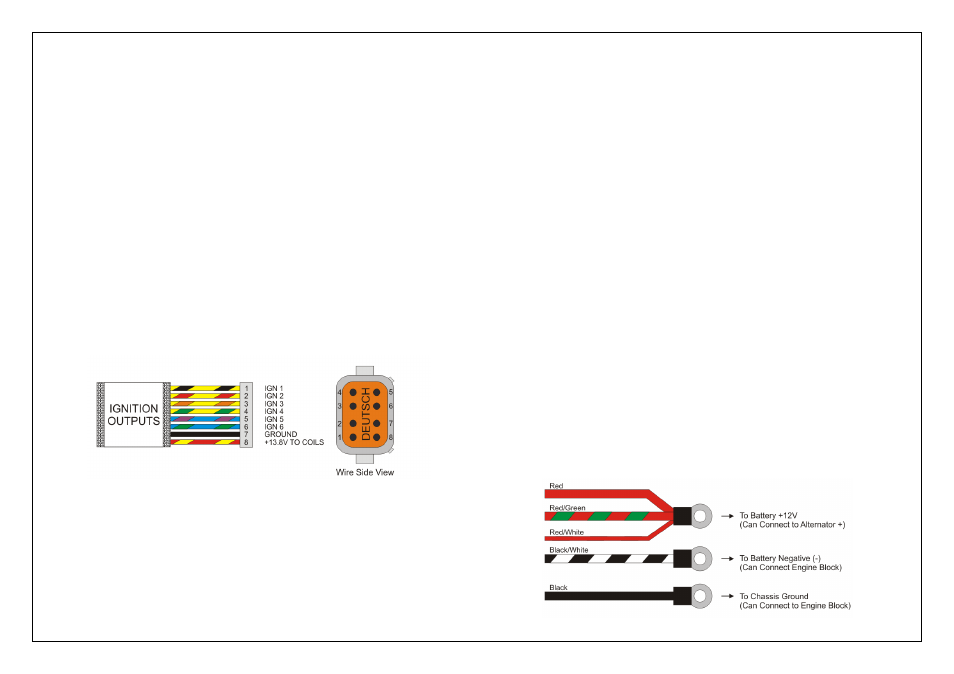
The Ignition breakout connector pinout is shown below
Figure 1 – Ignition Breakout Connector wiring
Injection 1-6 (INJ1, INJ2, INJ3, INJ4, INJ5, INJ6,)
The injector outputs connect directly to the injectors.
Please ensure the correct injector output is connected to the corresponding injector in
the engine. Please refer to the label on the harness for correct injector allocation.
Ground (GND)
The Ground cable connects directly to the engine intake manifold or head.
Warning
this in
NOT
the earth cable for the engine, please ensure that you earth the
engine with an earth strap from the block of the engine to the chassis of the car.
Ensure that the chassis of the car is connected to the battery negative (-) terminal with
heavy gauge cable or earthing strap.
Damage to the ECU and or terminated harness may result if this is not done.
Wideband 02 Input (02) WBC 1
Wideband 02 sensors accurately measure the Air/Fuel ratio of the engine which is
required for precise tuning and control of the engine.
The Terminated harness has been integrated with the Haltech WBC1 wiring harness
allowing a quick installation of a Haltech WBC1 and Wideband O2 Sensor.
Connect your optional Haltech wideband sensor (HT010714) directly to the supplied
connector labeled O2 in the engine bay. Mount the sensor in the exhaust manifold
Connect the Haltech WBC1 to the allocated corresponding connector located
near the main ECU connectors labeled O2,
Connect the Haltech WBC1 to the Haltech Sport ECU directly via the supplied
CAN Cable.
Enable the Haltech WBC1 in your map using ECU manager software.
Your Haltech ECU will now have access to correct Air /Fuel Ratio readings allowing
precise tuning and control of your engine.
Main Power Connections
The following cables will connect directly to the main power on the vehicle
Figure 2 – Main Power wiring