Adding details to your spacewalker arf – Great Planes SpaceWalker ARF - GPMA1300 User Manual
Page 16
❏
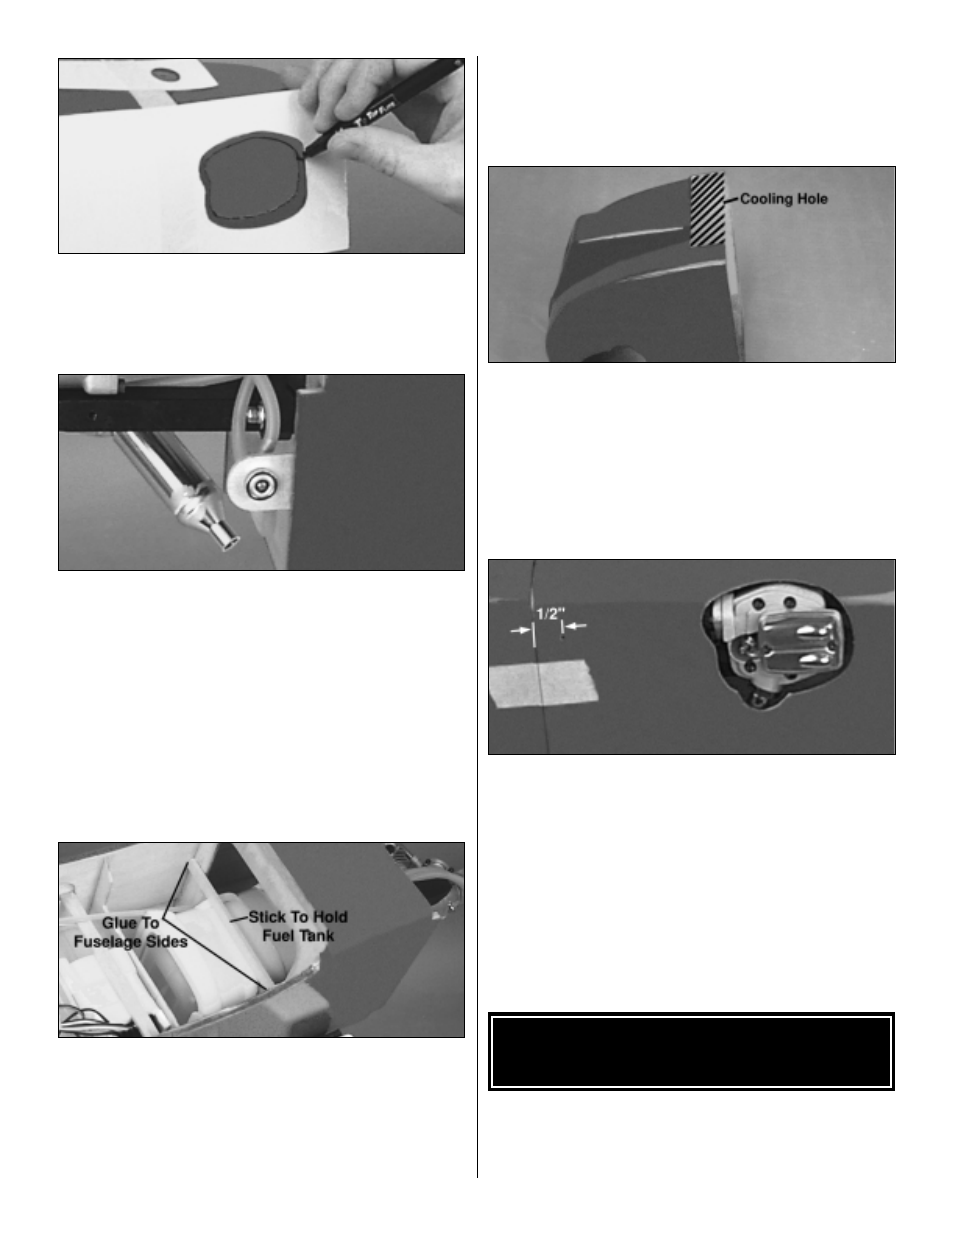
3. Use a felt-tip pen to transfer the template outlines
onto the cowl. Because the cowl comes pre-painted and
removing the marks may be difficult, we recommend you
draw the outline of the template approximately 1/8"
[3.2mm] inside of the template.
❏
4. For convenience, we installed on the left side of the
firewall, a Great Planes Easy Fueler
™
Fuel Filling Valve
(GPMQ4160) mounted on a piece of 1/8" [3mm] plywood.
To locate the fill valve on the cowl, make a template as
previously done for the engine head. Connect the fuel
tubing from the fuel pick-up to the carburetor (or fill valve)
and the tubing from the pressure fitting to the muffler
pressure tap.
❏
5. Remove the cowl and templates. Re-install the engine
(this should be the last time you need to install it). Install
the muffler on the engine so that the muffler exhaust is
pointing towards the bottom of the firewall.
❏
6. Assemble the fuel tank per the manufacturer ’s
instructions. Connect approximately 12" [304.8mm] of fuel
tubing to the fuel pick-up fitting and the pressure fitting on
the tank. Wrap the tank in 1/4" [6.4mm] foam rubber and
slide the tank through the opening in the second former.
The top of the tank must face the top of the fuselage. Route
the fuel tubing through the firewall. Use a stick (not
included) to secure the fuel tank in the fuselage. Optional:
A third piece of fuel tubing may be installed on the fuel tank
for an overflow line and routed to the bottom of the firewall.
Note: This line must be plugged in flight if you intend to
pressurize your fuel tank.
❏
7. Using the template lines drawn on the cowl, cut the
holes for the engine head and needle valve. Also cut out a
cooling hole on the bottom of the cowl as shown. Hint: Cut
the holes in the cowl slightly undersize at first. Test fit the
cowl on the fuselage, making slight adjustments to the
holes as needed.
❏
8. When satisfied with the fit of the cowl, install the
spinner backplate, propeller and spinner cone on the engine.
❏
9. Tape the cowl in position with the cowl front aligned
with the spinner backplate. On both sides of the cowl make
three marks for the cowl mounting screws 1/2" [12.7mm]
from the aft edge. At each mark drill a 3/32" [2.4mm] pilot
hole through the cowl and fuselage sides.
❏
10. Remove the cowl and enlarge the holes in the cowl
to 1/8" [3.2mm]. Mount the cowl to the fuselage with six
#4 x 1/2" sheet metal screws and #4 washers.
❏
1. We recommend that the cockpit area be painted with
a fuelproof paint. We used flat black LustreKote
™
on
our models.
ADDING DETAILS TO YOUR
SPACEWALKER ARF
16