Install the landing gear fairing – Great Planes Old Timer 40 Kit - GPMA0495 User Manual
Page 32
❏
16. Before painting the wheel pant, fill the seams with
filler such as Bondo
®
Auto Body Filler or an automotive
scratch and dent glazing compound. We use Bondo most of
the time as it cures quickly and sands easily, but it is
normally sold in large quantities. Automotive glazing
compound usually comes in small tubes, dries quickly and
sands easily, but for proper drying, can only be applied in
thin layers.
❏
17. After the filler cures, wet sand the wheel pants with
400-grit sandpaper to prepare them for primer.
❏ ❏
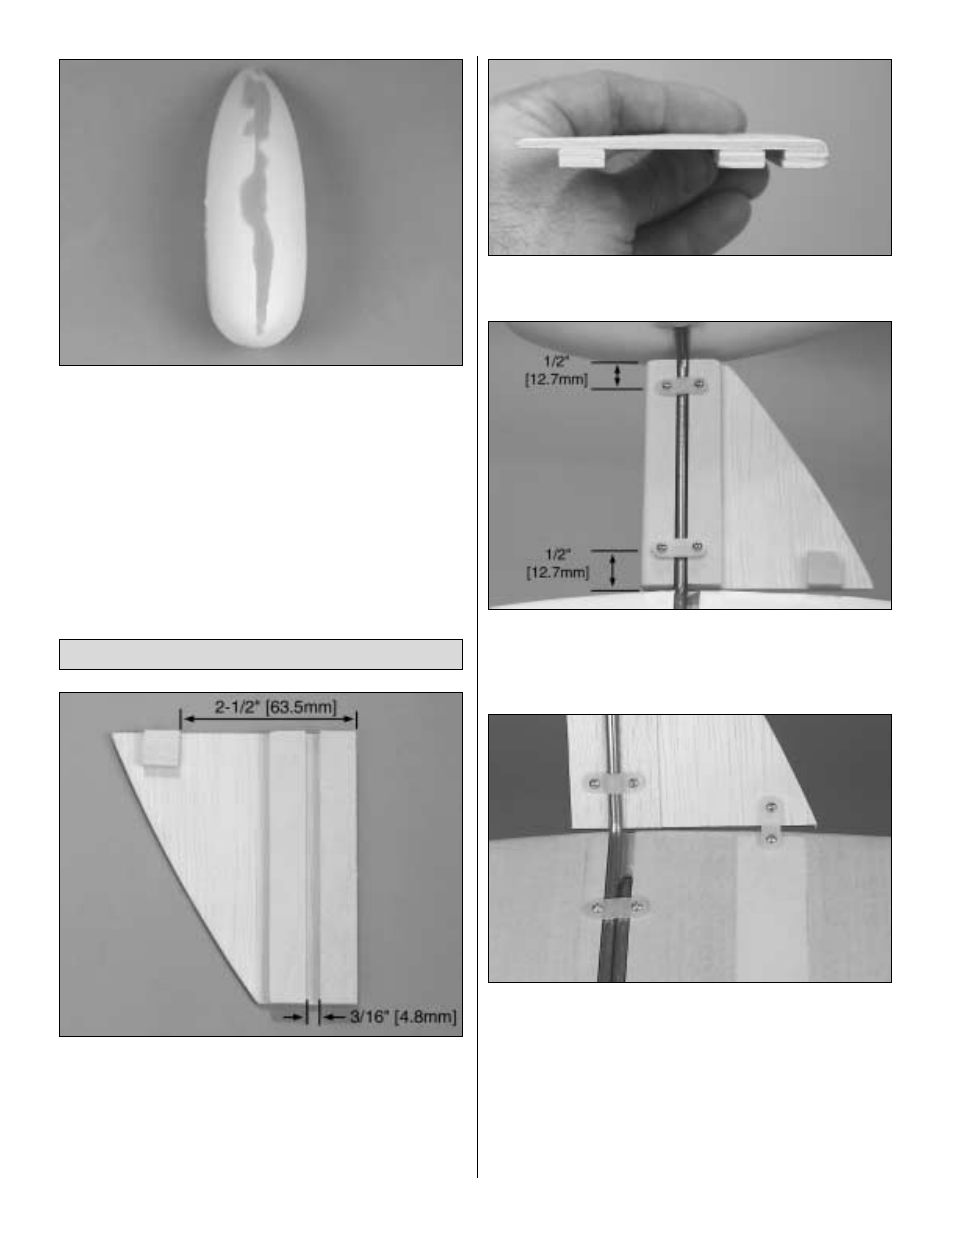
1. Glue two of the die-cut 3-ply fairing doublers, flush
with the long edge of the die-cut 3-ply landing gear fairing.
Measure over 3/16" [4.8mm] and glue two more fairing
doublers. Measure over 2-1/2" [63.5mm] from the long edge
and glue two die-cut 3-ply 1/2" [12.7mm] square fairing
doublers, flush with the top of the fairing. Sand the doublers
flush with the edges of the landing gear fairing.
❏ ❏
2. Use a sanding bar to round the leading and trailing
edge of the fairing.
❏ ❏
3. Position two nylon flat landing gear straps, approximately
1/2" [12.7mm] from each end of the landing gear fairing.
Mark the mounting holes and drill 1/16" [1.6mm] pilot holes
at the marks. Attach the straps with #2 x 3/8" screws.
❏ ❏
4. Take one of the flat nylon straps and bend it slightly
in the center to match the angle of the landing gear fairing
and fairing mounting plate. Make sure that the fairing is
parallel with the side of the fuselage. Mark the mounting
holes and drill 1/16" [1.6mm] pilot holes. Attach the strap
with #2 x 3/8" screws.
❏
5. Return to step 1 and install the second landing gear
fairing on the other side of landing gear. After the landing
gear fairings have been installed, remove the screws and
Install the Landing Gear Fairing
32