Great Planes Old Timer 40 Kit - GPMA0495 User Manual
Page 25
❏
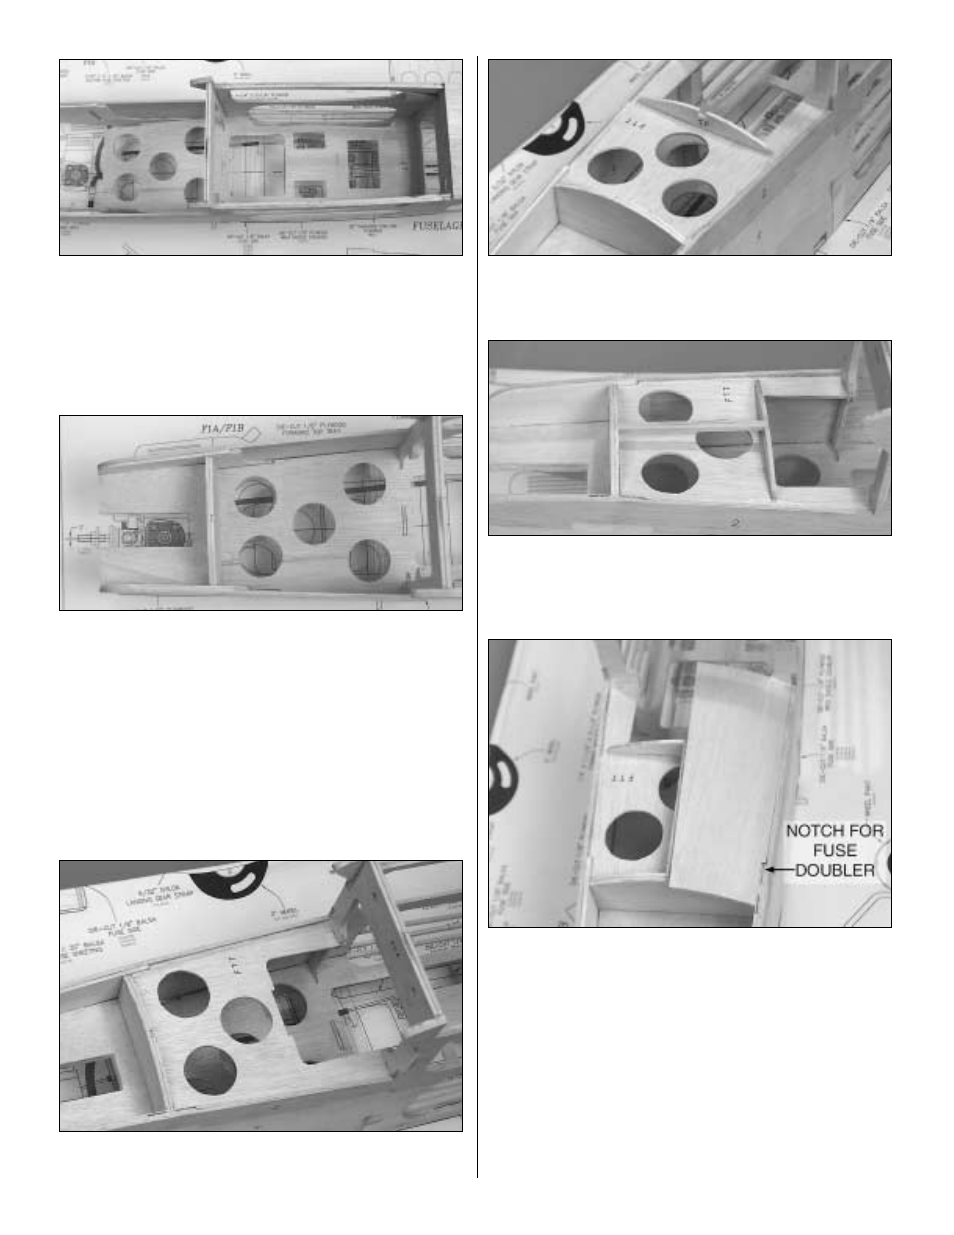
10. Fit the die-cut 3-ply servo tray in the fuselage. To install
the tray in former F2 you will need to insert one side of the
servo tray over F2 and slide it down as far as possible. Then,
slide the other side of the tray over the former. Do not glue
it yet.
❏
11. Fit the firewall/engine tray to the front of the fuselage.
Make any adjustments so that the fuse sides fit tight against
the firewall and engine tray. The servo tray should fit against
the back of the firewall. Use 30-minute epoxy to glue the
firewall/engine tray to the fuse sides. Use clamps to hold the
fuse sides tight against the firewall/engine tray until the
epoxy cures. While waiting for the epoxy to cure, use CA to
glue the servo tray to the firewall, fuse sides and formers F2
and F3.
❏
12. Glue the die-cut 3-ply forward top tray (FTT) to the
back of the firewall, fuse sides and former F2.
❏
13. Glue the die-cut 3-ply instrument panel (IP)
perpendicular to the forward top tray.
❏
14. From leftover 1/8" x 3/16" [3.2mm x 4.8mm] balsa sticks
used for the fuse stringers, glue two top deck stringers
between the firewall and the instrument panel.
❏
15. From the 3/32" x 3" x 30" [2.4mm x 76.2mm x
762mm] balsa sheet, cut two forward top deck sheets 7"
[177.8mm] long. Position the sheet from the firewall to
former F2. Mark and cut a notch for the fuse doubler.
Reposition the sheet and trim it to the middle of the top deck
stringers. When satisfied with the fit, glue the sheeting to the
top of the firewall, the inside of the fuse side, the top deck
stringers and former F2.
❏
16. Trim and glue the second sheet to the other side of
the top of the forward deck.
25