Great Planes Old Timer 40 Kit - GPMA0495 User Manual
Page 22
❏
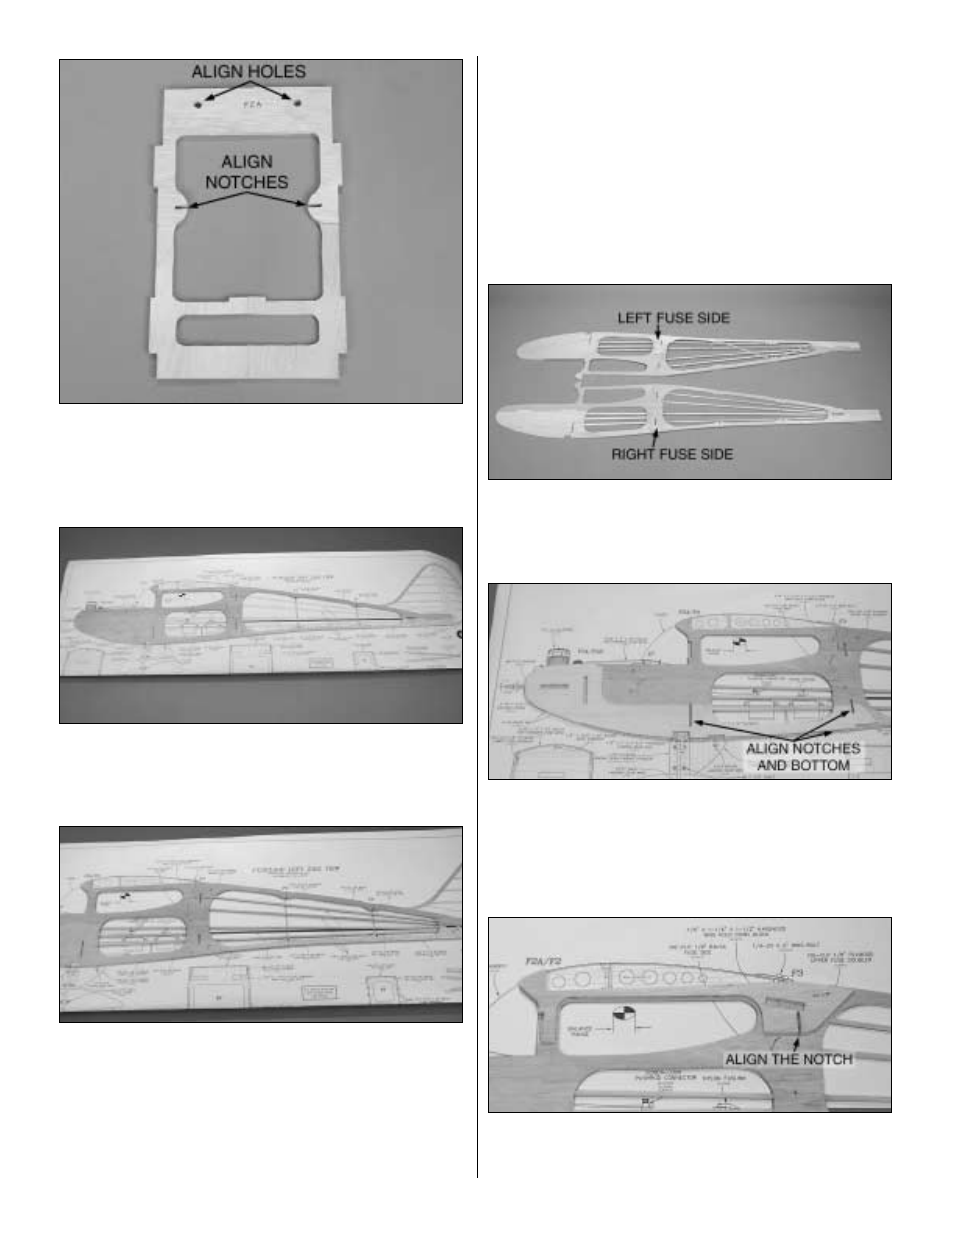
4. Glue the two halves of the die-cut 3-ply former F2
together. Glue the die-cut 3-ply former F2A to the front of
former F2. Align the two 1/4" [6.4mm] holes and the two
notches. The top of F2 and F2A do not align.
❏ ❏
5. Position the seven die-cut 1/8" [3.2mm] balsa fuse
side pieces over the plan and check their fit. Lightly sand
any tabs or slots as needed. Glue the fuse sides together
with CA, starting at the front of the fuselage.
❏ ❏
6. Cut and glue the four 1/8" x 3/16" x 24" [3.2mm x
4.8mm x 609.6mm] balsa fuse stringers to the fuse sides.
❏ ❏
7. Lightly sand the fuse side to remove any excess
glue and smooth out the joints.
❏
8. Go back to step 5 and assemble the second fuse side.
❏
9. Place the two fuse sides together and check that they
match up all the way around. If they are not identical, pin
them together and use a sanding bar to make them match.
❏
10. Lightly sand both sides of each fuselage side to
remove any excess glue.
❏
11. Lay the fuse sides next to each other so they mirror
each other. Mark one fuse side left side and one right side.
❏ ❏
12. On the right fuse side, glue the die-cut 3-ply lower
fuse doubler to the fuse side. Align the notches for formers
F2 and F3 and the bottom of the fuselage.
❏ ❏
13. Glue the die-cut 3-ply wing saddle doubler (WSD)
to the fuse side. Align the notch for former F3 and the wing
saddle.
22